
Hail Roof Damage Insurance Claims: A Texas Roofer's Complete Guide (From 15+ Years of Storm Damage Experience)
I have been a licensed roofing contractor in Texas for over fifteen years. Our team has completed more than 2,500 roofing projects. We hold certifications from major manufacturers like GAF and Owens Corning. This experience has given me a front-row seat to the confusion and stress homeowners face after a hailstorm. This article exists to solve that exact problem. It answers the critical question: How do I successfully navigate a hail damage insurance claim to get my roof properly repaired? I wrote this guide because I have seen too many good people get short-changed or overwhelmed by the process. The information here comes directly from working with hundreds of homeowners, reviewing thousands of insurance estimates, and understanding the technical specifications from material manufacturers and Texas building codes. My goal is to give you the knowledge we share with our own customers, so you can approach your claim with confidence and clarity, not fear.
This guide is built on real-world methodology. We will walk through the entire process, from the first signs of damage to the final inspection. I will explain how insurance companies assess damage, what they often miss, and how to ensure your claim reflects the true cost of a proper, code-compliant repair. We will compare roofing materials from a hands-on installation perspective, not just a sales brochure. You will get practical tips we've learned from field experience that can save you time, money, and headaches. This is not generic advice. This is the detailed, transparent information I would want if my own home was damaged. Let's get started.
Understanding Hail Damage: More Than Just Dents
Hail damage is often invisible from the ground. Small hailstones can cause significant functional damage to your roof's protective layers. As a contractor, I look for specific, measurable signs. The most common is bruising on asphalt shingles. This looks like a dark spot or a soft depression where the roofing granules have been knocked away. This exposes the asphalt mat underneath to UV rays, which causes rapid deterioration. Another key sign is fractured or cracked shingle mat. This compromises the shingle's waterproofing ability immediately.
How Contractors Identify Functional vs. Cosmetic Damage
Insurance policies typically cover "functional" damage, not "cosmetic" wear. This distinction is crucial. A cosmetic issue might be a few missing granules from normal aging. Functional damage is a breach in the roof's ability to shed water. My method involves a hands-on inspection. I gently press on suspected bruises. If the shingle mat gives way or feels spongy, it's functional damage. I also check for fractures in the fiberglass mat by flexing the shingle. We document everything with high-resolution photos and sometimes even core samples to show the insurance adjuster the hidden damage beneath the surface.
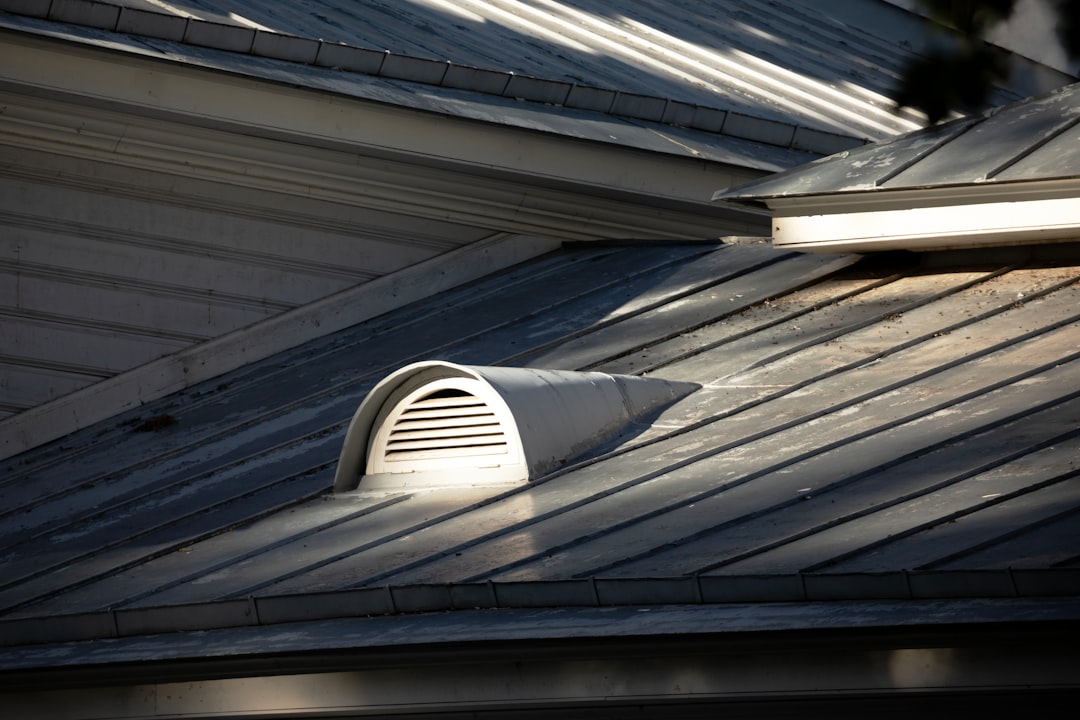
The Hidden Dangers of Hail Impact on Roof Systems
Hail doesn't just hit shingles. It damages the entire roof system. This includes roof vents, plumbing stacks, skylights, and metal flashing. We often find cracked vent covers or dented metal valley flashing that an untrained eye misses. These components are critical for preventing leaks. Hail can also damage the self-sealing adhesive strips on shingles. This means shingles may not seal properly to each other, making them vulnerable to wind uplift in the next storm. According to the National Roofing Contractors Association (NRCA), proper assessment must include all components.
The Step-by-Step Insurance Claim Process: A Roofer's Perspective
Navigating an insurance claim is a process with specific steps. Missing one can delay or reduce your settlement. First, document the damage safely from the ground. Take clear photos of your roof and any visible damage to siding, gutters, or windows. Then, contact your insurance company to start a claim. They will assign an adjuster. This is the most critical step: hire a reputable, local roofing contractor to perform a detailed inspection BEFORE the adjuster arrives. A good contractor will meet the adjuster on-site to point out all the damage, ensuring nothing is overlooked.
What to Expect During the Adjuster's Inspection
The insurance adjuster's job is to assess the damage and write an estimate for repairs. However, their estimate is often based on software with regional average costs. It may not include all necessary items for a complete, code-compliant repair. For example, it might omit tear-off and disposal of the existing roof, proper ice and water shield at the eaves, or upgraded synthetic underlayment. Your contractor's detailed estimate serves as a crucial comparison document. We always provide line-item estimates that reference current International Building Code (IBC) requirements and manufacturer installation instructions.
Reviewing Your Claim Settlement: Reading Between the Lines
p>When you receive the insurance company's settlement paperwork, read it carefully. You will typically get an Actual Cash Value (ACV) payment first. This is the depreciated value of your roof. After the work is completed, you submit the final invoice to receive the Recoverable Depreciation payment, making up the full Replacement Cost Value (RCV). The key is ensuring the RCV amount is sufficient to cover the full scope of work. If there is a discrepancy between the insurance estimate and your contractor's estimate, this is the time to discuss supplements. A professional roofer will handle this communication with the insurance company on your behalf.Real Project Costs and Material Comparisons
Costs vary widely based on material, roof complexity, and location. In the Texas market, a full roof replacement for a standard 2,000 sq. ft. home can range from $12,000 to $30,000+. Insurance deductibles are a key factor. Let's look at a real project example from last spring. A homeowner in Kingwood had widespread hail bruising on a 25-square roof. The initial insurance estimate was $14,500. Our detailed inspection found damaged ridge vent, cracked pipe boots, and compromised starter shingles. We submitted a supplement for these items and for matching current code requirements for underlayment. The final approved settlement was $18,200, covering a complete, high-quality repair.
Hands-On Material Comparison: Asphalt Shingles
Most Texas homes use asphalt shingles. From an installer's perspective, not all shingles are equal. Standard 3-tab shingles are thinner and offer less impact resistance. Architectural or dimensional shingles are thicker, have a longer warranty, and are much better at hiding minor imperfections. Premium shingles from manufacturers like GAF or Owens Corning often carry enhanced warranties that include wind and hail protection. If your insurance is paying for a replacement, consider upgrading to a heavier, more durable architectural shingle. The material cost difference is often marginal when factored into the total claim, but the longevity benefit is significant.
Considering Alternative Materials: Metal and Tile
In some cases, especially with repeated hail claims, homeowners choose to upgrade to metal or concrete tile. Metal roofing has excellent hail resistance. A standing seam metal roof can last 50+ years. Concrete tile is also very durable but is heavier and requires a roof structure that can support the weight. The insurance payout is based on the cost to replace your existing roof with like kind and quality. If you want to upgrade, you will pay the difference out-of-pocket. Discuss this thoroughly with your contractor, as the installation process and timeline are different for these materials.
The Roof Installation Process: What a Quality Job Looks Like
A proper roof replacement is a system, not just shingles. The installation process matters as much as the materials. First, the old roof is torn off and all debris is removed from the property. The decking is then inspected for rot or damage. Any compromised wood is replaced. Next, a water-resistant barrier, or underlayment, is installed. In Texas, we recommend and often require by code a synthetic underlayment. It is stronger and provides better secondary protection than traditional felt paper.
Critical Installation Steps Often Missed in Estimates
Ice and water shield is a self-adhering membrane. It should be installed along the eaves, in valleys, and around all penetrations like chimneys and vents. This is a critical line of defense against wind-driven rain. Another key step is proper flashing. All wall intersections, valleys, and penetrations need new, corrosion-resistant metal flashing installed correctly. We also install drip edge metal on the rakes and eaves to direct water away from the fascia. These components are essential for a long-lasting roof but are sometimes undervalued or omitted in insurance scope.
Shingle Installation and Ventilation
Shingles must be installed according to the manufacturer's specific instructions to keep the warranty valid. This includes using the correct number of nails per shingle and placing them in the correct location. Proper attic ventilation is part of the roof system. It regulates temperature and moisture, extending the life of your shingles. A good installation includes balanced intake (soffit vents) and exhaust (ridge or roof vents). An under-ventilated attic can cause shingles to fail prematurely, which may not be covered by warranty or insurance.
Practical Homeowner Tips from Hundreds of Projects
Based on my experience, here are the most actionable tips for homeowners. First, get everything in writing. All communication with your insurance company and your contractor should be documented via email or letter. Second, do not sign a contract with a roofing company that asks you to sign over your insurance benefits or "direction to pay." You should remain the payee on the insurance checks. Third, be wary of storm chasers. These are out-of-town contractors who swarm an area after a storm, often offering cheap deals or pressuring you to sign quickly. They frequently disappear when warranty issues arise.
- Choose a local, established contractor. Check their physical address, Texas license, and insurance. Read reviews on Google and the Better Business Bureau.
- Ask for references. A reputable roofer will gladly provide names of past customers in your area.
- Understand your warranty. Get clarity on both the manufacturer's material warranty and the contractor's workmanship warranty.
- Never pay the full amount upfront. A reasonable payment schedule ties payments to completion milestones.
Frequently Asked Questions (Real Customer Questions)
Will filing a hail damage claim raise my insurance rates?
It might, but in many cases, hail damage is considered an "act of God" or catastrophic event. Rates in your entire area may go up after a major storm, regardless of whether you file a claim. It is best to discuss this directly with your insurance agent. However, you pay for insurance to use it when you have covered damage. Avoiding a claim to keep rates low can lead to much costlier repairs from undressed water intrusion later.
How long do I have to file a claim after a hailstorm?
This depends on your insurance policy and state law. In Texas, the statute of limitations for filing a property damage claim is generally two years from the date of the storm. However, you should file as soon as possible. Delay can make it harder to prove the damage was caused by that specific storm and not by normal wear and tear.
What if my insurance company denies my claim?
First, get a detailed written explanation for the denial. Then, have a licensed roofing contractor review their report. If we believe the damage is legitimate and covered, we can help you appeal the decision. This may involve providing additional documentation, like core samples or a second expert opinion. You can also hire a public adjuster or contact the Texas Department of Insurance for assistance.
Can I repair just the damaged sections instead of replacing the whole roof?
This is called a "spot repair." It is only advisable if the damage is very minor and isolated, and if your existing roof is fairly new. For widespread hail damage, a full replacement is almost always the better option. Matching the color and style of old shingles is difficult, and repairs can create uneven wear and potential leak points at the repair boundaries.
What is "code upgrade" coverage, and do I have it?
Building codes change over time. Your roof may need to be brought up to current code during a replacement (e.g., different nail requirements, added underlayment). Some insurance policies include an endorsement called "Ordinance or Law" coverage that pays for these required upgrades. Check your policy or ask your agent. If you don't have it, you may be responsible for the extra cost.
Real Project Case Studies and Outcomes
Case Study 1: The Overlooked Valley. A homeowner in The Woodlands had an insurance estimate that only covered shingles. Our inspection revealed the metal valley flashing was severely dented and would leak. We documented this with photos and measurements. We submitted a supplement with the cost for new, code-compliant valley metal. The insurance company approved the additional $1,200, ensuring a watertight roof.
Case Study 2: The Depreciation Dispute. An older roof in Atascocita had significant hail damage. The insurance company applied a high depreciation rate, leaving a large out-of-pocket cost for the homeowner. We helped the homeowner provide proof of the roof's age and condition, arguing for a lower depreciation rate. The settlement was increased by over $3,000, making the replacement affordable.
Industry Statistics and Data
Hail causes billions of dollars in damage each year. According to the Insurance Information Institute, hail accounted for nearly 40% of all insured catastrophe losses in 2023. The National Oceanic and Atmospheric Administration (NOAA) reports that Texas consistently leads the nation in hail events. This data underscores the importance of being prepared and informed. A study by the Roofing Industry Committee on Weather Issues (RICOWI) found that proper installation is the single biggest factor in a roof's wind and hail performance, more so than the shingle brand alone.
Conclusion: Your Path Forward After Hail Damage
Dealing with hail damage is stressful, but you don't have to navigate it alone. The key takeaways are simple. First, get a professional, local roofing inspection immediately. Second, understand your insurance policy and claim process. Third, choose your contractor based on local reputation, proper licensing, and clear communication. Your roof is your home's first line of defense. A successful insurance claim should result in a roof that is not just replaced, but rebuilt to a high standard that will protect your family for years to come. Use the information in this guide to ask the right questions and make confident decisions. If you are in the Texas area and have questions about hail damage, reach out to a trusted local roofer for a consultation. Your home deserves nothing less.