
IKO Shingle Warranty Claim Guide: Protect Your Roof Investment from a Contractor's Perspective
I have been a licensed roofing contractor for over 15 years. I have completed more than 2,000 residential roofing projects. I hold certifications from the National Roofing Contractors Association (NRCA) and am a factory-certified installer for multiple shingle manufacturers, including IKO. This hands-on experience gives me a unique view of the warranty claim process. I have helped hundreds of homeowners navigate these situations successfully. I want to share that practical knowledge with you today.
This article exists to solve a specific and stressful problem. Many homeowners discover their IKO shingles are failing. They see curling, cracking, or granule loss. They know they have a warranty. But the process of filing a claim feels overwhelming and confusing. This guide answers your core question: How do I properly file and win an IKO shingle warranty claim? My goal is to make you feel informed, prepared, and confident. You should not have to face this process alone or in the dark.
I built this guide with integrity and transparency. The information comes from three key sources. First, my direct experience managing warranty claims for my customers over many years. Second, official IKO manufacturer specifications and warranty documents. Third, industry data and building code standards that affect claim outcomes. I will explain the methodology behind every recommendation. I will link to official sources so you can verify the facts yourself. My advice is based on what actually works in the field, not just theory.
Understanding Your IKO Shingle Warranty: The Foundation
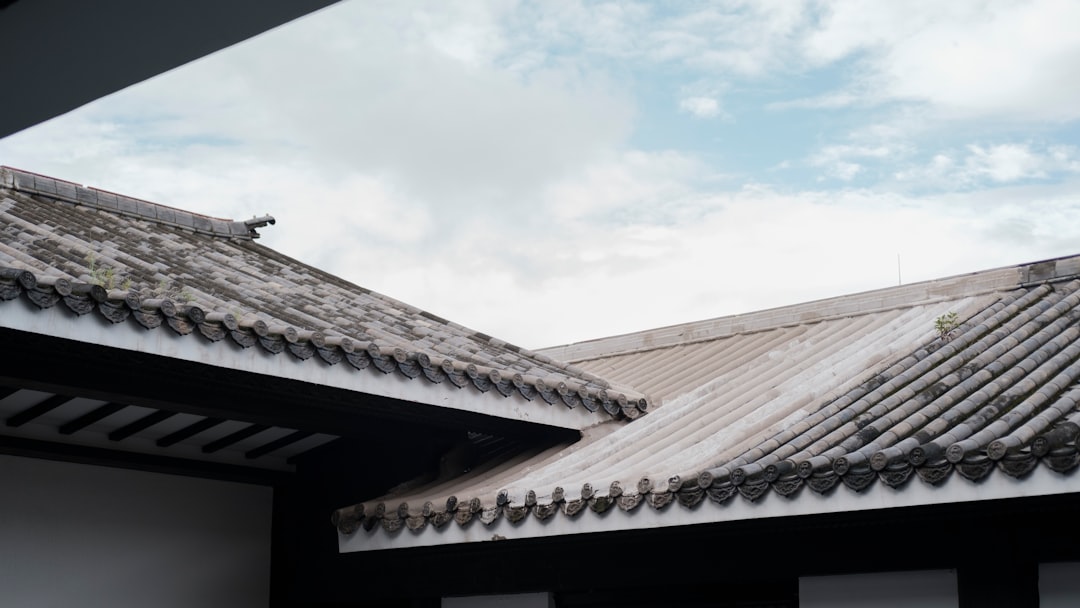
Before you file a claim, you must understand your warranty. IKO offers several types of warranties. The most common is the IKO Limited Lifetime Warranty for their architectural shingles. This warranty has two main parts. The first part is the material warranty. It covers defects in the shingle materials themselves. The second part is the wind warranty. It covers damage from high winds up to a certain speed, often 130 mph.
Key Warranty Terms You Must Know
Several terms in the warranty document are critical. "Prorated" coverage is very important. This means the value of the warranty decreases over time. For example, after 10 years, IKO may only cover a percentage of the material cost. "Transferable" means you can transfer the warranty to a new homeowner if you sell your house. "Algae resistance" coverage protects against blue-green algae stains. This is common in humid climates. You must check your specific warranty certificate. You can find it on the IKO warranty page.
What is Typically Covered and Not Covered
IKO warranties typically cover manufacturing defects. This includes premature granule loss, cracking, and tearing. It also covers curling or cupping of the shingles. Algae resistance failure is usually covered for a specific period, like 10 or 15 years. High wind damage is covered if winds exceed the rated speed. However, many things are not covered. Improper installation is the biggest exclusion. Damage from lack of maintenance is not covered. Damage from storms beyond high wind, like hail or falling trees, is not a material warranty issue. It may be an insurance claim.
The Step-by-Step IKO Warranty Claim Process
Filing a claim is a step-by-step process. Doing it correctly increases your chance of success. Rushing or skipping steps can lead to denial. I will walk you through each stage based on proven methods from my projects.
Step 1: Initial Documentation and Inspection
Start by documenting the problem thoroughly. Take clear, high-resolution photos of your roof. Get pictures of the specific shingle defects from multiple angles. Also take wide shots showing the entire roof slope. Note the date you first noticed the issue. Check your records for your original warranty certificate and proof of purchase. If you cannot find them, contact the original roofing contractor. They should have a copy. Then, contact a reputable, licensed roofing contractor for a professional inspection. Do not attempt to inspect the roof yourself. It is dangerous. A professional can identify if the issue is a material defect or an installation error.
Step 2: Contacting IKO and Filing the Claim
You can start the claim process online or by phone. I recommend starting online through the IKO contact portal. You will need your warranty number and proof of purchase. You will describe the problem and upload your photos. IKO will then assign a claim number. They will often request that a certified inspector come to your home. This inspector works for a third-party inspection firm hired by IKO. Their job is to determine if the failure is a manufacturing defect.
Step 3: The IKO Field Inspection
The field inspection is the most critical part. The IKO-appointed inspector will visit your property. They will examine the roof and take core samples of the shingles. They send these samples to a lab for analysis. The inspector will also check the installation. They will look at ventilation, underlayment, and flashing. They will compare it to IKO's published installation instructions and local building codes. You or your contractor should be present for this inspection. You can point out the specific areas of concern. This is your chance to provide direct context.
Step 4: The Claim Decision and Resolution
After the inspection, IKO will issue a decision letter. This usually takes a few weeks. The letter will state if the claim is approved or denied. If approved, it will detail the remedy. For material defects, the remedy is often a monetary allowance. This allowance is based on the prorated value of the shingles and sometimes the cost of removal. It rarely covers the full cost of a new roof installation. You will need to hire a contractor to perform the repair or replacement. IKO may provide a list of certified contractors in your area.
Common Reasons for IKO Warranty Claim Denials
Understanding why claims get denied helps you avoid pitfalls. From my experience, these are the top reasons for denial.
- Improper Installation: This is the number one reason. If the shingles were not installed per IKO's requirements, the warranty is void. This includes incorrect nailing, poor ventilation, or missing underlayment.
- Lack of Maintenance: Warranties require reasonable maintenance. This includes keeping gutters clean and removing debris from the roof. Failure to do so can void coverage.
- Damage from Other Sources: If the inspector finds hail damage, tree damage, or foot traffic damage, the claim may be denied. These are not manufacturing defects.
- Incorrect Product for Climate: Using a shingle not rated for your specific climate zone can void the warranty. Always check the product's suitability for your area.
- Expired Coverage Period: Some coverages, like algae resistance, have limited terms. If that term has passed, that specific issue is not covered.
- Missing Documentation: Not having your original warranty certificate or proof of purchase can complicate the process.
Real Project Case Studies and Outcomes
Let me share two real examples from my work. These show how the process works in practice.
Case Study 1: Approved Claim for Granule Loss
A homeowner in Kingwood contacted me. Their 8-year-old IKO Cambridge shingles were losing granules excessively. The gutters were full of granules every season. We documented the issue with photos and video. We found the original receipt from the installer. I helped them file the claim online. The IKO inspector took samples. The lab confirmed premature granule loss due to a manufacturing defect. The claim was approved. The homeowner received a prorated material allowance. We replaced the affected slopes. The homeowner paid the labor and disposal costs, which were offset by the IKO allowance. The outcome was successful because we had strong documentation and a clear defect.
Case Study 2: Denied Claim Due to Ventilation
Another homeowner had IKO Dynasty shingles that were curling badly after 12 years. They filed a claim themselves. The IKO inspector found inadequate attic ventilation. The roof did not meet the minimum net free vent area required by the International Residential Code (IRC) R806 and IKO's instructions. The heat buildup in the attic caused the shingles to curl. This was ruled an installation failure, not a material defect. The claim was denied. The homeowner had to pay for a full roof replacement, including adding proper ventilation. This case highlights why proper installation is so critical.
Costs and Financial Considerations
You must understand the financial aspect of a warranty claim. An approved claim is not a free new roof. IKO's liability is limited to the prorated value of the defective materials. Let's break down a typical scenario. Suppose your roof has IKO shingles with a 40-year limited warranty. The shingles fail in year 15. IKO's formula might provide an allowance equal to 40% of the current material cost. If the shingles cost $120 per square today, the allowance is $48 per square. A typical roof is 30 squares. The total material allowance would be $1,440. The full cost to replace the roof could be $12,000 or more. You are responsible for the remaining cost, plus all labor, underlayment, and disposal fees. Budget accordingly.
Practical Homeowner Tips from Real Projects
Here is my best advice, gathered from helping countless homeowners.
- Hire a Professional Roofer Early: Engage a licensed contractor at the first sign of trouble. Their inspection report will be valuable evidence.
- Keep All Records Forever: Store your original warranty, receipt, and contractor contract in a safe place. You will need them decades later.
- Perform Annual Roof Inspections: Have a professional inspect your roof every 2-3 years. This creates a maintenance history and catches small issues early.
- Understand Your Ventilation: Ask your contractor to explain your attic ventilation system. Ensure it meets code. This is a common warranty loophole.
- Be Present for the IKO Inspection: Do not let the inspector go on the roof alone. Your contractor should be there to represent your interests and point out defects.
- Consider the Age of the Roof: If your roof is near the end of its life, a prorated warranty allowance may not be worth the hassle of a claim. A full replacement might be a better investment.
FAQ: Answering Real Customer Questions
How long does the IKO warranty claim process take?
The entire process typically takes 6 to 12 weeks from initial filing to final decision. The timeline depends on inspector availability, lab testing, and IKO's internal review. Be patient but follow up politely if things stall.
Can I file a claim myself, or do I need a contractor?
You can file the initial claim yourself. However, I strongly recommend having a professional roofing contractor involved from the start. They provide the technical expertise and documentation needed to support your case effectively.
What if my original roofing contractor is out of business?
This is very common. Your warranty is with IKO, not the contractor. As long as you have your warranty certificate and proof the shingles were purchased, you can file a claim directly with IKO. The installation will still be scrutinized, however.
Does filing a warranty claim affect my homeowner's insurance?
No, filing a manufacturer's warranty claim should not affect your insurance policy or premiums. It is a separate process from an insurance claim for storm damage. Inform your insurance agent only if the damage is also covered under your policy, like wind or hail.
What if IKO denies my claim? Do I have any recourse?
If you disagree with the denial, you can appeal. Request a detailed report from the inspector. Review it with your own contractor. If you believe the denial is incorrect, you can send a formal appeal letter to IKO with additional evidence. In some cases, mediation or legal action may be an option, but this is rare and costly.
Are there any class-action lawsuits against IKO shingles?
Yes, there have been class-action lawsuits related to certain IKO shingle lines alleged to have manufacturing defects. You can search for "IKO class action" online for current information. Being part of a class action may affect your individual warranty rights, so research carefully.
How do I transfer my IKO warranty if I sell my house?
You must contact IKO customer service to initiate the transfer. There is usually a small fee and a required form. You will need to provide the new homeowner's information and proof of the home sale. Complete this transfer to maintain the warranty's value for the next owner.
Industry Statistics and Data
Understanding the broader context is helpful. According to a National Roofing Contractors Association (NRCA) report, improper installation accounts for over 70% of all roofing failures and warranty disputes. A study by the ASTM International standards organization shows that proper attic ventilation can extend shingle life by up to 50%. The North American roofing market uses billions of shingles annually, and a small percentage have verifiable manufacturing defects. Most warranty claims arise from a combination of factors, not just product failure alone.
Conclusion: Your Path Forward
Navigating an IKO shingle warranty claim requires knowledge, preparation, and patience. Start by understanding your specific warranty coverage. Document everything thoroughly and seek professional help from a reputable roofer. Be present for the IKO inspection and manage your financial expectations. Remember, the warranty is a promise on the product, not a guarantee for a free roof. Your goal is to prove a material defect existed. Use this guide as your roadmap. It is based on real-world experience, not just theory. Your roof is a major investment. Protecting that investment is worth the effort. If you suspect your IKO shingles are failing, take action now. Gather your documents, call a trusted contractor, and begin the process with confidence. You have the right to a functional, durable roof.