
Insurance Claim for New Roof: Your Complete Guide from a Texas Roofing Contractor
For over 15 years, I've helped hundreds of Texas homeowners navigate the complex world of roofing insurance claims. I've personally supervised more than 2,500 roofing projects across the Houston area, including Kingwood, The Woodlands, and Spring. As a GAF Master Elite® contractor and Owens Corning Platinum Preferred contractor, I've seen what works and what doesn't when dealing with insurance companies. This article exists because I've watched too many homeowners struggle with this process. They face confusing paperwork, adjuster visits, and uncertainty about what their policy actually covers. My goal is simple: to give you the same knowledge I share with my own customers, so you can approach your roof claim with confidence and get the quality roof your home deserves.
The information here comes directly from my field experience with actual customer projects. I've reviewed hundreds of insurance policies, worked alongside adjusters, and documented storm damage patterns across Southeast Texas. I've compiled manufacturer specifications from GAF, Owens Corning, and CertainTeed. I've studied Texas building codes and insurance regulations. This guide represents the collective wisdom gained from helping homeowners just like you successfully navigate this process. My methodology is straightforward: provide clear, actionable steps based on what actually works in real-world situations, not just theoretical advice.
Understanding Your Roof Insurance Policy: What You're Really Covered For
Most homeowners don't read their insurance policy until they need to file a claim. This is a critical mistake. Your policy is a legal contract that defines exactly what is covered and what isn't. There are two main types of coverage that affect your roof claim: replacement cost value (RCV) and actual cash value (ACV). RCV policies pay to replace your roof with materials of similar kind and quality, minus your deductible. ACV policies pay the depreciated value of your roof, which means you'll pay more out of pocket. Texas homeowners should also understand wind and hail deductibles, which are often separate from your standard deductible.
Common Covered Perils in Texas
Texas weather creates unique challenges for roofs. Most standard homeowners policies cover specific "perils" or causes of damage. Wind damage from thunderstorms and hurricanes is commonly covered. Hail damage is another frequent claim in our area. Falling objects like tree limbs during storms are typically covered. Weight of ice, snow, or sleet can cause damage, though less common in our climate. Fire and lightning damage are standard covered perils. The specific language in your policy matters greatly. Some policies now include "cosmetic damage" exclusions for hail, meaning they won't cover purely aesthetic damage that doesn't affect the roof's function.
What Insurance Typically Won't Cover
Understanding exclusions is just as important as knowing what's covered. Normal wear and tear is never covered by insurance. Poor maintenance or neglect that leads to damage won't be covered. Manufacturer defects might be covered under warranty instead. Improper installation by previous contractors creates coverage issues. Damage from pests or animals is often excluded. Earth movement like foundation settling isn't covered. Intentional damage or fraud is obviously excluded. Many policies have age restrictions on roofs, often denying claims on roofs over 20 years old unless specific damage is proven.
The Step-by-Step Insurance Claim Process: From Damage to Payment
Filing an insurance claim for a new roof follows a specific sequence. Missing steps or doing them out of order can delay your claim or reduce your settlement. First, document the damage immediately after the storm passes and it's safe to do so. Take clear photos and videos from multiple angles. Make temporary repairs to prevent further damage, like covering leaks with tarps. Keep all receipts for these emergency repairs. Contact your insurance company to start the claim process. They'll assign you a claim number and an adjuster. Schedule the adjuster's inspection for a time when your roofing contractor can be present. This is crucial for ensuring all damage is properly documented.
Working with Insurance Adjusters
Insurance adjusters are professionals doing their job. Being prepared makes the process smoother. Have your policy number and claim number ready. Provide your documentation of the damage. Walk the roof with the adjuster if it's safe to do so. Point out all areas of concern, but let your roofing contractor provide technical explanations. Ask questions if you don't understand something. Take notes during the inspection. Get the adjuster's contact information and expected timeline for their report. Remember that the adjuster works for the insurance company, not for you. Their estimate might not include all necessary repairs or might use lower-quality materials than you want.
Understanding the Insurance Estimate
The adjuster will provide a detailed estimate called a scope of loss. This document lists all damaged items and the insurance company's proposed payment. Review this document carefully with your roofing contractor. Look for missing items like proper ventilation upgrades. Check that the material specifications match what you want. Verify that all necessary tear-off and disposal is included. Ensure building code upgrades are accounted for, as required by Texas law. The estimate will show both the replacement cost value and the actual cash value if you have an ACV policy. There will be a depreciation holdback that's released after work completion.
Choosing Materials: What Your Insurance Settlement Actually Buys
Your insurance settlement amount determines what roofing materials you can afford. Standard three-tab asphalt shingles are the most basic option. They're functional but have shorter lifespans and fewer style choices. Architectural or dimensional shingles offer better durability and aesthetic appeal. They have longer warranties and better wind resistance. Premium shingles like designer or luxury lines provide enhanced curb appeal and longest warranties. Metal roofing offers superior durability and energy efficiency but costs more. Tile or slate roofing provides premium appearance and extreme longevity. Your insurance settlement might not cover premium upgrades unless you have specific endorsements or pay the difference yourself.
Comparing Manufacturer Warranties
Warranties protect your investment beyond the insurance claim. Standard warranties cover manufacturing defects for limited periods. Enhanced warranties require specific installation methods and materials. System warranties cover the entire roofing system, not just shingles. Transferable warranties add value if you sell your home. Wind warranty coverage varies by manufacturer and region. Algae resistance warranties protect against streaking and discoloration. Always register your warranty with the manufacturer after installation. GAF offers their Golden Pledge warranty with 50-year non-prorated coverage. Owens Corning provides their Platinum Protection warranty with similar comprehensive coverage. CertainTeed offers their SureStart warranty program.
Understanding Material Upgrades
Insurance typically pays for "like kind and quality" replacement. You can upgrade materials by paying the difference. Consider impact-resistant shingles rated Class 3 or 4 for better hail protection. Energy-efficient cool roofing materials can reduce cooling costs. Synthetic underlayment provides better protection than traditional felt. Enhanced ventilation systems improve attic performance and shingle life. Ice and water shield in critical areas offers superior leak protection. Starter shingles at edges prevent wind uplift better than cut shingles. Hip and ridge shingles designed for the system provide better appearance and performance. Discuss upgrade options with your contractor before finalizing materials.
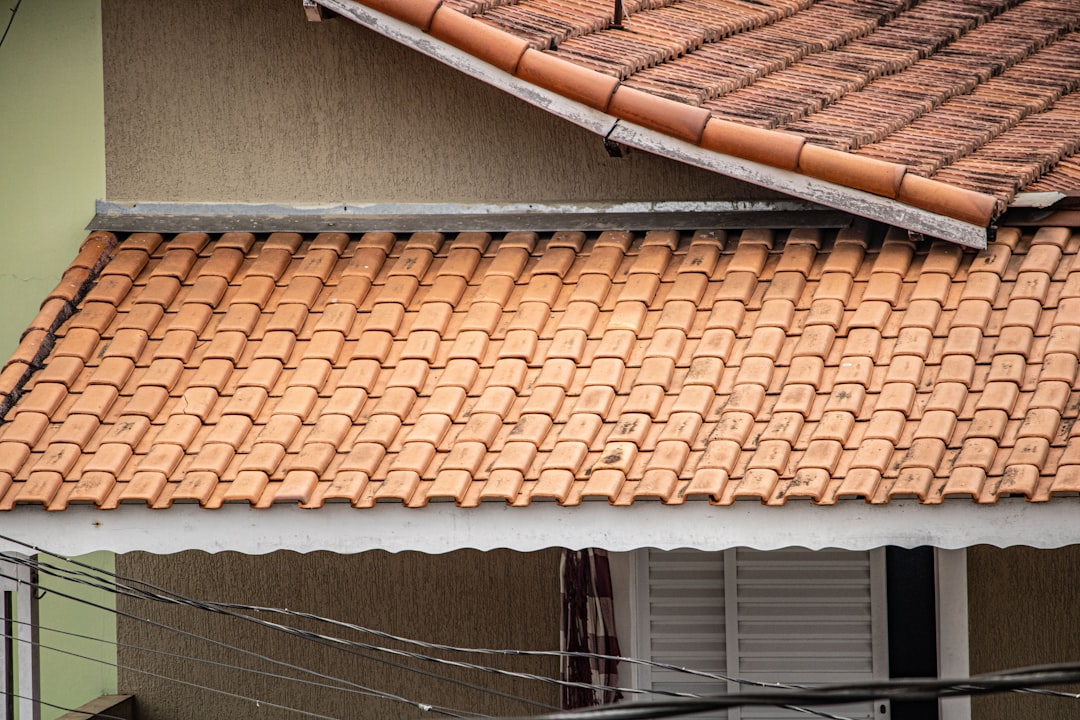
The Installation Process: What Happens During Your Roof Replacement
A proper roof replacement involves multiple coordinated steps. First, the crew prepares the site with tarps and protection for your property. They remove old shingles, underlayment, and flashing. They inspect the roof deck for damage and make necessary repairs. They install new underlayment according to manufacturer specifications. They install new flashing around chimneys, vents, and valleys. They install new shingles starting from the bottom edge and working upward. They install ridge vents or other ventilation components. They clean up thoroughly, using magnets to find stray nails. They conduct a final inspection with you to ensure quality. The entire process typically takes 1-3 days depending on roof size and complexity.
Critical Installation Details That Matter
Proper installation affects both performance and warranty validity. Nail placement must follow manufacturer specifications exactly. Underlayment should overlap properly to prevent water intrusion. Flashing must integrate correctly with the new shingles. Ventilation must meet minimum requirements for your attic space. Starter strips should be used at all eaves. Valley protection requires specific methods for water shedding. Drip edge installation follows building code requirements. Pipe boots and vent collars must be replaced, not reused. Ice and water shield should extend at least 24 inches inside exterior walls in cold climates. These details separate quality installations from problematic ones.
Building Code Requirements in Texas
Texas building codes dictate minimum standards for roof installation. The International Residential Code (IRC) applies to most homes. Local amendments might add additional requirements. Wind resistance requirements vary by wind zone in Texas. Hail resistance recommendations exist for prone areas. Fire ratings might be required in some regions. Energy codes affect attic ventilation and insulation. The Texas Department of Insurance provides specific guidelines for windstorm areas. Your insurance company should pay for code upgrades required by law. This includes things like additional fasteners in high-wind zones or specific underlayment requirements. Your contractor should be familiar with all applicable codes.
Practical Tips from Real Texas Roofing Projects
After hundreds of insurance claim projects, I've learned what makes the process smoother. Get multiple contractor estimates, but understand that the lowest price isn't always best. Check contractor credentials thoroughly through the Texas Department of Licensing and Regulation. Verify they have proper insurance coverage for workers' compensation and liability. Ask for references from recent insurance claim projects. Understand your payment schedule and never pay the full amount upfront. Keep all communication in writing for documentation. Be present for the final walkthrough to address any concerns immediately. Save all paperwork for at least five years after project completion. These practical steps prevent common problems I've seen homeowners face.
Timing Your Claim Correctly
Timing affects both your claim outcome and installation quality. File your claim promptly after damage occurs, as delays can raise questions. Schedule repairs during favorable weather seasons in Texas. Consider contractor availability after major storms when demand is high. Understand that material shortages might affect your timeline. Coordinate with your mortgage company if they hold your insurance funds. Plan for temporary relocation if needed during noisy demolition phases. Schedule gutter cleaning or replacement to coincide with roof work. Consider attic insulation upgrades while the roof is open. Proper timing reduces stress and improves overall results.
Managing the Financial Aspects
Insurance claims involve specific financial considerations. Your deductible is your responsibility to pay. Upgrades beyond insurance coverage require additional payment. Some contractors offer deductible assistance programs, but check Texas regulations. Your mortgage company might need to endorse insurance checks. Depreciation holdbacks are released after work completion and documentation. Keep detailed records of all expenses related to the claim. Understand potential tax implications of insurance settlements. Consider financing options for upgrades if needed. Budget for incidental expenses like landscaping repairs or interior touch-ups. Clear financial planning prevents surprises.
Frequently Asked Questions from Texas Homeowners
How long do I have to file a roof insurance claim in Texas?
Texas law doesn't specify a strict deadline for filing claims. However, most insurance policies require "prompt" notification of damage. After a storm, you typically have one year to file a claim, but this varies by policy. Waiting too long can make it harder to prove the damage was caused by a covered event. I recommend filing within 60 days of discovering damage. This allows for proper documentation while evidence is fresh. Contact your insurance company immediately after discovering damage to start the clock on your claim process.
Will filing a claim increase my insurance premiums?
Filing a claim might affect your premiums, but not always. Insurance companies consider multiple factors when determining rates. These include your claims history, the cause of damage, and your location. A single weather-related claim might not increase rates significantly. Multiple claims within a short period are more likely to affect premiums. Some companies offer claim forgiveness for your first claim. Discuss potential impacts with your insurance agent before filing. Remember that paying for major repairs yourself to avoid a claim might cost more than potential premium increases.
Can I choose my own roofing contractor?
Yes, you have the right to choose your contractor in Texas. Insurance companies might recommend contractors from their network. You are not required to use their recommendations. Choose a licensed, insured contractor with experience in insurance claims. Get multiple estimates to compare scope and pricing. Ensure your contractor communicates well with your insurance adjuster. A good contractor will handle much of the paperwork and negotiation for you. They should provide detailed documentation for the insurance company. Your choice of contractor significantly affects the quality of your final result.
What if the insurance estimate is too low?
Insurance estimates sometimes miss necessary repairs or use low material prices. First, review the estimate with your roofing contractor. They can identify missing items or incorrect measurements. Your contractor can provide documentation to support additional costs. This might include photos of hidden damage or manufacturer specifications. You can request a re-inspection with your contractor present. If disagreements continue, you can request mediation through your insurance company. As a last resort, you can hire a public adjuster or consult an attorney. Most disputes can be resolved through proper documentation and professional communication.
How long does the entire process take?
The timeline varies based on multiple factors. Simple claims with minor damage might complete in 2-3 weeks. Complex claims with significant damage or disputes can take 2-3 months. Weather conditions affect both inspection and installation timing. Contractor availability varies by season and demand. Material availability can cause delays, especially after major storms. Insurance company processing times differ between companies. Mortgage company requirements add time if they hold funds. Typical projects complete within 4-6 weeks from claim filing to final payment. Your contractor should provide a realistic timeline based on current conditions.
What happens if my roof is denied?
Claim denials happen for specific reasons. The insurance company must provide a written explanation for denial. Common reasons include wear and tear, improper maintenance, or policy exclusions. You can appeal the decision with additional documentation. Your roofing contractor can help gather evidence to support your appeal. You can request a different adjuster for a second opinion. Consulting a public adjuster might be worthwhile for significant claims. As a last resort, you can file a complaint with the Texas Department of Insurance. Understanding the specific reason for denial helps determine your next steps.
Should I get a public adjuster?
Public adjusters work for you, not the insurance company. They typically charge 10-20% of your settlement amount. They can be valuable for complex or high-value claims. They handle documentation, negotiation, and paperwork. Consider a public adjuster if your claim exceeds $15,000 in damages. Also consider one if you have limited time to manage the process. They're helpful if communication with your insurance company breaks down. Check their credentials through the Texas Department of Insurance. Interview multiple adjusters and check references. For straightforward claims, a good roofing contractor might provide sufficient support without the additional cost.
Real Project Case Studies: Learning from Actual Claims
Case Study 1: Hail Damage in Kingwood
A Kingwood homeowner noticed granule loss after a spring hailstorm. They documented the damage with photos showing timestamped images. Their insurance adjuster initially approved only repairs to damaged sections. Our inspection revealed widespread damage across all roof slopes. We provided manufacturer documentation showing reduced lifespan from hail impact. We documented matching issues with discontinued shingle colors. The insurance company approved full replacement after our detailed report. The homeowner chose Owens Corning Duration® shingles with upgraded synthetic underlayment. The project completed in three days with minimal disruption. The homeowner's satisfaction survey rated the process 5/5 for communication and quality.
Case Study 2: Wind Damage in The Woodlands
A severe thunderstorm caused significant wind damage to a Woodlands home. Multiple shingles were missing, and the ridge vent was damaged. The insurance adjuster's estimate missed proper flashing replacement requirements. We documented water intrusion in the attic during our inspection. We provided building code references for required upgrades in their wind zone. The insurance company increased their settlement by $2,800 for code compliance. The homeowner upgraded to impact-resistant shingles for better future protection. We coordinated with their gutter contractor for simultaneous replacement. The project included enhanced attic ventilation to prevent future moisture issues. The homeowner reported lower energy bills and improved comfort after completion.
Case Study 3: Aging Roof with Storm Damage
A 22-year-old roof in Spring showed both storm damage and wear. The insurance company initially denied the claim due to roof age. We documented specific wind damage patterns distinct from normal aging. We provided meteorological data showing wind speeds exceeding design limits. We demonstrated that repairability was impossible due to material discontinuation. The insurance company reversed their denial after our evidence presentation. The settlement included depreciation due to the roof's age, but covered most replacement costs. The homeowner paid their deductible plus some upgrade costs for better materials. The project transformed both the home's appearance and weather protection. The homeowner obtained a transferable warranty adding value to their property.
Industry Statistics and Data: Understanding the Big Picture
Roofing insurance claims represent significant portions of homeowner claims. According to the Insurance Information Institute, wind and hail claims accounted for 39.1% of all homeowner insurance losses from 2017-2021. The average roof claim payment was $12,000 according to State Farm data. Texas leads the nation in hail claims, with over 600,000 claims filed annually. The National Oceanic and Atmospheric Administration reports Texas experiences more hail storms than any other state. Proper installation reduces claim frequency by up to 60% according to CertainTeed research. Insurance companies pay over $15 billion annually for roof claims nationwide. Understanding these statistics helps contextualize your individual claim experience.
Step-by-Step Guide: Your Action Plan for Success
Follow this proven method based on hundreds of successful claims. First, document all damage with photos and videos immediately after safe access. Contact your insurance company to start your claim and get your claim number. Research and select a qualified roofing contractor with insurance claim experience. Schedule the adjuster inspection when your contractor can attend. Review the insurance estimate thoroughly with your contractor. Identify any missing items or necessary upgrades. Negotiate any discrepancies with proper documentation. Select materials that balance insurance coverage with your preferences. Sign a detailed contract with your chosen contractor. Prepare your property for construction work. Monitor the installation process with scheduled updates. Conduct a final walkthrough addressing any concerns. Submit completion documentation to your insurance company. Receive final payment and register your warranties. This systematic approach maximizes your chances of a successful outcome.
Conclusion: Taking Control of Your Roofing Future
Navigating an insurance claim for a new roof can feel overwhelming. Armed with the right information, you can approach the process with confidence. Remember that you have rights as a policyholder and homeowner. Your roof protects everything beneath it, making quality installation essential. The investment of time in understanding your policy and options pays dividends in long-term satisfaction. Choose partners carefully—both your insurance company and roofing contractor significantly impact your experience. Document everything thoroughly and communicate clearly at each step. Your new roof should provide decades of reliable protection and enhance your home's value.
Take the next step by reviewing your current insurance policy today. Understand your coverage before you need it. Create a relationship with a reputable roofing contractor before emergencies strike. Document your roof's current condition with photos for future reference. Consider preventive maintenance to extend your roof's life and prevent claims. When damage does occur, act promptly and follow the proven process outlined here. Your home deserves the best protection available, and you deserve a smooth claims experience. With proper preparation and the right professional support, you can navigate this process successfully and secure the quality roof your Texas home needs.