
Choosing a Roofer Company: An Expert Guide from 15+ Years of Roofing Experience
My name is Michael, and I have been a licensed roofing contractor for over fifteen years. I have completed more than two thousand residential and commercial roofing projects. I hold certifications from major manufacturers like GAF and Owens Corning. This experience gives me a unique perspective on what makes a great roofing company. I want to share that knowledge with you today. This article exists to solve a very real problem for homeowners. How do you choose the right roofing company from dozens of local options? The decision is confusing and stressful. A roof is one of the biggest investments you will make in your home. Making the wrong choice can lead to leaks, poor workmanship, and wasted money. My goal is to give you the clear, honest information you need. I want you to feel confident and informed before you sign any contract.
This guide is built on real-world experience. The information comes from my own customer projects, industry training, and manufacturer specifications. I have reviewed building codes like the International Residential Code (IRC). I have studied insurance claim processes with adjusters. My recommendations are based on what actually works on job sites, not just theory. I will explain the methodology behind every suggestion. You will learn how professional roofers evaluate materials, assess damage, and plan installations. This transparency is important for building trust. You deserve to know why certain practices are better than others.
The Critical Role of Proper Roof Installation
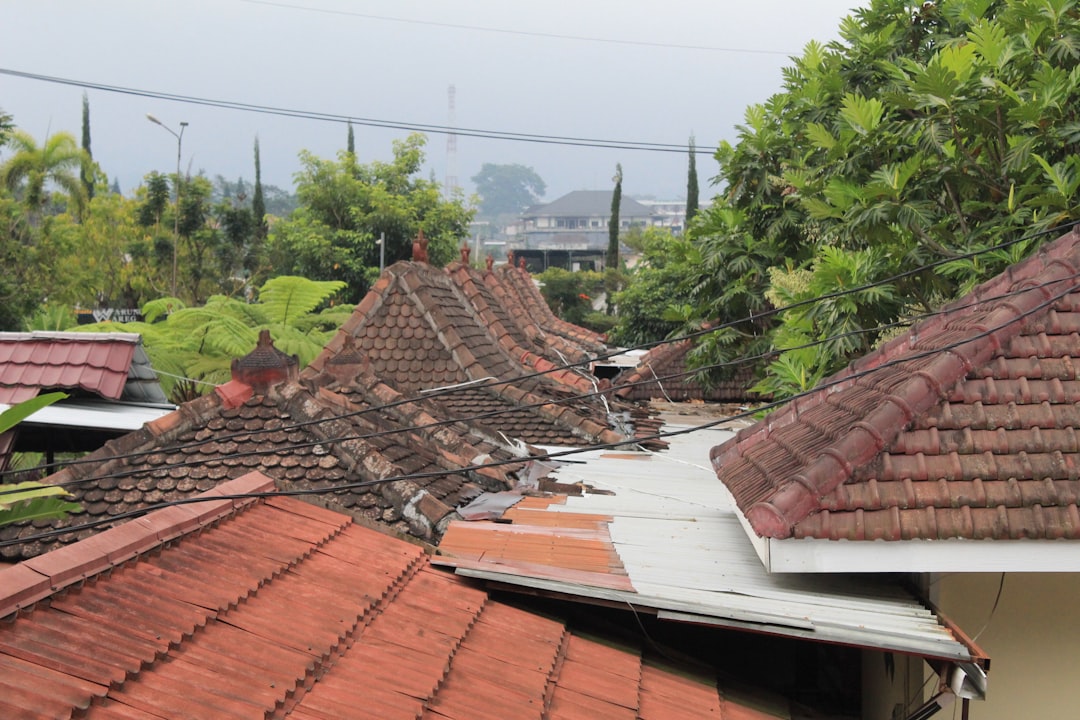
A roof is a complex system, not just shingles. The installation quality determines its lifespan and performance. A poor installation can ruin the best materials. I have seen beautiful architectural shingles fail in five years due to bad work. The opposite is also true. Properly installed basic shingles can last their full warranty period. The installation includes many hidden components. These include underlayment, flashing, ventilation, and ice and water shield. Each layer must be installed correctly. They work together to protect your home from water, wind, and heat.
Understanding Roof System Components
The decking is the wooden base, usually plywood or OSB. It must be solid and dry before anything else is done. The underlayment is a water-resistant barrier installed over the deck. It provides a secondary layer of protection. High-quality synthetic underlayment is now the industry standard. It is much stronger than traditional felt paper. Flashing is metal installed at roof intersections and penetrations. These are critical leak points. Proper flashing technique is non-negotiable for a watertight roof. Ventilation is often overlooked by homeowners. A balanced attic ventilation system is essential. It prevents heat and moisture buildup that can damage shingles and decking.
How to Vet and Choose a Reputable Roofer Company
Finding a good roofer requires research. Do not just pick the first name from an online ad. Start by checking for proper licensing and insurance. In Texas, roofing contractors must be licensed with the Texas Department of Licensing and Regulation (TDLR). Always ask for proof of both general liability and workers' compensation insurance. This protects you if an accident happens on your property. Look for established companies with a local physical address. Be wary of storm chasers who appear after bad weather. They often leave town once the work is done, leaving you with no warranty support.
Key Questions to Ask During Consultation
Prepare a list of questions for your initial meeting. Ask about the company's experience with your specific roof type. Ask for local references you can actually call. Request to see photos of recent, similar projects. Inquire about who will be the project foreman on site each day. A good company will provide clear, written answers. They should explain their process in detail. Ask about their cleanup and disposal procedures. A professional crew leaves your property as clean as they found it. Finally, ask about their warranty. Understand what is covered by the manufacturer's warranty versus their workmanship warranty.
- Verify Licensing: Check the contractor's license status online with the TDLR.
- Request Certificates of Insurance: Get copies sent directly from the insurer.
- Check Online Reviews: Look at Google, BBB, and Facebook for consistent feedback.
- Ask for Manufacturer Certifications: Companies certified by GAF or Owens Corning meet higher standards.
- Get Multiple Estimates: Always get at least three detailed, written estimates for comparison.
Comparing Roofing Materials: A Contractor's Hands-On Perspective
Material choice impacts cost, appearance, and longevity. Asphalt shingles are the most common for good reason. They offer a great balance of cost, durability, and ease of installation. There are three main tiers: 3-tab, architectural, and premium designer shingles. 3-tab shingles are the most basic and economical. Architectural shingles are thicker and have a dimensional look. They offer better wind resistance and a longer warranty. Premium shingles mimic the appearance of slate or wood shakes. They are the most durable and aesthetically pleasing option.
Metal roofing is growing in popularity for its longevity. A standing seam metal roof can last 40-70 years. It is excellent for shedding snow and resisting high winds. The initial cost is higher than asphalt, but the lifespan justifies it for many homeowners. Tile roofing, either clay or concrete, is common in certain architectural styles. It is extremely durable and fire-resistant. However, it is very heavy and requires a reinforced roof structure. Slate is the premium, natural stone option. A slate roof can last over a century. It is also the most expensive material with a very specialized installation process.
When comparing, consider your climate, budget, and home style. Review the manufacturer's specifications for wind and impact ratings. For Texas homes, I often recommend impact-resistant shingles rated for Class 4 hail. Products like GAF Timberline HDZ or Owens Corning Duration are excellent choices. Always use materials that meet or exceed local building code requirements. You can find code information for your area on the International Code Council website.
Understanding Roofing Costs and Project Estimates
Roofing costs vary widely based on size, pitch, materials, and location. A typical asphalt shingle roof replacement in our area can range from $8,000 to $25,000. The national average is around $9,000 to $12,000 according to industry cost surveys. The estimate should be a detailed, line-item document. It should list all materials by brand and product line. It should specify the quantity of underlayment, flashing, and ventilation components. Labor costs should be clearly stated. Beware of estimates that are just one total number with no breakdown.
Real Project Cost Examples
Let me share two real project examples from last year. Project A was a 2,200 square foot ranch-style home. The roof had a simple 6/12 pitch with two skylights. We installed GAF Timberline HDZ architectural shingles with synthetic underlayment. We added new ridge vent and repaired some decking. The total project cost was $14,500. Project B was a similar sized two-story home with a steeper 10/12 pitch. It had multiple valleys and complex flashing around chimneys. Using the same materials, the cost was $18,200 due to increased labor and safety requirements. The pitch and complexity significantly affect the price.
Always ask what is included. Does the price include tear-off and disposal of the old roof? Does it include repairing any rotten decking found during the project? Is the cost of permits included? A reputable company includes all these items in the initial quote. They should also explain potential additional costs that may arise. For example, if more decking is damaged than initially visible.
The Roof Installation Process: A Step-by-Step Guide from the Field
A professional roof replacement follows a clear sequence. Day one begins with site preparation. The crew lays tarps to protect your landscaping. They set up safety equipment and a dump trailer. The tear-off process starts next. They remove the old shingles and underlayment down to the decking. All old nails are removed or hammered flat. The crew then inspects the decking thoroughly. Any soft, rotten, or damaged wood is marked for replacement. This is a critical quality control step that cannot be skipped.
Once the deck is sound, installation begins. They install drip edge along the eaves. Then they roll out the synthetic underlayment, stapling it securely. In valleys and around penetrations, they install ice and water shield. This is a self-adhering membrane that seals around nails. Next, they install step flashing and base flashing around chimneys and walls. The shingles are then installed according to the manufacturer's precise nailing pattern. Proper nailing is crucial for wind resistance. Finally, ridge vent is installed at the peak for ventilation. The crew does a final cleanup, using magnets to pick up stray nails.
Practical Homeowner Tips from Real Projects
Schedule your roof replacement during dry weather. Spring and fall often provide the best conditions. Plan for noise and vibration. The tear-off process is loud. Consider this if you work from home. Move vehicles out of the driveway and clear the yard of toys or furniture. Protect items in your attic from dust that may fall through gaps. Talk to your neighbors as a courtesy, as the work will be visible and audible. Be present for the initial walk-through with the foreman. Point out any specific concerns you have about your property.
After installation, do a visual inspection with the project manager. Look for clean lines and uniform shingle alignment. Check that all vents and pipes have new flashing boots. Ensure the gutters are clear of debris. Ask for leftover shingles for future repairs. Keep all warranty paperwork and receipts in a safe place. Perform a simple annual roof inspection from the ground. Look for missing or curling shingles. Keep trees trimmed back from the roof surface.
Navigating Insurance Claims for Roof Damage
Storm damage often leads to insurance claims. The process can be confusing. If you suspect damage, contact a reputable roofer for a professional inspection first. They can identify hail hits, wind damage, or leaks. Document everything with photos and notes. Then contact your insurance company to file a claim. An adjuster will be assigned to inspect the damage. It is very helpful to have your roofer present during the adjuster's inspection. They can point out damage the adjuster might miss.
The insurance company will provide an estimate for repairs. This estimate is often based on regional pricing software. Your roofing contractor will review this estimate. They will ensure it covers all necessary materials and labor to current standards. There is often a negotiation process. A good roofing company will work with you and your insurer to reach a fair settlement. Remember, you have the right to choose your own contractor. The insurance company cannot force you to use a specific company. For more information, review the Texas Department of Insurance guide on homeowners insurance claims.
Frequently Asked Questions from Real Customers
How long does a roof replacement typically take?
A standard asphalt shingle roof on an average-sized home takes 2-3 days. The first day is for tear-off and deck preparation. The second day is for installation of underlayment and shingles. A third day may be needed for complex roofs or cleanup. Weather delays can extend this timeline. Metal or tile roofs take significantly longer, often 1-2 weeks.
What is the difference between a repair and a full replacement?
A repair addresses a specific, localized problem like a leak around a chimney. It involves fixing only the damaged section. A replacement removes all existing roofing materials and installs a completely new system. A replacement is needed when the roof is at the end of its service life. Widespread wear, curling shingles, or multiple leaks indicate a need for replacement.
Can I install a new roof over my old one?
Technically, building codes in some areas allow one overlay. However, I strongly advise against it as a professional. A tear-off allows for a proper inspection of the decking. It ensures all old materials are removed. It prevents hidden moisture problems. It also avoids adding excessive weight to your home's structure. Most manufacturer warranties are void if shingles are installed over an existing layer.
How important is attic ventilation?
Extremely important. Proper ventilation extends shingle life and reduces energy costs. In summer, a hot attic can bake shingles from underneath. In winter, trapped moisture can lead to mold and wood rot. A balanced system has intake vents at the eaves and exhaust vents at the ridge. The general rule is 1 square foot of net free vent area per 150 square feet of attic floor space.
What does a roofing warranty cover?
There are typically two warranties. The manufacturer's warranty covers defects in the roofing materials. This can be 25 years to a lifetime, often prorated. The contractor's workmanship warranty covers installation errors. This is usually 2-10 years. Read both warranties carefully. Understand what voids them, such as improper maintenance or unapproved repairs.
What are the signs I need a new roof?
Look for shingles that are cracked, curled, or missing granules. Check for bald spots where the asphalt is exposed. Look in your gutters for an accumulation of granules. This indicates advanced wear. Inspect for moss or algae growth, which can trap moisture. Check inside your attic for daylight coming through the boards or signs of water stains.
How do I maintain my roof after installation?
Keep gutters clean to prevent water backup. Trim tree branches to prevent physical damage and debris accumulation. After major storms, do a visual inspection from the ground. Have a professional inspection every 3-5 years. Do not pressure wash asphalt shingles, as this can remove granules. Address minor repairs immediately to prevent larger problems.
Real Project Case Studies with Outcomes
Case Study: Hail Damage Recovery
A Kingwood family had severe hail damage after a spring storm. Their 15-year-old roof showed widespread bruising on the shingles. We performed a detailed inspection and documented over 200 hail hits per 10'x10' square. We met with the insurance adjuster and provided our evidence. The insurance company approved a full replacement. We installed impact-resistant shingles rated for Class 4 hail. The project was completed in four days. The homeowners now have a stronger roof with a transferable warranty, adding value to their home.
Case Study: Preventative Replacement Before a Sale
A couple planning to sell their home requested an inspection. Their roof was 22 years old but had no active leaks. Our inspection revealed brittle shingles and failing sealant strips. We advised that a new roof would be a major selling point. They chose a mid-range architectural shingle in a modern color. The installation went smoothly. When they listed the home, they could market it with a "brand new roof." Their realtor confirmed it helped the house sell faster and above asking price.
Industry Statistics and Data
According to the National Roofing Contractors Association (NRCA), a properly installed and maintained asphalt shingle roof should last 20-30 years. Metal roofs typically last 40-70 years. The Remodeling 2024 Cost vs. Value Report indicates a new roof recoups about 60% of its cost in home resale value. The Insurance Institute for Business & Home Safety (IBHS) recommends roofs in hail-prone areas use impact-resistant materials. Their research shows these materials significantly reduce claim frequency and severity. Proper attic ventilation can reduce peak cooling demand by up to 10%, according to the U.S. Department of Energy.
Conclusion: Your Path to a Successful Roofing Project
Choosing a roofer company is a significant decision. Use this guide as your roadmap. Start by verifying credentials and getting multiple estimates. Ask detailed questions and understand the quotes. Choose materials that suit your climate, budget, and home's style. Be present and engaged during the project. A good roofing experience ends with a durable, beautiful roof and peace of mind. Your home is your most valuable asset. Protect it with quality materials and expert installation.
Your next step is to schedule inspections with two or three licensed, insured, and locally recommended roofing contractors. Show them this article. Ask them how their process aligns with the standards discussed here. A reputable company will welcome your informed questions. They will appreciate you doing your homework. This knowledge puts you in control of your home investment. Remember, the cheapest price is rarely the best value when it comes to your roof. Quality workmanship lasts for decades. Thank you for taking the time to educate yourself. I wish you the best of luck with your roofing project.