
Fix Roof Leak: Your Complete Guide from a 15-Year Roofing Contractor
I have been fixing roofs in Texas for fifteen years. My team has completed over two thousand roofing projects. We hold certifications from GAF, CertainTeed, and Owens Corning. This experience taught me one important lesson. A small roof leak can cause big problems very quickly. This article exists to solve a specific homeowner problem. You have water dripping from your ceiling. You need to know what to do right now. You need to understand your options. You need to avoid costly mistakes. I will answer your urgent questions. I will share real contractor wisdom from my field experience. This information comes from fixing leaks on hundreds of homes. It combines manufacturer specifications, local building codes, and practical know-how. My goal is simple. I want to give you clear, actionable steps. I want to save you time, money, and stress. Let's get started.
Understanding Your Roof Leak: The First Critical Steps
Water inside your home is always an emergency. Your first reaction matters. Do not panic. Follow these steps immediately. First, contain the water inside. Place buckets under drips. Move furniture and valuables away. Protect your belongings. Second, try to trace the water path. Water often travels far from the actual leak point. Look for stains on ceilings or walls. Check your attic if it is safe to access. Third, document everything. Take clear photos and videos. This evidence is vital for insurance claims. Fourth, call a professional roofer for an inspection. Do not climb onto a wet or steep roof yourself. It is extremely dangerous. These initial actions protect your home and your safety.
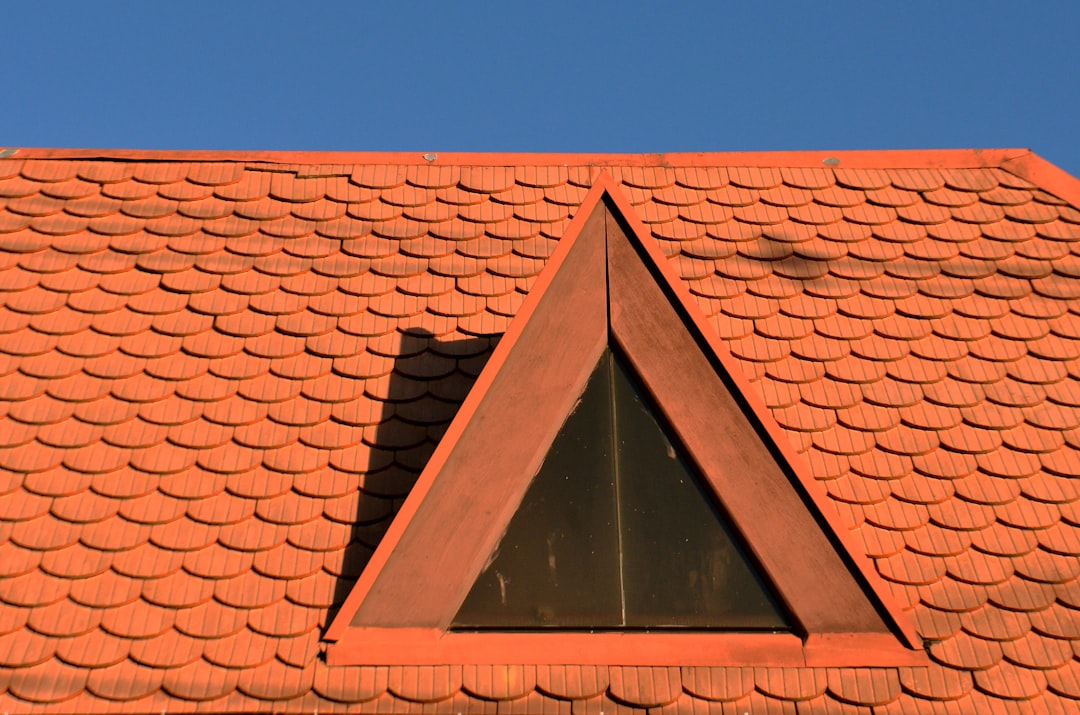
Common Causes of Roof Leaks in Residential Homes
Roof leaks have predictable causes. Understanding them helps with diagnosis. Damaged or missing shingles are the most common issue. High winds or hail can tear shingles off. Aging shingles become brittle and crack. Flashing failures are another major cause. Flashing is the metal material around roof penetrations. It seals areas around chimneys, vents, and skylights. Over time, flashing can rust, crack, or pull away. Clogged gutters are a silent culprit. When gutters back up, water sits against the roof edge. This water eventually finds a way inside. Ice dams in cold climates force water under shingles. Poor attic ventilation traps heat and moisture. This moisture condenses and mimics a leak. Knowing these causes helps you talk to your contractor.
How to Safely Locate a Roof Leak from Inside Your Attic
Finding a leak requires patience and a flashlight. Only enter your attic if it is safe and accessible. Wear proper protective gear. Look for daylight shining through the roof deck. This is a clear sign of a hole. Look for water stains on the wood. Follow the stain to its highest point. The leak is usually directly above that point. Check for damp or moldy insulation. Feel for wet rafters. Use a garden hose test from the outside if needed. Have someone spray water on the roof section by section. Another person watches inside the attic for drips. This method pinpoints the exact leak location. Always prioritize safety over investigation.
Emergency Temporary Fixes for Roof Leaks
Sometimes you need a quick fix before the roofer arrives. These are temporary solutions only. They are not permanent repairs. Your safety is the top priority. Do not attempt these in bad weather. For a small hole in the shingles, use roofing cement. Apply it under the damaged shingle. Press the shingle down firmly. Cover the area with a piece of sheet metal or plywood. Weigh it down with bricks or heavy objects. For a leak around a pipe vent, use roofing tape or sealant. Clean the area first. Apply the tape or sealant generously. For larger damaged areas, use a heavy-duty tarp. Secure the tarp over the leak area. Use wooden boards nailed along the edges. Do not nail directly into the shingles if possible. These fixes buy you time for a professional repair.
Materials You Need for a DIY Roof Leak Patch
Having the right materials makes a temporary repair easier. Keep a basic roof repair kit in your garage. You will need roofing cement in a caulk tube. Buy a roll of roofing tape or peel-and-stick membrane. A heavy-duty tarp is essential for storm season. Have a hammer, roofing nails, and some 1x4 wooden boards. Safety gear is non-negotiable. You need a sturdy extension ladder. Wear shoes with good traction. Use a safety harness if you have one. A headlamp helps for working in dim light. Remember, these are for emergency stops only. A professional must assess the damage later.
Professional Roof Leak Repair: What to Expect
Hiring a professional roofer is the best long-term solution. A good contractor follows a systematic process. First, they perform a thorough inspection. They examine the exterior roof and the interior attic space. They identify all potential leak sources. Second, they provide a detailed written estimate. This estimate should list all repairs and material costs. Third, they obtain necessary permits if required by local code. Fourth, they complete the repair using proper techniques. They replace damaged materials with matching new ones. They ensure proper sealing and integration with the existing roof. Finally, they clean up the work area completely. They should also explain the repair and warranty to you.
Cost Breakdown: How Much Does It Really Cost to Fix a Roof Leak?
Roof leak repair costs vary widely. The national average is between $350 and $1,100. Simple shingle replacement might cost $150 to $400. Fixing flashing around a chimney can cost $200 to $500. Repairing a leak around a skylight often ranges from $300 to $600. Complex leaks involving decking repair cost more. If the roof deck is rotten, repair costs jump to $500 to $1,500. Labor is a significant part of the cost. Emergency or weekend repairs carry premium rates. Your location also affects the price. Texas rates differ from California rates. Always get at least three written estimates. Compare the scope of work, not just the bottom line.
Real Project Case Study: Hail Damage Leak in Kingwood
Last spring, a hailstorm hit a neighborhood in Kingwood. A homeowner called us with a leak in their living room. The home was fifteen years old. Our inspection found three damaged shingles on the south-facing slope. The hail had cracked the shingle mat. Water was seeping through the cracks. The attic insulation was wet in one area. The roof deck was still solid. We replaced the three damaged shingles. We also replaced the surrounding shingles for a seamless look. We installed new ice and water shield under the repair area. The total cost was $475. The repair was completed in one afternoon. The homeowner filed an insurance claim. Their deductible was $1,000, so they paid out-of-pocket. The leak was fixed permanently. This case shows the importance of a prompt inspection.
When to Repair vs. When to Replace Your Entire Roof
This is a critical financial decision. Repair is the right choice in specific situations. The roof is less than 15 years old. The damage is isolated to a small area. The surrounding shingles are in good condition. The roof deck is structurally sound. Most of the roof has many years of life left. Replacement becomes necessary in other cases. The roof is near the end of its lifespan. Asphalt shingles last 20-25 years typically. There are leaks in multiple areas. The roof has widespread granule loss. Shingles are curling, cracking, or buckling. The roof has suffered major storm or wind damage. The cost of repairs approaches 50% of a replacement cost. A professional roofer can help you make this choice.
Material Comparisons: What Works Best for Leak Repairs?
Matching materials is key for a lasting repair. For asphalt shingle roofs, use the same brand and style if possible. GAF, CertainTeed, and Owens Corning are major manufacturers. Their websites have color matching tools. For metal roofs, use the same panel profile and paint finish. Sealants must be compatible with the roof material. For flat roofs, EPDM or TPO patches must be properly welded. Underlayment is crucial. Synthetic underlayment offers better water resistance than felt paper. Ice and water shield provides superior protection in vulnerable areas. Always use corrosion-resistant nails and fasteners. Quality materials ensure the repair lasts as long as the rest of the roof.
Navigating Insurance Claims for Roof Leak Damage
Homeowners insurance often covers sudden, accidental damage. This includes damage from storms, falling trees, or hail. It typically does not cover wear and tear or lack of maintenance. The claims process has specific steps. First, mitigate further damage. This is your duty as a policyholder. Use temporary fixes as described earlier. Second, contact your insurance company promptly. Report the claim and get a claim number. Third, document all damage with photos and videos. Fourth, your insurer will send an adjuster to inspect. It is wise to have your own roofer present during this inspection. The adjuster will write an estimate for repairs. Review this estimate carefully with your contractor. If the estimate is too low, you can dispute it. Provide your contractor's estimate as supporting evidence.
Tips for a Successful Roof Leak Insurance Claim
Be proactive and organized. Keep a detailed log of all communications. Write down names, dates, and summaries of calls. Save all emails and letters. Get everything in writing. Do not rely on verbal promises from the adjuster. Understand your policy details. Know your deductible amount. Know your coverage limits for dwelling and personal property. Hire a reputable, licensed roofing contractor. Insurance companies prefer to work with established professionals. Do not sign over your insurance benefits to a contractor. This is called an "assignment of benefits" and can be problematic. Be patient but persistent. Insurance claims can take weeks or months to resolve. Your goal is a fair settlement that fully covers quality repairs.
Preventative Maintenance to Avoid Future Roof Leaks
The best repair is the one you never need. Regular maintenance prevents most leaks. Perform a visual inspection of your roof twice a year. Spring and fall are ideal times. Look from the ground with binoculars. Check for missing, cracked, or curling shingles. Look for piles of granules in gutters. This signals shingle wear. Keep your gutters and downspouts clean and clear. Clogged gutters cause water backup. Trim tree branches hanging over the roof. Falling branches and rubbing limbs cause damage. Ensure your attic has proper ventilation. Check soffit and ridge vents for blockages. After major storms, always do a quick visual check. Address small problems immediately. A $10 tube of sealant can prevent a $1,000 repair bill later.
Seasonal Roof Care Checklist for Homeowners
- Spring: Inspect for winter storm damage. Clean gutters from fall debris. Check flashing around chimneys.
- Summer: Look for signs of heat damage or blistering. Ensure attic ventilation is working to reduce heat buildup.
- Fall: Clean gutters thoroughly after leaves drop. Trim back any new tree growth. Inspect shingles before winter.
- Winter: Monitor for ice dams if you live in a cold climate. Keep attic well-insulated to prevent them. Remove heavy snow carefully if safe.
Frequently Asked Questions About Fixing Roof Leaks
1. How long does a roof leak repair take?
A simple repair often takes a few hours. The roofer must locate the leak, prepare materials, and execute the fix. Complex repairs involving decking or multiple points can take a full day or more. Weather is a major factor. Repairs cannot be done in rain, snow, or high winds. Scheduling with a contractor also affects timeline. During busy storm seasons, wait times can be longer.
2. Can I fix a roof leak myself?
You can perform a temporary patch for safety. Permanent repairs require professional skill and knowledge. Roofing work is dangerous. Falls from roofs cause serious injuries every year. Professionals understand building codes, material compatibility, and proper techniques. A DIY repair might void your shingle warranty. It could also lead to more extensive hidden damage. For your safety and your home's protection, hire a licensed professional.
3. Will my homeowners insurance cover the repair?
It depends on the cause of the leak. Insurance typically covers sudden, accidental events like hail, wind, or a fallen tree. It usually does not cover leaks from normal wear and tear, aging, or lack of maintenance. You must review your specific policy and talk to your agent. Always file a claim if you suspect storm damage. Let the insurance company make the determination.
4. What is the most common spot for a roof leak?
Roof penetrations are the most vulnerable areas. This includes plumbing vents, chimney flashing, skylights, and roof valleys. These spots have seams and joints where water can infiltrate. The second most common area is near the roof edge where gutters attach. Ice dams often cause leaks here in cold climates. Regular inspection of these areas can catch problems early.
5. How do I find a trustworthy roofing contractor?
Look for local companies with strong reputations. Check for proper licensing and insurance. Ask for references from recent customers. Look for manufacturer certifications like GAF Master Elite or CertainTeed Select ShingleMaster. These certifications require proper training and insurance. Avoid door-to-door storm chasers after bad weather. Get multiple written estimates. A trustworthy contractor will provide a detailed scope of work, not just a price.
6. What should I do if water is actively dripping into my home?
First, contain the water. Place buckets, pots, or towels under the drip. Move furniture, electronics, and valuables out of the way. If water is soaking into the ceiling, you can poke a small hole at the low point to let it drain. This prevents the ceiling from collapsing. Then, call a professional roofing company immediately for emergency service. Take photos for documentation.
7. How can I tell if my roof deck is damaged from a leak?
You need to inspect the attic. Look at the underside of the roof decking. Probe the wood with a screwdriver. If it feels soft or spongy, the wood is rotten. Dark stains or mold growth also indicate water damage. Sagging between the rafters is a serious sign of structural weakness. Any decking damage must be replaced during the repair. Leaving rotten wood will lead to future problems.
Industry Statistics and Data on Roof Leaks
Roof leaks are a leading cause of homeowner insurance claims. According to the Insurance Information Institute, water damage is one of the most common claims. The average claim for water damage is over $10,000. A National Roofing Contractors Association (NRCA) survey found poor installation causes 70% of roofing problems. Proper flashing installation is the most critical factor in preventing leaks. Another study shows that regular maintenance can extend a roof's life by up to 50%. These statistics highlight the importance of quality work and ongoing care.
Step-by-Step Guide: The Professional Method for a Permanent Shingle Repair
This is the method I teach my crew. It ensures a leak-free repair. First, safely access the roof. Use proper ladder placement and fall protection. Second, identify the exact damaged shingles. Third, carefully lift the shingles above the damaged ones. Use a flat bar to avoid breaking them. Fourth, remove the nails holding the damaged shingles. Pull the old shingles out. Fifth, inspect the roof deck underneath. Replace any soft or rotten wood. Sixth, slide the new shingle into place. It must align perfectly with the existing course. Seventh, nail the new shingle with four to six roofing nails. Follow the manufacturer's nailing pattern. Eighth, apply a small dab of roofing cement under each tab. This seals the nail holes. Ninth, press the overlying shingles back down. Finally, clean up all nails and debris from the roof and ground.
Conclusion: Your Path to a Dry, Secure Home
A roof leak is stressful but manageable. Your immediate actions protect your home's interior. Understanding the causes helps you communicate with professionals. Temporary fixes are for emergencies only. A permanent repair requires skilled workmanship. The cost depends on the damage extent and materials needed. Insurance may help if the cause is a covered peril. Preventative maintenance is your best defense against future leaks. Use the seasonal checklist provided. Choose your contractor carefully based on credentials and reputation. Your roof is your home's first line of defense. Do not ignore small signs of trouble. Address them promptly with quality repairs. This protects your biggest investment and gives you peace of mind. If you have a leak, take a deep breath and follow the steps in this guide. You now have the knowledge to handle the situation confidently.