
Liquid Rubber Roof Repair: A Contractor's Complete Guide to Waterproofing Your Home
For over 15 years, I've worked on thousands of roofing projects across Texas. I hold multiple certifications from the National Roofing Contractors Association (NRCA) and am a certified installer for major liquid membrane manufacturers. This experience comes from repairing everything from small residential leaks to large commercial flat roofs. I've seen what works, what fails, and what saves homeowners money in the long run. This article exists because homeowners face confusing choices when their roof leaks. You need clear, honest information about liquid rubber products. You want to know if this solution is right for your home and budget. This guide answers those questions with real contractor insights, not just marketing claims. The information here comes from installing these products on actual customer homes. It references manufacturer specifications from companies like Henry Company and Gaco Western. It considers building codes relevant to Texas homeowners. Recommendations follow proven methods that protect your investment. My goal is simple: give you the knowledge to make an informed decision about your roof repair.
What Is Liquid Rubber Roof Coating?
Liquid rubber is a flexible, waterproof coating applied directly to your roof surface. It cures to form a seamless, rubber-like membrane. This membrane bonds to your existing roof material. It creates a continuous barrier against water, UV rays, and weather damage. Think of it like painting a giant, stretchy water shield over your roof. The material is typically acrylic, silicone, or polyurethane based. These are high-performance elastomers. They expand and contract with temperature changes. This flexibility prevents cracking that plagues traditional patch repairs. Liquid coatings work on many roof types. They are especially popular for flat or low-slope roofs. These roofs are prone to ponding water and leaks. The seamless nature eliminates seams where water can enter.
How Liquid Rubber Differs From Traditional Repairs
Traditional repairs often involve cutting out damaged sections. You then install new roofing material like shingles or membrane sheets. This creates seams and potential new leak points. Liquid rubber flows into cracks and crevices. It seals them from the inside out. There are no seams to fail. Traditional materials can be rigid. They crack when the roof deck moves. Liquid rubber stretches up to 300% of its original size. It moves with your roof without tearing. Application is also different. Traditional repairs require specific weather conditions. Liquid rubber can often be applied in damp conditions. It cures quickly to form a waterproof seal. This is crucial for emergency leak repairs.
When Should You Consider Liquid Rubber Repair?
Not every roof problem needs liquid rubber. It is a specific solution for specific situations. Understanding when to use it saves you money and prevents future issues. The ideal candidate is a roof with multiple small leaks or widespread surface degradation. If your roof has good structural integrity but failing waterproofing, coating may work. Look for alligatoring on modified bitumen. Check for blistering on built-up roofs. Notice granule loss on shingles. These are signs the surface protection is gone. Liquid rubber can restore it. Consider coating if you have a flat or low-slope roof. These designs hold water. Ponding water accelerates roof failure. A seamless coating directs water to drains. It also protects the underlying material from UV degradation. This extends the roof's life significantly.
Signs Your Roof Is a Good Candidate
Your roof deck must be structurally sound. Probe for soft spots or rotted wood. Coating cannot fix structural problems. The existing roof surface must be clean and mostly intact. Heavy alligatoring is okay. Large holes or missing sections are not. The roof should have proper drainage. Standing water over 48 hours needs addressing first. Check for adequate slope to drains. The substrate must be compatible. Most coatings adhere to asphalt, concrete, metal, and wood. Some substrates require special primers. Always check manufacturer guidelines. Finally, consider the roof's age. Coating an old, failing roof is a temporary fix. It is best for roofs with 5-10 years of life left. This approach adds another 10-15 years of protection.
Types of Liquid Rubber Coatings Explained
Not all liquid rubber is the same. Choosing the right type is critical for long-term performance. The three main categories are acrylic, silicone, and polyurethane. Each has strengths and weaknesses. Your roof type, climate, and budget determine the best choice. Acrylic coatings are water-based. They are easy to apply and clean up with water. They offer good UV protection and are breathable. This allows moisture vapor to escape. They are typically the most affordable option. Silicone coatings are highly durable. They have excellent resistance to ponding water. They remain flexible in extreme temperatures. They are often more expensive than acrylic. Polyurethane coatings are extremely tough and abrasion resistant. They form a hard, protective shell. They are ideal for roofs with foot traffic. Understanding these differences prevents product failure.
Acrylic vs. Silicone: A Hands-On Comparison
From field experience, acrylic works well in dry, sunny climates like Texas. It reflects UV rays, reducing cooling costs. However, it performs poorly with constant water exposure. Silicone excels in wet environments. It can sit under water for extended periods. I've used it successfully on restaurant roofs with grease exposure. Acrylic requires a perfectly clean, dry surface for adhesion. Silicone can tolerate some moisture during application. This is valuable for emergency repairs after rain. Acrylic coatings are typically white or reflective. Silicone comes in more colors but can attract dirt. Cost-wise, silicone is about 30-50% more expensive per gallon. But its longevity in harsh conditions often justifies the price. Always consult the product data sheet for your specific roof type.
Real Cost Analysis: What Homeowners Actually Pay
Costs vary widely based on roof size, condition, and product choice. For accurate budgeting, consider material, labor, and preparation costs. Material costs range from $0.50 to $2.50 per square foot. This depends on coating type and thickness. Most systems require 1.5 to 2 gallons per 100 square feet. Labor is the major expense. Professional application costs $2 to $6 per square foot. A typical 1,500 square foot roof costs $3,750 to $9,000 professionally installed. DIY material-only costs for the same roof are $750 to $3,750. But this excludes equipment rental and your time. Preparation often accounts for 40% of the total job cost. This includes cleaning, repairs, and priming. Never skip proper preparation. It is the foundation of a successful coating.
Breaking Down a Sample Project Cost
Let's analyze a real project from last spring. The homeowner had a 1,200 sq ft flat roof on a garage. The existing modified bitumen roof was 12 years old. It showed surface cracking but no structural issues. We chose a high-quality silicone coating. Material cost: $1.80 per sq ft = $2,160. Labor for cleaning and prep: $1,500. Labor for coating application: $1,800. Primer and miscellaneous materials: $300. Total project cost: $5,760. This extended the roof's life by an estimated 12 years. A full tear-off and replacement would have cost over $12,000. The coating provided a cost-effective solution. The homeowner was pleased with the 10-year warranty. Always get 3 detailed quotes from licensed contractors. Compare the scope of work, not just the bottom line.
The Professional Installation Process Step-by-Step
Proper installation is everything. Even the best product fails if applied incorrectly. The process has distinct phases. Each phase is critical for long-term performance. First, conduct a thorough roof inspection. Identify all problem areas. Mark them for repair. Check for proper drainage. Measure the roof area accurately. Second, prepare the surface meticulously. This is the most important step. Remove all dirt, debris, and loose material. Pressure wash the roof. Allow it to dry completely. Repair all cracks, blisters, and penetrations. Use compatible patching compound. Seal all flashings and edges. Third, apply the primer if required. Some coatings need a primer for proper adhesion. Follow the manufacturer's instructions exactly. Apply primer evenly. Let it cure as specified.
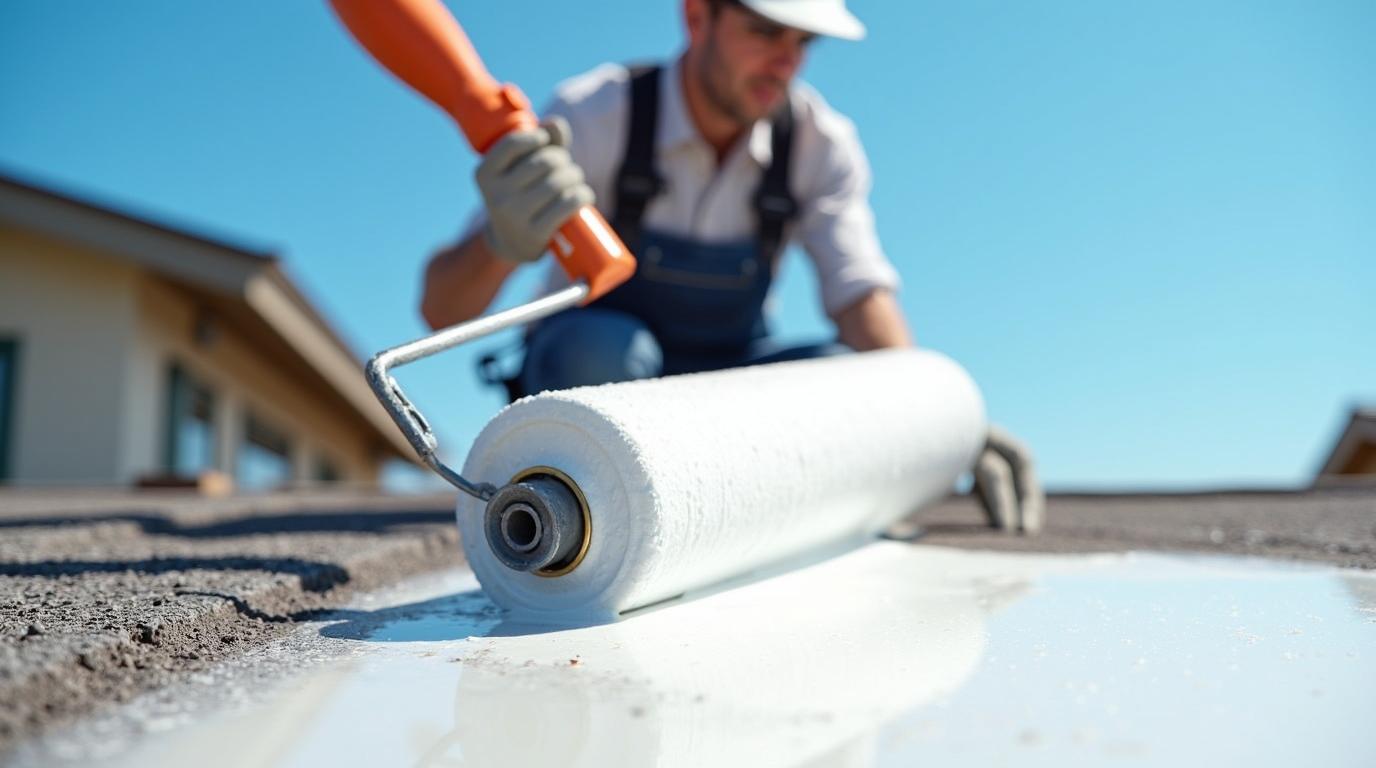
Application Techniques From the Field
Application method depends on the product. Rollers are common for DIY and small areas. They provide good control. Use a 3/4-inch nap roller for textured surfaces. Spray application is fastest for large roofs. It requires professional equipment. It creates a uniform thickness. Brushes are used for edges, corners, and details. They ensure proper coverage in tight spaces. Always apply the coating in multiple thin coats. Two coats are standard. The first coat acts as a sealant. The second coat builds thickness and durability. Maintain a wet edge to avoid lap marks. Follow the recommended spread rate. Applying too thin reduces protection. Applying too thick wastes money and can cause curing issues. Check weather conditions. Ideal temperature is 50-90°F. Avoid application in direct sun on hot days. Plan for no rain for at least 24 hours after application.
Practical Homeowner Tips From Real Projects
Learn from others' experiences. These tips come from hundreds of completed jobs. First, never coat over wet insulation or trapped moisture. This leads to blistering and failure. Use a moisture meter to check the substrate. Second, address the root cause of leaks before coating. Coating over active leaks just hides the problem. Water will find another way out. Third, invest in proper safety equipment. Roof work is dangerous. Use a harness, non-slip shoes, and eye protection. Fourth, clean and maintain roof drains regularly. Clogged drains cause ponding water. This stresses the coating system. Fifth, keep records of the product used, application date, and warranty. This information is valuable for future repairs or insurance claims.
- Schedule repairs for mild, dry weather. Spring and fall are ideal in most regions.
- Communicate with neighbors about the project schedule and noise.
- Protect landscaping with tarps before starting work. Overspray can damage plants.
- Check local building codes for permit requirements. Some areas require permits for roof coatings.
- Verify contractor insurance before allowing work. Request certificates of liability and workers' compensation.
Frequently Asked Questions (FAQ)
How long does liquid rubber roof coating last?
Properly applied coatings last 10 to 20 years. Product quality, surface preparation, and climate affect longevity. High-quality silicone systems often reach the upper end of this range. Annual inspections and minor maintenance extend the life significantly. Look for manufacturer warranties that guarantee specific performance periods.
Can I apply liquid rubber over existing shingles?
Yes, but with important caveats. The shingles must be in good condition, securely attached, and clean. Loose or curling shingles must be repaired first. The coating adds significant weight. Ensure your roof structure can support it. This application is less common than on flat roofs. Consult a structural engineer or experienced contractor first.
Is liquid rubber repair DIY-friendly?
Small, accessible repairs can be DIY projects. Products are available at home improvement stores. However, large areas or complex roofs require professional skill. Mistakes in preparation or application lead to costly failures. Consider your comfort with heights, physical ability, and time commitment. Renting spray equipment adds complexity and cost.
Will coating my roof lower my energy bills?
Reflective white or elastomeric coatings can reduce cooling costs. They reflect sunlight instead of absorbing heat. The U.S. Department of Energy notes cool roofs can lower roof surface temperature by 50°F. This reduces heat transfer into your building. Savings vary by climate, insulation, and previous roof color. In hot climates like Texas, savings can be noticeable.
How do I maintain a coated roof?
Maintenance is simple but important. Inspect the roof at least twice a year, in spring and fall. Clear debris like leaves and branches. Keep drains and scuppers clean. Check for any punctures, tears, or areas where the coating has pulled away. Repair minor damage promptly with compatible patching material. Avoid walking on the roof unnecessarily to prevent abrasion.
Does homeowners insurance cover liquid rubber repairs?
Insurance typically covers repairs for sudden, accidental damage like storm-related leaks. It does not cover wear and tear or maintenance. A coating project to extend an aging roof's life is usually not covered. However, if a covered peril damages a coated roof, the coating may be included in the replacement cost. Always review your policy and discuss with your agent.
What are the biggest mistakes homeowners make?
The top mistake is poor surface preparation. Applying coating to a dirty or wet surface guarantees failure. Another is choosing the wrong product for their roof type or climate. Using acrylic where silicone is needed leads to early failure. Applying coating too thinly is also common. Follow the manufacturer's spread rate exactly. Finally, ignoring flashing and edge details creates leak paths.
Real Project Case Studies With Outcomes
Case Study 1: The Ponding Water Problem. A community center had a 20-year-old flat roof. Water pooled in several areas for days after rain. We installed tapered insulation to improve slope to drains. Then we applied a silicone coating. Two years later, the roof remains dry. The coating's water tolerance handles occasional ponding. The project cost 40% less than a full replacement.
Case Study 2: The Leaky Mobile Home Roof. A homeowner had a metal mobile home roof with numerous small leaks. Patching failed repeatedly. We cleaned the roof thoroughly, treated rust spots, and applied an acrylic elastomeric coating. The seamless layer sealed all leaks. The reflective coating also reduced interior heat. The repair has held for 5 years with no issues.
Case Study 3: The Historic Building Challenge. A historic building had a leaking built-up roof. Replacement would damage original interior finishes. We used a breathable acrylic coating. It sealed the roof without trapping moisture in the historic deck. The project preserved the building's character and solved the leak. It followed guidelines from the Secretary of the Interior's Standards.
Industry Statistics and Data
The roofing coating market is growing. According to a Grand View Research report, the global market size was valued at USD 10.8 billion in 2021. It is expected to expand further. Demand is driven by the cost-effectiveness of re-covering versus replacement. The National Roofing Contractors Association (NRCA) reports that proper maintenance, including coatings, can extend a roof's service life by up to 100%. A study by the Oak Ridge National Laboratory found that reflective cool roof coatings can reduce peak cooling demand by 10-15%. This data supports the value of this technology. Always look for products with an ENERGY STAR® rating for verified energy performance.
Conclusion: Making the Right Decision for Your Home
Liquid rubber roof repair is a powerful tool for extending your roof's life. It is not a magic fix for all problems. It works best on sound, well-drained roofs needing new waterproofing. The choice between DIY and professional installation depends on scale, skill, and risk tolerance. Investing in proper preparation and the right product is non-negotiable. This guide aimed to provide the clarity you need. You should now understand the process, costs, and key considerations. Your next step is to assess your roof's condition honestly. If it seems like a candidate, consult with a qualified roofing professional. Get multiple opinions and written quotes. Ask for references from past coating projects. Check their licensing and insurance. Protect your home with knowledge and quality workmanship. A well-executed liquid rubber coating can provide peace of mind and significant savings for years to come.