
Roof and Siding Repair Guide: Protect Your Home from Storm Damage - Advice from a 15-Year Roofing Contractor
Hello homeowners. My name is Mike, and I've been a licensed roofing contractor for fifteen years. I've completed over 2,500 residential projects across Texas. I hold certifications from GAF, CertainTeed, and Owens Corning. This article comes from real experience on your roofs, not just a textbook. I've seen what works and what fails. I've helped families navigate insurance claims after major storms. I've repaired siding damaged by hail and wind. This guide exists to solve a real problem. Homeowners often face confusing decisions about roof and siding repairs. They wonder if they need a full replacement or just a patch. They worry about costs and contractors. This article answers those questions clearly. I'll share practical knowledge from the field. You'll learn how to assess damage, choose materials, and work with professionals. My goal is to save you time, money, and stress. The information here comes from my project notes, manufacturer specifications, and building codes. I reference credible sources like the International Residential Code (IRC) and material warranties. My recommendations follow proven methods that protect your home for decades. Let's begin.
Understanding Roof and Siding Damage: A Contractor's Eye View
Damage to your roof and siding is often interconnected. A failing roof can cause siding problems. Damaged siding can lead to water intrusion behind walls. The first step is a proper assessment. You need to know what you're looking at. I'll explain the most common issues I find on Texas homes.
Common Roof Damage Signs You Can't Ignore
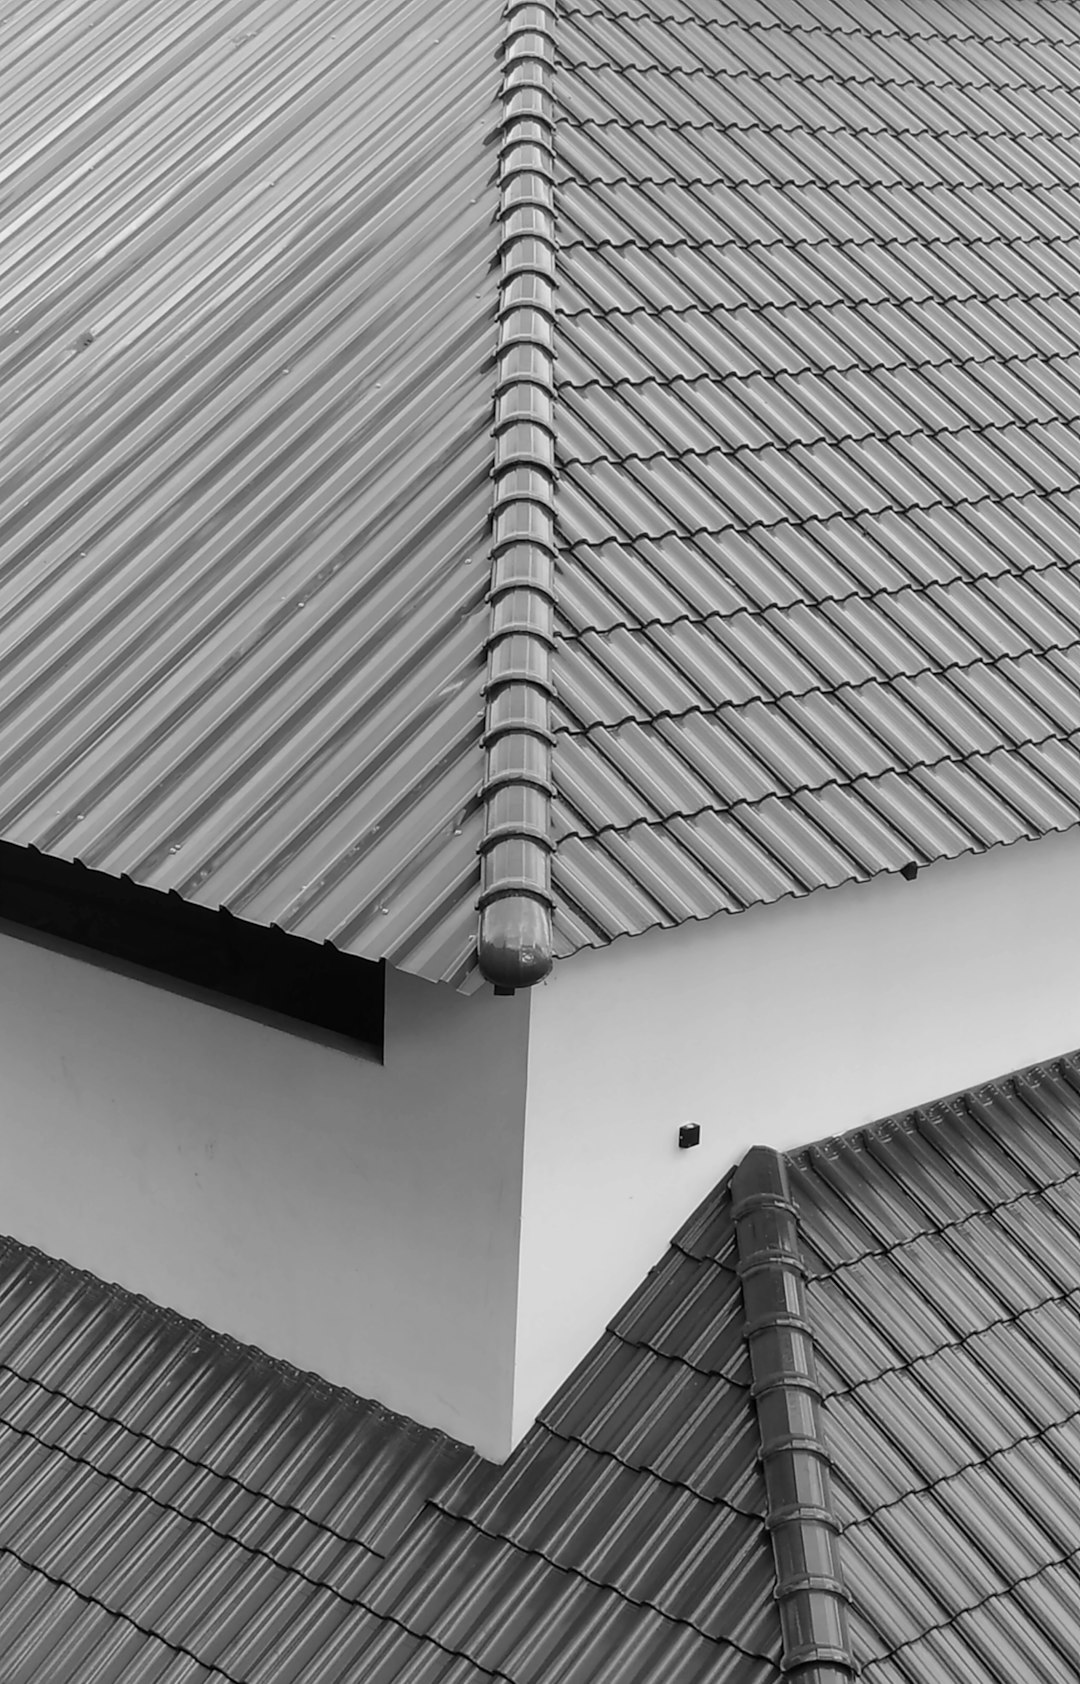
Roof damage isn't always obvious from the ground. You need to know the subtle signs. Missing or cracked shingles are clear indicators. Look for granules in your gutters; this means your asphalt shingles are wearing out. Check for curling or buckling shingle edges. This often signals poor ventilation or aging materials. Inspect your roof valleys carefully. Valleys channel water and are prone to leaks. Look for rust on metal flashing around chimneys and vents. Flashing failure is a leading cause of leaks. Inside your attic, look for water stains on the plywood decking. Check for daylight coming through the roof boards. These are urgent signs of failure. Don't forget about your roof's ventilation system. Blocked soffit vents or a broken ridge vent can cause heat and moisture buildup. This shortens your roof's life dramatically.
Siding Damage: More Than Just Cosmetic
Siding protects your home's sheathing and insulation. Damage compromises this protective layer. For vinyl siding, look for cracks, holes, or warped panels. Hail can punch right through thin vinyl. Check for loose or missing pieces, especially after high winds. Fiber cement siding, like James Hardie products, can crack or chip. Look for areas where the paint is failing or the material is swelling. Wood siding requires checking for rot, insect damage, and peeling paint. Always inspect the areas where siding meets trim or windows. These joints are common leak points. Press on the siding gently. If it feels soft or gives way, you likely have water damage behind it. This hidden damage is often the most expensive to repair.
The Storm Damage Connection: Hail, Wind, and Water
Texas weather is tough on exteriors. Hail damage has a distinct pattern. It creates circular dents or bruises on shingles and siding. These bruises break the protective granule layer on shingles. This leads to accelerated aging. High winds can lift shingles and tear siding panels loose. Wind-driven rain exploits any small opening. It can force water under shingles and behind siding. After a storm, I always check the north and west sides of a house first. These sides typically receive the most wind and weather impact. The Insurance Institute for Business & Home Safety (IBHS) provides excellent guides on storm preparedness. Understanding these patterns helps you communicate effectively with insurance adjusters.
Material Choices: A Hands-On Comparison for Homeowners
Choosing repair materials is a major decision. You want durability, aesthetics, and value. I've installed nearly every major brand. Each has strengths and weaknesses. Let's compare them from a practical standpoint.
Roofing Shingles: Asphalt, Architectural, and Premium Options
Asphalt shingles are the most common choice. They are cost-effective and reliable. Basic 3-tab shingles are the most affordable. They typically last 15-20 years. Architectural or dimensional shingles are thicker. They have a more textured, upscale look. Brands like GAF Timberline and Owens Corning Duration offer excellent warranties. They can last 25-30 years or more. Premium shingles include designer styles and impact-resistant options. For example, CertainTeed's Northgate line resists hail damage. Impact-resistant shingles often qualify for insurance discounts. Always check the manufacturer's warranty. A 50-year warranty doesn't mean the shingle will last 50 years on your roof. It's a prorated warranty against manufacturing defects. Proper installation is more important than the warranty length. The Asphalt Roofing Manufacturers Association (ARMA) sets industry standards I follow on every job.
Siding Materials: Vinyl, Fiber Cement, and Engineered Wood
Vinyl siding is popular for its low maintenance and cost. Modern vinyl is more durable than older versions. It resists fading and impact better. However, it can become brittle in extreme cold and melt if too close to a grill. Fiber cement siding, like James Hardie, is my top recommendation for durability. It resists fire, rot, and insects. It holds paint beautifully for 15+ years. The installation is precise and requires special tools. Engineered wood siding, such as LP SmartSide, offers a wood look with better moisture resistance. It comes with a strong warranty when installed correctly. For repair projects, try to match your existing material. A patch with different material will look obvious and may not perform the same. Always refer to the manufacturer's installation instructions for proper clearances and fastening.
Matching Existing Materials for Seamless Repairs
Matching old materials can be challenging. Sun exposure fades colors over time. Manufacturers discontinue product lines. My advice is to check your attic or garage for leftover materials. Sometimes previous installers left extra bundles. If not, take a sample to a specialty supplier. They can often find a close match. For roofs, consider repairing a damaged section with similar shingles. Then have a professional apply a treatment to blend the new and old areas. For siding, you might need to replace a larger section to create a uniform look. Don't just replace one broken panel. Replace from one natural break point to another, like from corner to corner. This creates a intentional section rather than a obvious patch.
The Repair Process: What to Expect from Start to Finish
A professional repair follows a logical sequence. Knowing the steps helps you manage the project. It also helps you spot a contractor cutting corners. Here's my standard process from thousands of jobs.
Step 1: Thorough Inspection and Detailed Estimate
Every project starts with a detailed inspection. I walk the roof with a hook knife and a moisture meter. I probe for soft wood and check the decking. I inspect the flashing, vents, and chimney. I take measurements and many photos. For siding, I check for level, plumb, and proper fastening. I look behind the siding if possible. Then I create a line-item estimate. It lists all materials, labor, and waste removal. A good estimate is transparent. It should specify the brand and type of shingles, the underlayment type, and the flashing details. It should include a start date and projected completion timeline. Beware of estimates given over the phone without an inspection. They are almost always inaccurate.
Step 2: Material Delivery and Site Preparation
Once you approve the estimate, I order materials. I schedule delivery for just before the work starts. Materials are placed on your driveway with protective boards underneath. I use magnetic nail sweepers around the work area. I protect your landscaping with tarps and plywood. I set up ground protection for walkways. For roof work, I install roof jacks and safety harnesses. Safety is non-negotiable. I also coordinate with you about noise and access. We discuss where workers will park and where the portable toilet will go. Good preparation prevents problems during the project.
Step 3: The Repair Work: Techniques That Matter
The actual repair begins. For roof repairs, we start by removing damaged shingles. We use flat bars to lift the shingles above the damaged ones. We remove old nails. We inspect the roof decking. Any rotten wood is replaced with new plywood. We install ice and water shield in critical areas like valleys and eaves. This is a self-adhering waterproof membrane. Then we install new shingles, carefully weaving them into the existing pattern. We use roofing nails of the correct length. We never use staples. We seal all nails in the replacement area. For siding repairs, we remove damaged panels. We inspect the house wrap or building paper behind it. We replace any compromised weather barrier. We install new siding, leaving proper expansion gaps. We match the nailing pattern and color as closely as possible. The International Residential Code, Chapter 9, provides the requirements for roof and wall coverings we must follow.
Step 4: Cleanup and Final Inspection
Cleanup is part of the job. We remove all old materials, nails, and packaging. We use magnetic rollers across your lawn and driveway. We leave your property as clean as we found it. Then we do a final walkthrough with you. We point out the work completed. We explain any warranties on the materials and our labor. We provide before-and-after photos. We also give you maintenance tips for your new repair. A professional job ends with a satisfied homeowner and a clean site.
Cost Analysis: Real Project Examples and Budgeting
Costs vary widely based on damage extent and materials. Let me share real examples from my project files. These are from the Kingwood area in the last two years.
Example 1: Localized Hail Damage Repair
A homeowner had hail damage on one roof slope and the north-facing siding. The insurance adjuster approved repairs. We replaced shingles on the affected slope only. We used Owens Corning Duration shingles to match the existing roof. We replaced 12 vinyl siding panels on the front of the house. Total project cost: $4,800. Insurance covered $4,200 after deductible. The homeowner paid $600 out-of-pocket. The repair blended perfectly. The key was working with the adjuster to document all damage.
Example 2: Wind Damage and Leak Repair
High winds lifted shingles along a roof ridge. Water leaked into an upstairs bedroom. We repaired a 10' x 10' section of roof decking that had rotted. We replaced the damaged shingles and installed new ridge cap. We also repaired the interior ceiling drywall. Total project cost: $2,900. This was an out-of-pocket repair as the deductible was higher than the cost. The repair stopped the leak and prevented further structural damage.
Example 3: Siding Repair from Impact Damage
A tree limb fell and damaged fiber cement siding. It broke three panels and cracked a fourth. We removed the damaged panels. We discovered minor water damage to the sheathing. We replaced a small section of plywood. We installed new James Hardie siding panels. We primed and painted them to match the house. Total project cost: $1,750. The repair restored the weather barrier and the home's appearance.
Budgeting for Your Project
As a rough guide, small roof repairs start around $500. Larger sections can cost $1,500 to $3,000. Siding repairs range from $300 for a single panel to $2,000+ for a full wall. Always get at least three detailed estimates. The cheapest option is not always the best. Look for value: quality materials, proper installation, and good communication. Consider financing options if needed. Some contractors offer them. Your local utility company might have rebates for energy-efficient siding or cool roofing materials.
Working with Insurance: A Contractor's Advice
Filing an insurance claim can be stressful. I've helped hundreds of homeowners through the process. Here is my practical advice.
Documenting Damage for Your Claim
Start by taking clear photos and videos. Get wide shots of the entire house. Get close-ups of specific damage. Use a ruler or coin in the photo to show hailstone size or dent depth. Write down the date of the storm. Keep records of any weather reports. Contact your insurance company promptly. They will assign an adjuster. Before the adjuster visits, get a contractor's inspection. A professional roofer can often identify more damage than a homeowner. Provide the adjuster with the contractor's report and photos. Be polite but firm. Point out all areas of concern. The adjuster works for the insurance company, but they are usually fair.
Understanding Your Policy and Depreciation
Know your policy details before a storm hits. What is your deductible? Is it a flat amount or a percentage of your home's value? Does your policy cover "replacement cost" or "actual cash value"? Replacement cost pays for new materials at today's prices. Actual cash value deducts for the age of your old roof. This can be a huge difference. Most policies have a clause for "matching." If they can't match your existing materials, they may need to replace more than just the damaged area. Discuss this with your adjuster. The Texas Department of Insurance provides resources to understand your rights.
Choosing a Contractor for Insurance Work
Your insurance company might recommend contractors. You are not required to use them. You have the right to choose your own. Select a licensed, insured, and local contractor. Check their references. Ask if they have experience with insurance claims. A good contractor will meet with the adjuster on-site. They will help ensure the estimate covers all necessary work. Never sign a contract that assigns your insurance benefits directly to the contractor without understanding it fully. Pay your deductible directly to the contractor. It's illegal for a contractor to waive your deductible; that's insurance fraud.
Preventive Maintenance: Save Money with Regular Care
Regular maintenance prevents major repairs. A small investment of time saves thousands of dollars. Here is your seasonal maintenance checklist.
Spring and Fall Roof Checkups
Inspect your roof twice a year. Spring checks for winter damage. Fall prepares for winter storms. From the ground, use binoculars. Look for missing, cracked, or curling shingles. Check your gutters and downspouts. Clean them of leaves and debris. Ensure they are securely attached. Water should flow freely away from your house. Trim tree branches hanging over your roof. Falling branches cause damage. Moss and algae growth can degrade shingles. Use a zinc or copper strip at the ridge to prevent growth. Never pressure wash your roof; it strips off the protective granules.
Siding Maintenance for Longevity
Wash your siding annually with a garden hose and mild soap. This removes dirt and mildew. For vinyl, check that panels are not too tight. They need room to expand and contract with temperature changes. Ensure weep holes at the bottom of the siding are not blocked. These allow moisture to escape. For wood or fiber cement, inspect the paint or stain. Touch up any chips or cracks immediately. This prevents water from getting into the material. Check caulking around windows, doors, and corners. Re-caulk if it's cracked or missing. Use a high-quality exterior paintable caulk.
Attic and Ventilation: The Hidden System
Your attic health directly affects your roof. Check it seasonally. Ensure insulation does not block soffit vents. These are the vents under your eaves. They let cool air in. Your ridge vent or roof vents let hot air out. This flow prevents ice dams and prolongs shingle life. Look for signs of animals or pests. They can damage wiring and insulation. Check for proper insulation levels. The U.S. Department of Energy recommends specific R-values for our climate zone. A well-ventilated, insulated attic saves on energy bills and protects your roof.
Frequently Asked Questions from Real Homeowners
These are the most common questions I get from customers. I answer them here with the detail they deserve.
1. Can I repair my roof myself, or should I hire a professional?
Small repairs like replacing a few shingles are possible for a handy homeowner. You need proper safety equipment and basic skills. However, most roof repairs involve underlying issues you can't see. A professional has the experience to diagnose the full problem. They also carry liability insurance if something goes wrong. For any repair involving structure, flashing, or a large area, hire a licensed contractor. The risk of a fall or a botched repair is too high.
2. How long should a roof repair last?
A properly executed repair should last as long as the surrounding materials. If you repair a 10-year-old roof with matching shingles, expect it to last the remaining life of the roof. The key is compatibility and proper installation. A patch on an old, failing roof is a temporary fix. It might last a few years until the rest of the roof fails. Discuss the long-term outlook with your contractor. Sometimes a full replacement is a better financial decision than repeated repairs.
3. Will a roof repair affect my home's resale value?
A well-documented, professional repair should not negatively affect value. In fact, it shows the home has been maintained. Be transparent with potential buyers. Provide them with the repair invoice and any warranty information. A leaking, damaged roof will certainly reduce your home's value and make it harder to sell. A repaired roof in good condition is a selling point, not a drawback.
4. What is the biggest mistake homeowners make with siding repair?
The biggest mistake is ignoring the cause of the damage. If siding is damaged by water from a leaking gutter, fixing just the siding is pointless. The gutter will continue to dump water and ruin the new siding. Always find and fix the source of the problem first. Another mistake is using the wrong fasteners or not leaving expansion gaps. This can cause buckling or failure down the road.
5. How do I find a trustworthy roofing contractor?
Ask for recommendations from friends and neighbors. Check online reviews on Google and the Better Business Bureau. Verify the contractor's license with the Texas Department of Licensing and Regulation (TDLR). Ask for proof of insurance, both liability and workers' compensation. Get a detailed, written estimate. Avoid contractors who demand full payment upfront or only accept cash. A reputable contractor will have a physical business address and a professional website.
6. Is it worth getting impact-resistant shingles in Texas?
Absolutely. Hail is common in our region. Impact-resistant shingles (Class 3 or 4) are designed to withstand hail strikes. They cost about 15-25% more than standard shingles. However, they often qualify for a significant discount on your homeowner's insurance premium. Over time, the insurance savings can pay for the upgrade. They also provide peace of mind during storm season. Manufacturers like CertainTeed and GAF have excellent impact-resistant lines.
7. Can I paint my repaired siding to make it match better?
Yes, painting can help blend a repair. This is common with fiber cement and wood siding. For vinyl, painting is trickier. Not all paints adhere well to vinyl, and dark colors can cause the panels to warp from heat absorption. If you paint, use 100% acrylic exterior paint specifically formulated for your siding material. Prime any bare material first. For the best match, consider painting the entire wall or elevation, not just the patch. This creates a uniform appearance.
Conclusion: Protecting Your Biggest Investment
Your home's roof and siding are its first line of defense. Timely repairs protect everything inside. Ignoring small problems leads to expensive, major damage. Use this guide to make informed decisions. Start with a thorough inspection. Document any damage carefully. Get multiple estimates from qualified contractors. Understand your insurance coverage. Invest in quality materials and proper installation. Commit to simple seasonal maintenance. This proactive approach saves money and stress in the long run. Your home is likely your largest investment. Protecting it is a wise and necessary responsibility. If you have specific questions about your roof or siding, consult a local professional. They can provide advice tailored to your home's unique situation. Thank you for taking the time to learn about proper roof and siding repair. Stay safe and protect your home.