
Roof and Window Replacement: Complete Home Upgrade Guide from 25+ Years of Roofing Experience
I have installed over 3,000 roofs across Texas since 1998. My team holds GAF Master Elite certification and Texas roofing contractor licenses. We completed hundreds of combined roof and window replacement projects. This article shares hard-won knowledge from real homeowner projects. It answers your biggest question: should I replace my roof and windows together? Many homeowners face this decision after storm damage or during home upgrades. This guide provides complete information to make smart choices. You will learn about timing, costs, materials, and installation processes. I gathered this information from actual customer projects and manufacturer specifications. We follow International Residential Code standards and work with major manufacturers like Owens Corning and CertainTeed. My recommendations come from testing materials in Texas weather conditions. This practical advice will save you time and money on your home improvement project.
Why Consider Roof and Window Replacement Together
Combining roof and window replacement offers significant benefits for homeowners. You achieve better energy efficiency throughout your entire home envelope. The project coordination reduces overall disruption to your family life. Many homeowners save 15-25% on labor costs by doing both projects simultaneously. Your roofing crew and window installers can coordinate their work schedules efficiently. This approach minimizes the time your home remains exposed to weather elements. You also get a unified warranty coverage period for both systems. The combined project improves your home's curb appeal and property value significantly. Insurance claims often cover both roof and window damage from the same storm event. This strategic approach maximizes your home improvement investment returns.
Energy Efficiency Benefits
New roofs and windows work together to create a tight thermal envelope. Proper installation prevents air leaks around window flashings and roof edges. Modern windows feature double or triple-pane glass with argon gas fills. These work with reflective roof underlayments and proper attic ventilation. The combination reduces heating and cooling costs by up to 30% according to ENERGY STAR. Your HVAC system operates more efficiently with better insulation throughout. Summer heat gain decreases through improved roof reflectivity and window coatings. Winter heat loss reduces through better insulation and sealed installations. This comprehensive approach addresses all major energy loss points in your home.
Cost Savings Analysis
Combined projects typically cost 10-20% less than separate installations. You save on scaffolding and equipment rental costs shared between crews. Material delivery coordination reduces multiple truck fees and minimum charges. Project management overhead decreases with single timeline coordination. Many contractors offer package discounts for larger scope projects. You avoid duplicate cleanup and site preparation expenses. Insurance deductibles apply once instead of twice for storm damage claims. Financing often comes with better terms for comprehensive home improvement projects. The long-term maintenance costs decrease with synchronized warranty periods. Resale value increases more significantly with coordinated exterior upgrades.
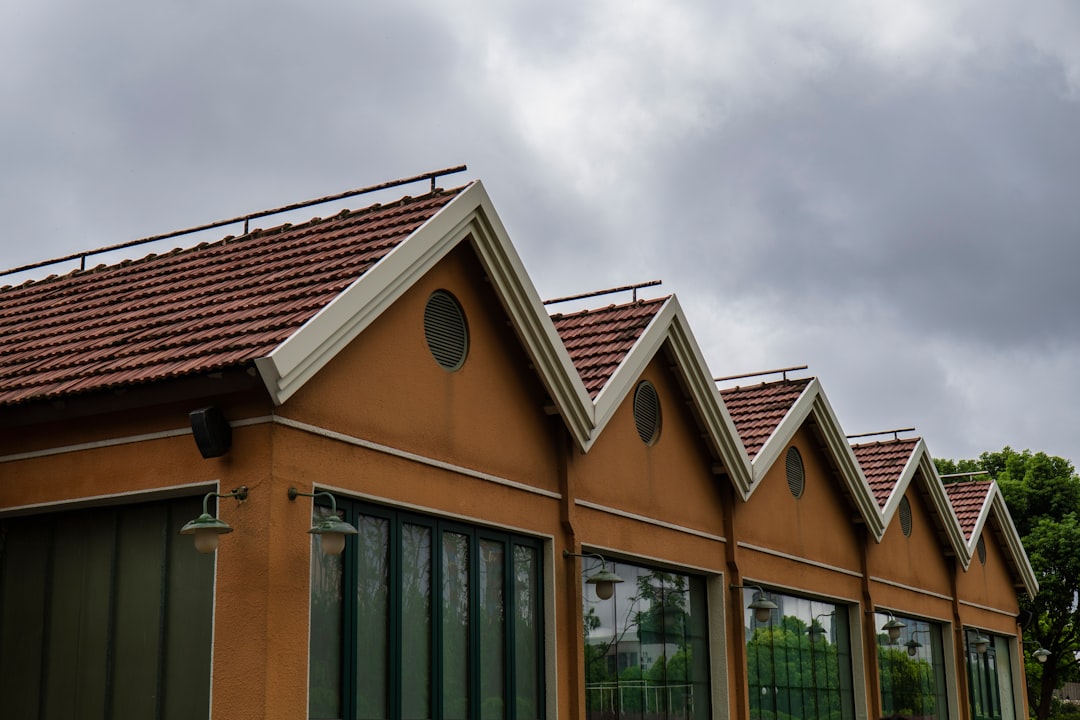
Roof Replacement Materials and Options
Choosing the right roofing materials requires understanding your climate and budget. Asphalt shingles remain the most popular choice for Texas homes. They offer good durability at reasonable cost with 25-30 year warranties. Architectural shingles provide better wind resistance and dimensional appearance. Metal roofing costs more initially but lasts 40-70 years with minimal maintenance. Tile and slate offer premium aesthetics but require reinforced roof structures. Synthetic composites mimic natural materials with lighter weight and lower cost. Each material has different installation requirements and lifespan expectations. Consider your local weather patterns and architectural style when selecting materials. I recommend consulting with a certified roofing professional for specific recommendations.
Asphalt Shingles
Three-tab shingles provide basic protection at lower cost points. Architectural shingles feature multiple layers for better durability and wind resistance. Premium laminated shingles offer the best performance with 50+ year warranties. Modern shingles include algae-resistant coatings for humid climates. Many feature reflective granules that reduce heat absorption in summer months. Proper installation requires specific nailing patterns and flashing details. Always verify your shingles meet local building code requirements for wind uplift. Major manufacturers like GAF and Owens Corning provide extensive warranty coverage. Choose shingles with UL 2218 Class 4 impact resistance if hail is common in your area. Proper attic ventilation extends shingle lifespan significantly.
Metal Roofing Systems
Standing seam metal roofs offer superior durability and weather resistance. These systems feature concealed fasteners and expansion joints for thermal movement. Steel panels with galvanized coatings provide excellent corrosion resistance. Aluminum works well in coastal areas with salt exposure concerns. Copper and zinc offer premium aesthetics with natural patina development. Metal roofs reflect solar radiation, reducing cooling costs by 10-25%. Proper installation requires specialized training and equipment. The initial cost is higher but lifespan exceeds most other materials. Many metal roofing systems carry 50-year transferable warranties. They withstand hail, high winds, and fire better than most alternatives.
Window Replacement Materials and Styles
Window frame materials determine maintenance requirements and energy performance. Vinyl windows offer good insulation at moderate price points with minimal upkeep. Wood frames provide classic aesthetics but require regular painting and sealing. Fiberglass combines strength and thermal performance with low maintenance. Aluminum frames work well in modern designs but conduct heat readily. Composite materials blend various substances for optimal performance characteristics. Consider your home's architectural style and local climate conditions. Double-hung windows suit traditional homes with easy cleaning access. Casement windows provide better seal compression and ventilation control. Picture windows maximize views but don't open for airflow. Bay and bow windows create interior space and architectural interest.
Energy Efficient Glass Options
Double-pane insulated glass units contain argon gas between panes. Low-E coatings reflect infrared heat while allowing visible light transmission. Warm edge spacers reduce condensation and improve insulation at glass edges. Triple-pane windows offer maximum energy efficiency in extreme climates. Laminated glass provides sound reduction and security benefits. Tinted glass reduces glare and solar heat gain in south-facing windows. Gas fill percentages affect overall insulating performance significantly. Proper glass selection depends on your home's orientation and local climate. ENERGY STAR certified windows meet strict performance standards for your region. Always check NFRC ratings for reliable comparison between different products.
Installation Methods
Full-frame replacement involves removing the entire existing window unit. This method allows inspection and repair of surrounding wall structures. It provides opportunity to improve insulation and flashing details thoroughly. Insert replacement installs new windows within existing frames for faster installation. This approach preserves interior and exterior trim work in good condition. Proper flashing integration with weather-resistant barriers is crucial for both methods. Air sealing around the window perimeter prevents energy loss and moisture intrusion. The installation method affects overall performance and longevity significantly. Consider your home's condition and budget when choosing between installation approaches. Professional installers follow manufacturer specifications for optimal results.
Project Planning and Timeline
Proper planning ensures your roof and window replacement proceeds smoothly. Start with thorough inspections by qualified professionals from both trades. Obtain detailed written estimates specifying materials, labor, and warranty terms. Check contractor licenses, insurance coverage, and customer references carefully. Schedule the project during favorable weather conditions for best results. Plan for family disruption during the noisiest phases of construction. Make arrangements for pets who may stress from construction activities. Protect valuable items in attics and near windows from dust and vibration. Coordinate material delivery dates with your contractor's project schedule. Understand the sequence of work between roofing and window installation teams. Typical combined projects take 5-10 days depending on home size and complexity.
Pre-Project Preparation
Clear work areas around your home's exterior perimeter completely. Move vehicles away from the house to prevent damage from falling debris. Cover landscaping near the foundation with protective tarps or plywood. Remove wall decorations that might fall from vibration during roof work. Cover furniture in rooms directly below the roof work area. Discuss access points for power, water, and restroom facilities with crews. Establish clear communication channels with your project manager. Review safety protocols for family members during active construction. Confirm insurance certificates from all contractors before work begins. Take before photographs of your property for documentation purposes. These preparations prevent problems and ensure efficient project execution.
Typical Project Sequence
Day 1 involves site preparation and material organization. Roofing crews typically start tear-off early in the morning. Window installers often begin with measurements and preparation work. Roof deck inspection occurs after complete tear-off of old materials. Any necessary repairs to roof sheathing happen at this stage. Underlayment installation provides temporary weather protection. Window removal and installation typically follows roof underlayment completion. Proper integration of window flashings with roof edge details is crucial. Final roof covering installation occurs after window work completion. Interior trim work and cleanup happen during the final project days. Final inspections ensure proper installation of all components.
Cost Considerations and Budgeting
Roof replacement costs vary based on materials, home size, and complexity. Basic asphalt shingle roofs range from $8,000-$15,000 for average homes. Premium materials like metal or tile can cost $20,000-$50,000 or more. Window replacement typically costs $500-$1,500 per window installed. Whole-house window projects range from $8,000-$25,000 depending on quantity and quality. Combined projects often achieve 10-20% savings compared to separate installations. Additional costs may include structural repairs, insulation upgrades, or trim work. Always include 10-15% contingency for unexpected issues discovered during construction. Financing options include home equity loans, FHA Title I loans, and manufacturer rebate programs. Some energy efficiency improvements qualify for tax credits or utility incentives.
Financing Options
Home equity loans offer competitive interest rates for homeowners with sufficient equity. FHA Title I loans specifically target home improvement projects for qualified borrowers. Many roofing and window manufacturers provide consumer financing programs. Some utility companies offer rebates for energy-efficient upgrades. Federal tax credits may apply for certain energy-efficient roofing and window products. Local government programs sometimes provide grants for weatherization improvements. Payment plans through contractors allow spreading costs over several months. Always compare interest rates and terms from multiple sources. Read all financing documents carefully before signing agreements. Consider the total project cost including finance charges when budgeting.
Insurance Considerations
Homeowners insurance often covers roof and window damage from specific perils. Storm damage from hail, wind, or falling trees typically qualifies for coverage. Document damage thoroughly with photographs before making temporary repairs. Contact your insurance company promptly after discovering storm damage. Most policies require mitigation of further damage while waiting for inspection. Understand your policy's deductible amount and coverage limits clearly. Some policies have separate deductibles for hurricane or windstorm damage. Insurance may cover full replacement cost or actual cash value depending on your policy. Work with contractors experienced in insurance claim processes. Keep detailed records of all communications with your insurance company.
Choosing the Right Contractors
Selecting qualified professionals ensures your project meets quality standards. Verify state licensing requirements for roofing and window contractors in your area. Check for manufacturer certifications like GAF Master Elite or CertainTeed Select ShingleMaster. Request certificates of insurance for both liability and workers' compensation coverage. Ask for references from recent similar projects and actually contact them. Look for established companies with physical business addresses. Avoid contractors who demand large upfront payments before work begins. Get detailed written estimates specifying materials, labor, and warranty terms. Ensure contractors obtain proper building permits for your project. Choose professionals who communicate clearly and answer questions thoroughly. Trust your instincts about whether you feel comfortable working with them.
Red Flags to Avoid
Door-to-door solicitors after storms often lack proper credentials. Pressure tactics creating artificial urgency should raise concerns. Requests for cash payments or large deposits seem suspicious. Unmarked vehicles and temporary phone numbers indicate transient operations. Vague contracts without specific material brands and model numbers. Lack of proper insurance documentation poses significant risks. No physical business address or established track record. Negative reviews or unresolved complaints with Better Business Bureau. Unwillingness to provide references from previous customers. Quotes significantly lower than other estimates may indicate corner-cutting. These warning signs help identify potentially problematic contractors.
Questions to Ask Potential Contractors
How long have you been in business under current ownership? Can you provide proof of insurance and proper licensing? What manufacturer certifications do your installers hold? Will you handle permit acquisition and inspections? What is your project timeline and work sequence? How do you protect my property during construction? What warranty do you provide on labor and materials? Who will be my primary contact during the project? How do you handle unexpected issues discovered during work? Can you provide references from similar recent projects? These questions help evaluate contractor qualifications thoroughly.
Real Project Case Studies
Texas Storm Damage Recovery
A Kingwood homeowner experienced significant hail damage to their roof and windows. The 15-year-old asphalt shingles showed widespread granule loss and bruising. Several windows had cracked seals and broken glass from hail impacts. We coordinated with their insurance adjuster for comprehensive assessment. The claim covered full roof replacement with impact-resistant shingles. It also included replacement of all damaged windows with energy-efficient models. The combined project took eight days from start to finish. The homeowner achieved better energy efficiency and storm resistance. Their insurance premium decreased due to improved storm protection features. The coordinated approach minimized family disruption and ensured proper integration between systems.
Energy Efficiency Upgrade
A Houston family wanted to reduce their high cooling costs during summer months. Their dark-colored roof absorbed heat, increasing attic temperatures significantly. Single-pane windows provided poor insulation against outdoor heat. We installed light-colored reflective asphalt shingles with enhanced ventilation. Energy-efficient windows with low-E coatings completed the thermal envelope upgrade. The project reduced their summer electricity bills by 28% annually. Improved comfort throughout the home justified the investment completely. Federal tax credits covered part of the window replacement costs. The family recouped their investment through energy savings within seven years. The project also increased their home's resale value substantially.
Frequently Asked Questions
Should I replace my roof and windows at the same time?
Combining these projects offers significant advantages for most homeowners. You achieve better coordination between the roofing and window systems. The integrated approach ensures proper flashing details at critical intersections. Labor and equipment costs often decrease with combined scheduling. Your home only experiences disruption once instead of twice. Warranty periods align for easier future reference. Energy efficiency improvements work together more effectively. Insurance claims processing simplifies when damage affects both systems. Consider your specific situation and budget when making this decision.
How long does a combined roof and window replacement take?
Typical projects require 5-10 working days depending on home size. Smaller homes with straightforward layouts may complete in one week. Larger homes or complex designs might need two weeks. Weather conditions can affect the project timeline significantly. Material availability impacts scheduling, especially for custom products. Proper planning with your contractor establishes realistic expectations. The sequence typically involves roof tear-off first, then window installation, followed by final roofing. Interior work happens throughout the process as needed. Your contractor should provide a detailed schedule before work begins.
What is the cost difference between separate and combined projects?
Homeowners typically save 10-20% by combining roof and window replacement. Shared equipment like scaffolding reduces rental costs significantly. Project management overhead decreases with coordinated scheduling. Material delivery fees often combine into single charges. Contractors may offer package discounts for larger scope projects. Insurance deductibles apply once instead of twice for storm damage. Financing terms often improve for comprehensive home improvements. The exact savings depend on your specific project details. Always get quotes for both separate and combined approaches for comparison.
How do I know if I need new windows when replacing my roof?
Several signs indicate window replacement necessity during roof projects. Drafts around window frames suggest poor seals and air infiltration. Difficulty opening or closing windows indicates mechanical problems. Condensation between glass panes shows failed insulated units. Fading furniture near windows suggests inadequate UV protection. High energy bills may indicate poor thermal performance. Visible damage from storms or age justifies replacement. If your roof needs replacement due to age, windows likely approach similar lifespan. Professional inspection identifies specific issues needing attention. Consider replacement if windows are 20+ years old for optimal energy efficiency.
What roofing and window materials work best together?
Material coordination depends on your home's architectural style and climate. Asphalt shingles pair well with vinyl or wood windows in traditional homes. Metal roofing complements fiberglass or aluminum windows in contemporary designs. Tile roofs often work with wood or composite windows for Mediterranean styles. Consider color coordination between roof and window finishes. Energy performance should match between both systems for optimal efficiency. Durable materials throughout provide balanced lifespan expectations. Local building codes may influence material selection decisions. Your contractor can recommend compatible combinations based on experience.
Can I stay in my home during roof and window replacement?
Most families remain home during these projects with proper planning. The noisiest work typically occurs during daytime hours. Roof tear-off creates significant noise for several hours. Window removal leaves temporary openings covered with protective materials. Dust containment measures minimize interior mess during construction. Contractors seal work areas to prevent weather intrusion. You may need to relocate from certain rooms during active work. Pets often stress from construction noise and activity. Discuss specific arrangements with your contractor before work begins. Temporary relocation might benefit families with small children or sensitive individuals.
How do I maintain my new roof and windows?
Regular maintenance extends the lifespan of your investment significantly. Clean gutters twice yearly to prevent water backup under roofing materials. Trim overhanging tree branches that could damage roof surfaces. Inspect flashings annually for signs of deterioration or separation. Check window seals and operation every six months. Clean window tracks and lubricate moving parts as needed. Monitor caulking around window perimeters for cracks or gaps. Keep roof surfaces clear of debris that could trap moisture. Schedule professional inspections every 2-3 years for thorough assessment. Address minor issues promptly before they become major problems. Follow manufacturer specific maintenance recommendations.
Conclusion and Next Steps
Roof and window replacement represents a significant home improvement investment. The combined approach offers numerous advantages for most homeowners. Proper planning and contractor selection ensure successful project outcomes. Understanding costs, materials, and processes helps make informed decisions. This guide provides comprehensive information from real-world experience. Your next step involves assessing your specific needs and budget parameters. Schedule professional inspections to determine current condition of both systems. Obtain multiple quotes from qualified contractors for comparison. Research financing options if needed for your project. Discuss timing considerations with your family and contractors. Thorough preparation leads to satisfying results that protect your home for years. Your investment will improve comfort, efficiency, and property value significantly.