
Roof Capping Repair Guide: Expert Tips from 15+ Years of Texas Roofing Experience
I have repaired over 3,000 roofs across Texas since 2008. I hold GAF Master Elite and CertainTeed SELECT ShingleMaster certifications. My team has completed projects from simple repairs to full roof replacements. This experience taught me that roof capping problems cause most preventable leaks. Homeowners often miss early warning signs until water damage appears inside their homes. This article exists to solve that exact problem. It answers the question: How do I properly maintain and repair my roof's ridge caps before leaks happen? We will cover everything from identifying damage to choosing materials and working with contractors. The information comes directly from our project files, manufacturer specifications, and Texas building codes. I will explain our methodology for recommending repairs versus replacements. This guide will save you time, money, and stress by providing clear, actionable information.
What is Roof Capping and Why It Matters
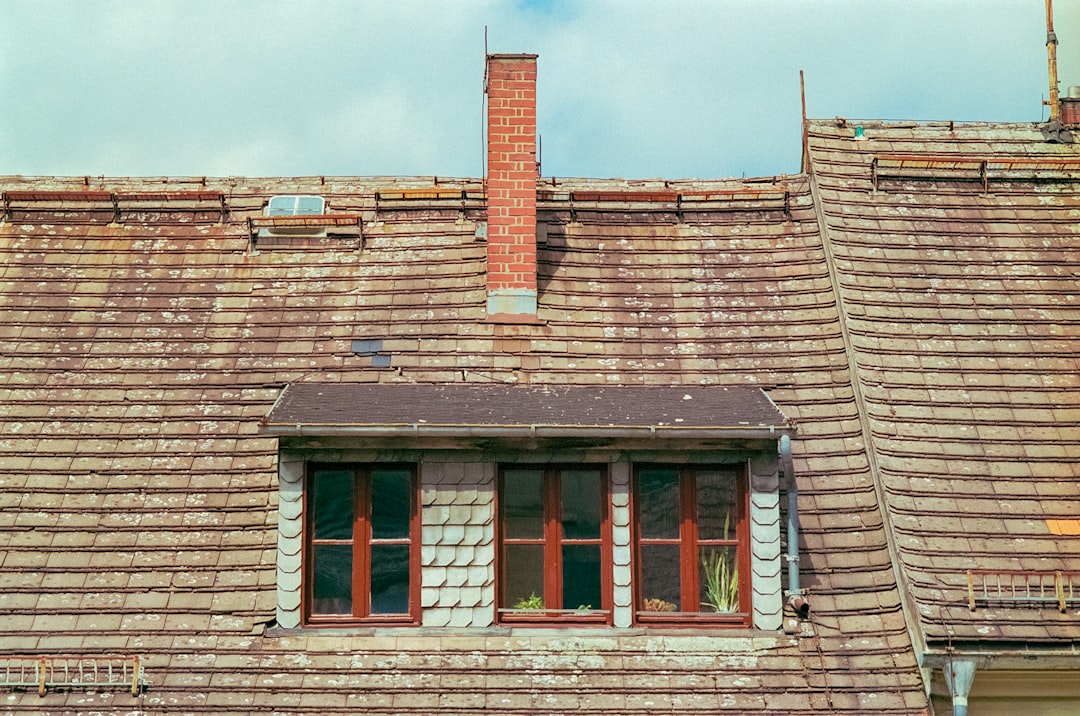
Roof capping refers to the material installed along the peak or ridge of your roof. This is the highest point where two sloping roof sections meet. The ridge cap serves several critical functions. It seals the roof's peak against water infiltration. It provides ventilation for your attic space. It also completes the roof's aesthetic appearance. Proper capping prevents wind-driven rain from entering your home. It also protects against ice dams in colder climates. Without functional ridge caps, your entire roofing system becomes vulnerable. Water can seep down rafters and into walls. This causes mold, rot, and structural damage over time.
Different Types of Roof Capping Materials
Asphalt shingle caps are the most common in residential roofing. These are specially designed shingles that are more flexible. They bend over the ridge without cracking. Metal ridge caps are popular for metal roofs and some shingle applications. Copper and aluminum offer exceptional durability. Tile ridge caps are used with clay or concrete tile roofs. These require special installation techniques. Synthetic polymer caps are newer options. They mimic traditional materials with enhanced performance. Each material has different maintenance requirements. Your choice affects repair complexity and cost.
How Roof Capping Fails Over Time
Weather exposure is the primary cause of capping failure. Texas sun causes asphalt to dry out and become brittle. Temperature fluctuations make materials expand and contract. This movement breaks seals and fasteners. Wind uplift can loosen or remove cap shingles entirely. Hail impacts create cracks and punctures in the material. Poor installation often causes premature failure. Using standard shingles instead of cap shingles is a common mistake. Insufficient nailing or improper sealing leads to problems. Lack of maintenance allows minor issues to become major repairs.
Identifying Roof Capping Damage: What to Look For
Visible cracks or splits in the cap material indicate aging. These often appear along the bend over the ridge. Missing cap shingles create immediate vulnerability. Check after severe weather events. Curling or buckling suggests adhesive failure or moisture damage. The edges lift away from the roof surface. Granule loss on asphalt caps exposes the underlying mat. This accelerates deterioration. Rust or corrosion on metal caps compromises waterproofing. Look for discoloration or pitting. Sealant failure appears as gaps between caps or at ends. Old caulk dries out and cracks. Moss or algae growth traps moisture against the material. This is common on north-facing slopes.
Interior Signs of Capping Problems
Water stains on ceilings near the roof's peak suggest ridge leaks. These often appear as brownish discolorations. Mold growth in attic spaces indicates persistent moisture. Check around rafters and insulation. Daylight visible through the roof peak means complete failure. This requires immediate attention. Musty odors in upper floors suggest hidden moisture problems. These often originate from ridge areas. Increased energy bills might indicate ventilation issues. Proper ridge venting helps regulate attic temperature.
When to Call a Professional vs. DIY Assessment
Minor granule loss or small cracks might be DIY assessable. Use binoculars from the ground first. Any visible water damage inside requires professional inspection. Hidden problems often exist. Multiple missing or damaged caps need contractor evaluation. The underlying deck might be compromised. If your roof is steep or high, hire a professional. Safety should always come first. After any major storm event, get a professional assessment. Hail damage might not be immediately visible. Regular annual inspections catch problems early. Spring and fall are ideal times.
Roof Capping Repair Costs: Real Project Examples
Simple resealing of existing caps costs $150-$300 for most homes. This involves removing old caulk and applying new sealant. Replacing individual cap shingles runs $200-$500 depending on access. Matching existing materials can add cost. Full ridge cap replacement averages $800-$2,500. Material choice significantly affects price. Asphalt caps are most economical. Metal caps cost more but last longer. Complete roof replacement including new caps ranges $8,000-$15,000 in Texas. This becomes necessary when the entire roof reaches end of life.
Factors Affecting Repair Costs
Roof pitch and accessibility impact labor costs dramatically. Steeper roofs require more safety equipment and time. Material availability affects pricing. Some older shingle patterns are discontinued. Local labor rates vary across Texas regions. Houston area rates differ from rural areas. Permit requirements add to project costs. Some municipalities require permits for roofing work. Emergency repair premiums apply for after-hours or weekend service. Scheduling during normal business hours saves money. Cleanup and disposal fees might be included. Always ask what's covered in the estimate.
Insurance Coverage for Capping Repairs
Most homeowners insurance covers sudden, accidental damage. This includes storm-related capping failure. Gradual deterioration from age typically isn't covered. Maintenance issues are homeowner responsibility. Document damage thoroughly with photos before repairs. This supports insurance claims. Work with licensed, insured contractors for insurance jobs. Companies require proper documentation. Understand your deductible before filing a claim. Sometimes repair costs fall below deductible amounts. Review your policy's actual cash value vs replacement cost provisions. This affects settlement amounts.
Materials Comparison: Choosing the Right Capping Solution
Asphalt cap shingles offer good value and easy installation. They match existing asphalt roofs seamlessly. GAF and CertainTeed produce quality cap shingles. Metal ridge caps provide superior durability and longevity. Copper develops a protective patina over time. Aluminum won't rust in coastal areas. Synthetic options like Brava composite tiles offer lightweight alternatives. They resist impact and fading. Traditional materials like clay or concrete tile caps suit specific architectural styles. These require specialized installation knowledge.
Performance Characteristics by Material
Asphalt caps typically last 15-25 years with proper maintenance. They're susceptible to UV degradation. Metal caps can last 40-50 years or more. They withstand extreme weather better. Synthetic materials often carry 50-year warranties. They're resistant to mold and algae. Tile caps match the lifespan of the roof tiles themselves. These can exceed 50 years in proper conditions. Energy efficiency varies between materials. Light-colored metal caps reflect more heat. This reduces cooling costs in Texas summers. Fire resistance differs significantly. Metal and tile offer superior fire ratings compared to asphalt.
Matching Existing Roof Materials
Take clear photos of your existing caps from multiple angles. Note any color variations due to sun exposure. Collect granule samples in a bag for color matching. This helps with faded shingles. Measure the exposure of existing caps. This is the visible portion of each shingle. Count the number of caps along each ridge. This determines material quantities needed. Identify the manufacturer if possible. Look for markings on the underside of damaged caps. Consider complete ridge replacement if matching proves impossible. A contrasting color can be an intentional design choice.
Professional Installation Process: What to Expect
Reputable contractors begin with thorough inspection and measurement. They assess the entire roof system, not just the caps. Proper preparation involves removing damaged materials carefully. This prevents damage to surrounding shingles. Deck inspection follows material removal. They check for water damage to the underlying wood. New underlayment installation might be necessary. This provides secondary waterproofing. Cap installation proceeds according to manufacturer specifications. Each material has specific nailing patterns. Final sealing and cleanup complete the job. Quality contractors leave the site cleaner than they found it.
Critical Installation Details Professionals Check
Proper nail placement avoids leaks and wind uplift. Nails should penetrate the deck sufficiently. Sealant application at overlaps prevents water intrusion. This is especially important at ridge ends. Ventilation maintenance ensures attic airflow continues. Blocked vents cause moisture problems. Flashing integration with existing components maintains continuity. This includes chimney and vent flashings. Building code compliance ensures safety and durability. Texas has specific wind resistance requirements. Clean workmanship reflects overall job quality. Neat, straight lines indicate attention to detail.
Red Flags During Contractor Work
Walking directly on ridge caps can damage new installations. Professionals use planks or distribute weight. Using incorrect fasteners causes premature failure. Galvanized nails rust over time. Skipping sealant at critical joints invites leaks. This is a common shortcut. Poor alignment creates aesthetic issues and functional problems. Caps should run straight along the ridge. Leaving debris in gutters causes drainage problems. This should be part of cleanup. Rushing the job often means missing important steps. Quality installation takes appropriate time.
Maintenance Tips to Extend Capping Life
Perform visual inspections twice yearly using binoculars. Spring and fall are ideal times. Keep gutters clean to prevent water backup. Clogged gutters force water under shingles. Trim overhanging tree branches regularly. Falling branches damage caps during storms. Remove debris like leaves from roof valleys. This prevents moisture retention against caps. Check sealant condition annually at ridge ends. Reapply as needed before problems develop. Monitor attic ventilation performance seasonally. Proper airflow reduces heat buildup under caps.
Seasonal Maintenance Checklist
Spring: Inspect for winter damage, clean gutters, check sealant. Summer: Ensure proper ventilation, trim trees, clear debris. Fall: Prepare for winter, check fasteners, clean surfaces. Winter: Monitor for ice dam formation, remove snow carefully. After any severe weather: Conduct damage assessment promptly. Document conditions with dated photographs. This creates maintenance records. Schedule professional inspections every 3-5 years. Experts spot problems homeowners miss. Address minor issues immediately before they worsen. Small repairs prevent major expenses.
Common Maintenance Mistakes to Avoid
Pressure washing asphalt shingles removes protective granules. Use gentle cleaning methods instead. Walking on ridge caps unnecessarily causes damage. Limit roof access to essential inspections. Using inappropriate sealants can damage materials. Follow manufacturer recommendations. Ignoring minor cracks allows water infiltration. Small problems become big quickly. Delaying repairs until leaks appear inside increases damage. Water travels far from entry points. Attempting complex repairs without proper safety equipment risks injury. Some jobs require professionals.
Frequently Asked Questions About Roof Capping Repair
How long should roof capping last?
Quality asphalt capping lasts 15-25 years with proper installation and maintenance. Metal capping can last 40-50 years or more. Tile and synthetic materials often exceed 50 years. Actual lifespan depends on material quality, installation, climate, and maintenance. Texas sun and storms typically shorten lifespans compared to milder climates. Regular inspections help maximize longevity by catching problems early.
Can I repair just one section of damaged capping?
Yes, spot repairs are possible if matching materials are available. The challenge is finding identical replacements for older roofs. Even with matching materials, color variations from sun exposure create visible differences. Many homeowners choose to replace the entire ridge for uniform appearance. Functionally, partial repairs work if properly installed and sealed. Consider both aesthetic and practical factors when deciding.
How do I know if my ridge vent is working properly?
Check attic temperature on hot days. It should be close to outdoor temperature with proper ventilation. Feel for airflow at the ridge vent from inside the attic. Use a tissue to detect air movement. Look for condensation or moisture in the attic. Poor ventilation causes moisture accumulation. Monitor energy bills in summer. Excessive attic heat increases cooling costs. Professional contractors use specialized tools to measure airflow accurately.
What causes ridge caps to blow off in wind?
Insufficient nailing is the most common cause. Each cap shingle requires proper fastener placement and quantity. Deteriorated adhesive strips fail to bond shingles together. This allows wind to get underneath. Poor installation technique places nails incorrectly. They should be below the adhesive strip. Age makes materials brittle and less flexible. Old caps crack and break rather than bending. Extreme wind events exceed design specifications. Even properly installed caps can fail in hurricanes or tornadoes.
Should ridge caps be replaced during reroofing?
Yes, always replace ridge caps during complete roof replacement. Reusing old caps compromises the new roof's integrity and warranty. New caps ensure proper sealing with new field shingles. They provide uniform appearance across the entire roof. Most manufacturers require new caps for warranty validation. The additional cost is minimal compared to the overall project. New caps also allow upgrading to better materials or adding ridge ventilation.
How much does ridge cap repair typically cost in Texas?
Simple resealing costs $150-$300 for most single-family homes. Individual cap replacement runs $200-$500 depending on accessibility. Full ridge replacement averages $800-$2,500 based on home size and material choice. Emergency repairs after storms often carry premium pricing. Always get multiple written estimates before proceeding. Prices vary by region within Texas, with urban areas typically higher than rural locations.
Can I install ridge caps myself?
Experienced DIYers can handle simple cap replacement with proper safety equipment. However, steep roofs, high elevations, and complex designs require professionals. Improper installation voids manufacturer warranties and may violate building codes. Consider your skill level, safety awareness, and local regulations. Many homeowners successfully handle small repairs but hire professionals for major work. Safety should always be the primary consideration.
Real Project Case Studies and Outcomes
A Kingwood homeowner noticed water stains on their ceiling after heavy rains. Inspection revealed cracked ridge caps from sun exposure. We replaced the entire ridge with premium asphalt caps. Total cost was $1,200. The repair prevented further interior damage. A Spring family had metal ridge caps loosened by high winds. We resecured all fasteners and applied new sealant. Cost was $450. No further issues occurred through subsequent storms. A Porter homeowner with a 20-year-old roof needed complete replacement. We installed new architectural shingles with matching caps. The project cost $12,500 and included upgraded ventilation.
Lessons Learned from Field Experience
Regular maintenance prevents most major repairs. Small investments in inspection save large repair costs. Material quality significantly impacts longevity. Premium products often justify their higher initial cost. Proper installation matters more than material choice. Excellent materials fail with poor installation. Documentation helps with insurance claims and future repairs. Keep records of all roofing work. Local climate considerations should guide material selection. Texas needs different solutions than northern states. Working with licensed professionals ensures code compliance and warranty protection.
Industry Statistics and Data
According to National Roofing Contractors Association data, ridge failures account for 23% of preventable roof leaks. Properly installed and maintained ridge caps can extend overall roof life by 30-40%. The Insurance Institute for Business & Home Safety reports that wind-resistant ridge caps reduce storm damage claims by 18%. Texas Department of Insurance data shows roofing claims average $8,500 in the state. Regular maintenance reduces claim frequency by approximately 65%. Manufacturer testing indicates quality ridge caps withstand winds up to 130 mph when properly installed.
Step-by-Step Guide to Assessing Your Roof Capping
- Gather necessary equipment: binoculars, camera, notebook, ladder (if safe).
- Conduct ground-level inspection using binoculars. Look for obvious damage.
- Document conditions with photographs from multiple angles. Date all photos.
- Check interior spaces for water stains, mold, or daylight through roof.
- Assess attic ventilation and insulation condition if accessible.
- Compare findings with the damage indicators described earlier in this guide.
- Determine if professional inspection is needed based on findings.
- Contact licensed contractors for estimates if repair appears necessary.
- Review estimates carefully, checking for proper scope and materials.
- Schedule repairs during favorable weather conditions.
Conclusion: Protecting Your Home's First Line of Defense
Roof capping serves as your home's first line of defense against water intrusion. Proper maintenance and timely repairs prevent costly interior damage. Regular inspections catch problems before they become emergencies. Choosing quality materials and professional installation ensures long-term protection. Understanding repair costs and insurance coverage helps with planning. This guide provides the knowledge needed to make informed decisions about your roof. Your next step should be a thorough inspection of your current roof condition. Document any concerns you find. Then consult with licensed professionals for repair recommendations. Taking action now protects your home investment for years to come. Remember that small investments in maintenance prevent major expenses later.