
Roof Repointing Guide: Fixing Chimney & Tile Roof Leaks - A Contractor's 15-Year Perspective
My name is Mark, and I've been a licensed roofing contractor for over fifteen years. I've completed more than 2,000 roofing projects across Texas. I hold certifications from GAF, CertainTeed, and the NRCA. This article comes from real experience on your neighbors' roofs. I've seen firsthand how small mortar problems become big, expensive leaks. This guide exists to solve a specific, frustrating problem for homeowners. You see water stains on your ceiling near the chimney. You hear dripping during storms. But you don't know where the water is coming from or how to fix it properly. This article answers that exact question. It gives you the knowledge to understand roof repointing. You will learn when it's needed, what it costs, and how to hire the right professional. The information here comes from hundreds of customer projects. It is based on manufacturer specifications from companies like Owens Corning and Boral. It follows the International Residential Code (IRC) for masonry. My recommendations come from a simple methodology: prevent water intrusion at the source. This is a clear, direct guide. It will save you time and money. It will help you protect your biggest investment: your home.
What Is Roof Repointing? The Foundation of Waterproofing
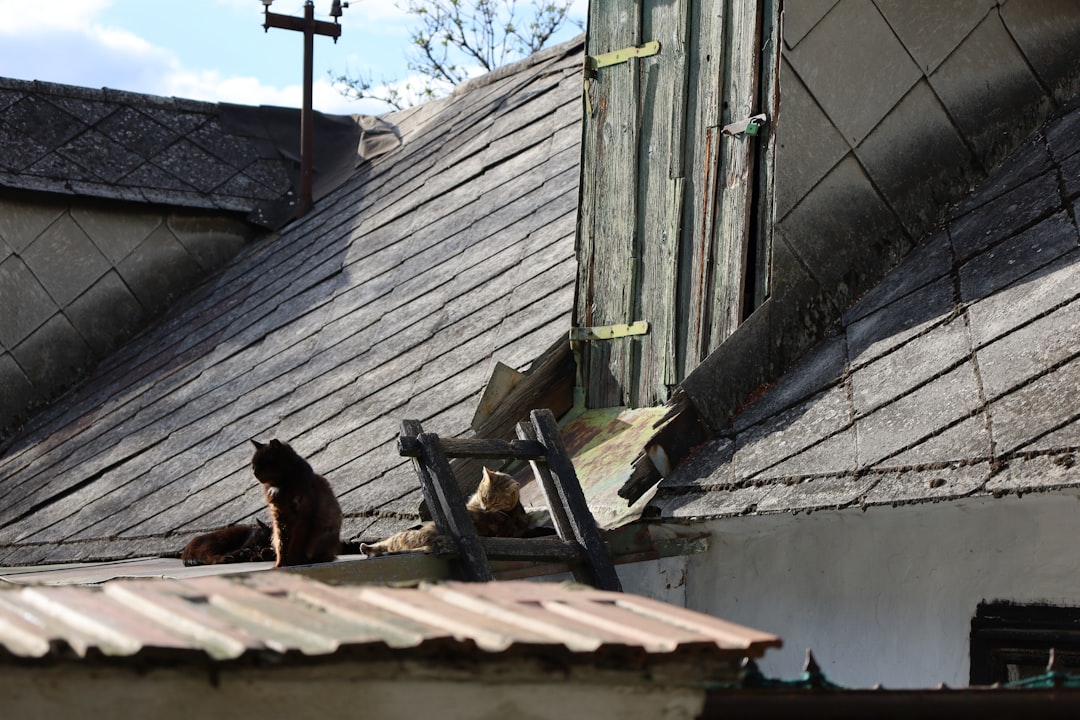
Roof repointing is the process of repairing deteriorated mortar joints. These joints are found in masonry structures on your roof. The most common locations are chimneys, parapet walls, and clay tile roofs. Mortar is the cement-like material between bricks or tiles. Over time, weather destroys this mortar. Sun, rain, wind, and freeze-thaw cycles cause cracks. These cracks let water into your home. Repointing removes the old, bad mortar. It replaces it with new, strong mortar. This seals your roof against water damage. It is a critical maintenance task. Many homeowners ignore it until they see a leak. By then, damage to roof decking and attic insulation has already started. Think of mortar as the caulk for your brickwork. When caulk fails, you recaulk. When mortar fails, you repoint.
Why Mortar Fails: The Science Behind the Cracks
Mortar failure is a natural process. It is not a sign of poor construction. Original mortar is softer than the brick or tile itself. This is by design. It allows for slight movement. Water is the main enemy. Water gets into tiny pores in the mortar. In winter, that water freezes. Ice expands and creates internal pressure. This pressure makes small cracks. The cracks get bigger each season. In Texas, our heat is also a factor. The sun's UV rays bake the mortar. This makes it brittle. Thermal expansion makes bricks and mortar move at different rates. This movement breaks the bond. Salt from the air can also degrade mortar. This is called efflorescence. You see it as a white, powdery stain on the brick. All these forces work together. They slowly break down the mortar's integrity. Once cracks form, they act like tiny gutters. They channel rainwater directly into your home's structure.
Signs You Need Roof Repointing: A Homeowner's Checklist
Do not wait for a major leak. Look for these early warning signs. Catching problems early saves thousands of dollars. First, visually inspect your chimney from the ground. Use binoculars for a closer look. Look for cracks in the mortar joints. The cracks may look like spider webs. They may be wide enough to fit a coin. Look for sections where mortar is missing completely. This is called spalling. Check for that white, powdery residue (efflorescence). It means water is moving through the masonry. Go into your attic on a sunny day. Look for light coming through the chimney area. Where light comes in, water will follow. After a rainstorm, check for dampness on the attic floor near the chimney. Feel the wood around the chimney for soft spots. Inside your home, look for water stains on ceilings or walls. These stains are often brown or yellow. They may appear on the top floor near the fireplace. A musty smell in that room is another clue. If your fireplace smells damp, it could be a repointing issue. Finally, listen during heavy rain. Do you hear dripping in the walls or attic? That sound is a clear call to action.
- Visible mortar cracks or gaps wider than 1/8 inch.
- Missing chunks of mortar between bricks or tiles.
- White, chalky stains on brick surfaces (efflorescence).
- Water stains on interior ceilings or walls near the chimney.
- Dampness or mold in the attic around the masonry.
- Light visible from the attic through chimney joints.
The Roof Repointing Process: Step-by-Step Contractor Method
A proper repointing job follows a precise sequence. First, we set up safety. We use roof brackets, harnesses, and guardrails. Safety is non-negotiable. Next, we prepare the work area. We cover the roof around the chimney with heavy-duty tarps. This protects your shingles from mortar dust and debris. We also cover plants and landscaping below. Then, the real work begins. We use specialized tools. A grinder with a diamond blade removes the old mortar. We grind to a depth of about 3/4 inch. This creates a clean, solid base for the new mortar. It is a dusty job. We use water misters to control the dust. After grinding, we brush out all the loose material. We use a wire brush and a blower. The joint must be perfectly clean. Any dust left behind will weaken the new bond. Now we mix the mortar. We never use pre-mixed tub mortar from a hardware store. That material is wrong for repointing. We use a type N or type S mortar mix. The choice depends on your existing brick hardness. We often add a bonding agent for extra strength. We mix with clean water to a stiff, putty-like consistency.
Tooling and Curing: The Keys to Longevity
The application technique is everything. We pack the mortar into the joints with a pointing trowel. We press it firmly to eliminate air pockets. We fill the joints slightly over-full. Then we use a tool called a jointer. This shapes the mortar to match your home's existing style. Common joint profiles are concave, v-shaped, or weathered. Matching the profile is important for looks and function. After tooling, we let the mortar set up. This takes a few hours. Then we brush the brick faces gently. This removes any mortar smears. The final and most critical step is curing. Mortar needs time to gain strength. We keep it damp for at least three days. We mist it with water several times a day. This slow curing prevents cracks. Rushing this step is the most common contractor mistake. A full cure takes about 28 days to reach maximum strength. However, it will be water-tight within a week if done correctly. We always apply a silane-based water repellent after curing. This clear sealer adds an extra layer of protection. It helps the new mortar last longer.
Material Selection: Choosing the Right Mortar for Your Home
Using the wrong mortar is a disaster. It can cause more damage than the original problem. Mortar is classified by type: M, S, N, O, and K. Each has different proportions of cement, lime, and sand. Type M is very hard. It is for foundations. Type S is strong and good for below-grade work. For most chimney repointing in Texas, we use Type N mortar. It is a good all-purpose mix. It has medium strength and good flexibility. It works well with most common bricks. For very soft, historic brick, we might use a Type O or a lime-rich mix. The goal is for the mortar to be slightly softer than the brick. This way, cracks form in the mortar, not the brick. The sand is also important. We use well-graded, clean masonry sand. Sharp sand creates a better bond than round sand. The color must match. We often add pigment to the mix. We take a sample of the old mortar to a supplier. They can match the color exactly. Do not use concrete mix. Concrete is too hard and non-porous. It will trap moisture behind it and spall the brick faces. Always refer to the Masonry Society guidelines for best practices.
Cost of Roof Repointing: Real Project Examples and Factors
Homeowners always ask about cost. The answer depends on many variables. A simple, single-story chimney repoint might cost $800 to $1,500. A large, two-story chimney with complex detailing could be $2,500 to $4,000. For a full tile roof ridge repointing, prices range from $1,200 to $3,000. These are Texas averages from my 2024 project invoices. What drives the cost? First, accessibility. A steep, high roof needs more safety equipment. That adds labor time. Second, the amount of mortar damage. A few bad joints cost less than a full rebuild. Third, the masonry details. A simple brick chimney is straightforward. A chimney with a stone cap or decorative corbelling takes more skill and time. Fourth, your location. Labor rates vary. Always get at least three written estimates. The estimate should detail the scope. It should list the mortar type. It should include cleanup and warranty. Beware of the lowest bid. It often means inferior materials or rushed curing. A proper repointing job should last 25 to 50 years. It is a long-term investment. Compare that to the cost of repairing water-damaged drywall, insulation, and structural wood. Repointing is always cheaper than fixing a major leak.
Case Study: The Johnson Family Home
Last spring, the Johnsons called me. They had a water stain on their living room ceiling. It was right below their brick chimney. They had already paid another handyman $500 to "fix the flashing." The leak returned after the next rain. I inspected their roof. The problem was not the flashing. The mortar on the back side of the chimney was completely gone. Water was running down the inside of the brick cavity. We repointed the entire chimney. We used a color-matched Type N mortar. We also installed a new cricket (a small roof behind the chimney) to divert water. The total project cost was $1,850. The Johnsons have been leak-free for over a year. The handyman's cheap fix cost them an extra $500 and more ceiling damage. This story is very common. It shows why a correct diagnosis is worth every penny.
DIY vs. Professional Repointing: An Honest Contractor's Advice
Can you repoint your own chimney? Technically, yes. Should you? Probably not. Let me explain why. Repointing requires working at height. Roof work is dangerous. One slip can cause serious injury. It requires specialized tools. A quality mortar grinder and diamond blades are expensive to rent. The technique takes practice. Packing mortar correctly is a skill. Poorly packed mortar will fail quickly. Matching the mortar joint profile is harder than it looks. Most importantly, diagnosis is key. Are you sure the mortar is the only problem? A professional spots related issues: cracked chimney crowns, damaged flashing, or failing roof tiles. We fix all problems at once. A DIYer might repoint the mortar but miss a broken tile above it. The leak continues. You waste your weekend and your money. However, if you are determined, here is my advice. Practice on a garden wall first. Invest in proper safety gear—a harness and a stable roof ladder. Use the correct mortar mix. Take your time with curing. For 95% of homeowners, hiring a licensed, insured professional is the wise choice. Your safety and your home's protection are worth it.
Finding a Qualified Contractor: 5 Essential Questions to Ask
Choosing the right contractor is crucial. Ask these questions before you hire anyone. First, ask for proof of insurance. They must have general liability and workers' compensation insurance. This protects you if someone gets hurt on your property. Second, ask about their specific experience with repointing. How many chimneys did they repoint last year? Ask for local references and photos of past work. Third, ask what type of mortar they will use and why. A good contractor will explain their choice. They will talk about matching strength and color. Fourth, get a detailed written estimate. It should include preparation, materials, labor, cleanup, and warranty. The warranty should be for at least 5 years on materials and labor. Fifth, ask about their process for curing the mortar. If they say "it just air dries," thank them and walk away. Proper curing is a sign of quality work. Check their license with the Texas Department of Licensing and Regulation. Search for complaints. A reputable contractor welcomes these questions. They want an informed customer.
Preventive Maintenance: How to Extend the Life of Your Repointing
Good maintenance keeps your new mortar strong for decades. Once a year, do a visual inspection. Use binoculars from the ground. Look for new cracks or vegetation. Moss or ivy growing in the joints is bad. The roots will break the mortar. Keep tree branches trimmed back from the chimney. Branches can scratch the brick and hold moisture against it. Ensure your gutters and downspouts are clean and flowing away from the house. Water pouring over the gutter onto the chimney base will accelerate wear. If you have a gas fireplace, have the chimney cleaned regularly. The acidic byproducts of combustion can degrade mortar over time. Consider applying a fresh coat of clear water repellent every 8 to 10 years. This is a simple, cost-effective booster. Finally, after any major storm, especially hail, do a quick check. Hail can chip brick and mortar. Catching a small chip early prevents a big repair later. A little attention goes a long way.
Frequently Asked Questions (FAQ)
How long does roof repointing last?
A quality repointing job with proper materials and curing should last 25 to 50 years. The lifespan depends on your local climate, exposure to weather, and the quality of the original brickwork. In Texas, with our intense sun and storms, expect the lower end of that range, around 25-30 years, for optimal performance.
Can repointing be done in winter or rainy seasons?
Repointing requires dry conditions and temperatures above 40°F (4°C) for proper curing. Mortar cannot freeze while it is setting. In Texas, we avoid repointing if there is a forecast for rain within 24 hours. The best times are typically spring and fall when temperatures are mild and stable.
Will repointing stop my leak immediately?
Yes, if the deteriorated mortar was the sole source of the leak. Once the new mortar is packed and tooled, it creates an immediate seal. However, the surrounding masonry and roof decking may be damp. It can take a few days for these materials to dry out completely, so interior stains may take time to stop spreading.
Is repointing covered by homeowners insurance?
Usually, no. Homeowners insurance typically covers sudden, accidental damage (like a tree branch hitting the chimney). It does not cover wear and tear, deterioration, or lack of maintenance. Repointing is considered routine maintenance. Always check your specific policy and talk to your agent for a definitive answer.
What's the difference between repointing and tuckpointing?
These terms are often used interchangeably, but there is a technical difference. Repointing is the general process of renewing mortar joints. Tuckpointing is a specific, decorative style. It uses two colors of mortar: one that matches the brick and a thin line of a contrasting color. Most residential work is standard repointing, not true tuckpointing.
How messy is the repointing process?
A professional crew will contain the mess. Grinding mortar creates a lot of dust, but we use tarps on the roof and water misters to suppress it. There will be some dust, but it should not infiltrate your home if windows are closed. The area around the downspouts will have some mortar debris, which is thoroughly cleaned up.
Can I paint over repointed mortar?
You should wait at least 30 days for the mortar to fully cure before painting. Use a high-quality, breathable masonry paint. Avoid non-breathable paints like standard acrylics, as they can trap moisture inside the brick and cause spalling. It is often better to leave the mortar unpainted and use a clear sealant.
Conclusion: Protecting Your Home from the Top Down
Your roof and chimney are your home's first line of defense. Roof repointing is a vital but often overlooked part of home maintenance. It is not a glamorous project, but it is essential. Ignoring failing mortar leads to expensive, hidden damage. Water rots wood, ruins insulation, and promotes mold. The cost to repair that damage is many times the cost of timely repointing. This guide gave you the knowledge to make an informed decision. You now know the signs of mortar failure. You understand the professional process. You have seen real cost examples. Your next step is action. Start with a simple visual inspection from your yard. If you see cracks or missing mortar, call for professional assessments. Get multiple quotes from licensed, insured contractors. Ask them the questions from this article. Choose the contractor who demonstrates knowledge and transparency, not just the lowest price. Investing in proper roof repointing protects your home's value. It gives you peace of mind during the next heavy Texas downpour. Your home is your sanctuary. Keep it dry, safe, and secure from the top down.