
Roof Water Leak Repairing: A 20-Year Contractor's Guide to Protecting Your Home
My name is Michael, and I have been a licensed roofing contractor for over twenty years. I have completed more than 2,500 residential roofing projects across Texas. I hold certifications from major manufacturers like GAF and Owens Corning. This experience gives me a unique perspective on roof leaks. I have seen the damage they cause and the stress they create for homeowners. This article exists to solve that exact problem. It answers the urgent question every homeowner faces when water drips from their ceiling: What do I do now? My goal is to provide clear, actionable guidance. I want to turn your panic into a plan. The information here comes directly from my work on customer homes. It is based on real-world repairs, manufacturer specifications, and local building codes. I will explain not just what to do, but why certain methods work best. This guide is designed to save you time, money, and prevent further damage to your most valuable asset.
Roof leaks are deceptive. A small stain on your ceiling often hides a much larger problem above. Water travels along rafters and sheathing far from the original entry point. Finding the true source requires a systematic approach. Over the years, I have developed a reliable methodology for leak diagnosis and repair. This process considers materials, weather patterns, and roof design. I will share that methodology with you. I reference materials from the Asphalt Roofing Manufacturers Association (ARMA) and the International Residential Code (IRC). My recommendations are practical, tested, and designed for long-term solutions. This is not generic advice. It is field-tested wisdom from hundreds of leak repairs in our Texas climate.
Understanding the True Source of Your Roof Leak
Finding a leak is often the hardest part. Water follows the path of least resistance. It can enter at your ridge vent and drip down a rafter to appear in a far-off bedroom. Do not assume the leak is directly above the water stain. You must think like water. Start by going into your attic with a bright flashlight. Look for the highest point of moisture or mold on the roof sheathing. That trail leads upward to the entry point. Common sources are not always shingles. Flashing failures cause most leaks I repair. Flashing is the metal or rubber material that seals roof penetrations.
Most Common Leak Locations
Certain spots on your roof are inherently vulnerable. These areas see the most wear and weather exposure. Knowing where to look first saves valuable time. The following list is based on my service call data from the last five years.
- Chimney Flashing: The metal steps around a chimney crack over time. Expansion and contraction from heat breaks the sealant.
- Plumbing Vent Boots: The rubber boot around plumbing pipes becomes brittle. It cracks and allows water to seep down the pipe.
- Valley Junctions: Where two roof planes meet, water flow is concentrated. Damaged or improperly installed valley metal is a major leak source.
- Skylights: The curb or flashing around a skylight can fail. Ice dam pressure or poor installation are common culprits.
- Roof Vents: Turbine vents, ridge vents, and box vents all have seals. These seals can dry out, crack, or be damaged by wind.
- Step Flashing: This is the metal woven into siding where a roof meets a wall. If it rusts or is installed incorrectly, water pours behind it.
- Drip Edge & Gutters: Missing or damaged drip edge lets water wick back under shingles. Clogged gutters cause water to back up under the roof edge.
How to Perform a Safe Visual Inspection
Safety is your first priority. Never go on a wet or steep roof. Use binoculars from the ground for an initial assessment. Look for missing, cracked, or curling shingles. Check for granules in your gutters; excessive granules signal aging shingles. Examine flashing for rust, cracks, or separation. Look for sagging areas in the roof deck. From inside the attic, use your flashlight during the day. Turn off all lights and look for pinpoints of daylight coming through the roof. Mark any spots you find with chalk. This is a clear sign of a potential leak path. Remember, what you see from the inside is often the end of the water's journey.
Emergency Actions: What to Do When Water is Actively Dripping
Discovering an active leak is stressful. Immediate action can limit interior damage. Your first step is to protect your home's contents and structure. Move furniture and electronics away from the drip area. Place a bucket or bin directly under the leak to catch water. For a widespread drip, use a large plastic tarp to cover the area. Poke a small hole in the center of the tarp and run a string through it. Direct the string into your bucket to channel all water. This contains the mess. Next, try to trace the water upward. Is it running along a ceiling joist or electrical wire? Knowing the path helps the roofer later.
Do not attempt a permanent roof repair during a storm or in the dark. It is dangerous. A temporary external patch may be possible in dry daylight. For a known hole, you can use a piece of plywood and a weighted tarp. Secure it over the suspected area. The goal is to stop new water from entering until a professional can make a proper repair. Call a licensed roofer immediately to schedule an inspection. Take photos and videos of the leak, both inside and out. This documentation is crucial for insurance claims. It also helps the contractor understand the problem before they arrive.
Professional Repair Methods: A Contractor's Perspective
As a contractor, my repair approach depends on the leak source and roof age. A proper repair addresses the root cause, not just the symptom. For flashing leaks, the old material must be completely removed. The area is cleaned, dried, and new flashing is installed according to manufacturer guidelines. I often use ice and water shield as an extra layer of protection under new flashing. For shingle damage, we do not just slap on sealant. We lift the surrounding shingles, replace the damaged one, and seal all nail heads with roofing cement. The key is integrating the repair seamlessly with the existing system.
Material-Specific Repair Techniques
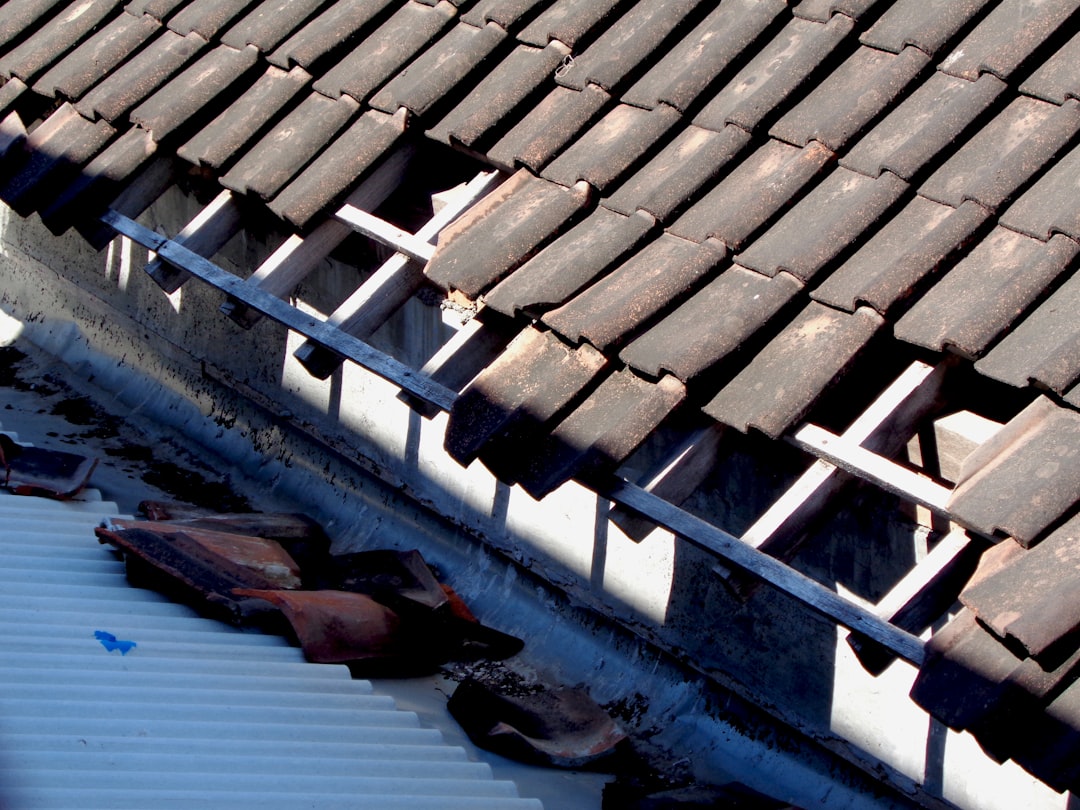
Different roofing materials require different repair strategies. Asphalt shingles are the most common. Repairs involve matching the existing shingle color and style. We keep samples from various manufacturers on our trucks for this reason. For tile roofs, broken tiles must be carefully removed without damaging neighbors. The underlayment is then inspected for damage before a new tile is set. Metal roof leaks often occur at seams or fastener points. These are repaired with new sealant or by replacing the neoprene washer on the fastener. Flat roofs (TPO, EPDM, or modified bitumen) require specialized materials like seam tape or liquid applied coatings. Using the wrong product can make the problem worse.
Understanding Repair Costs: Real Project Examples
Cost is a primary concern for every homeowner. A repair can range from a few hundred to several thousand dollars. The price depends on the leak's cause, accessibility, and materials needed. I believe in transparency. Here are real examples from recent projects in our service area, with all labor and materials included.
- Simple Vent Boot Replacement: A cracked rubber plumbing vent boot. Cost: $250 - $400. This is a common, straightforward repair.
- Chimney Flashing Repair: Re-sealing step flashing and counterflashing on a brick chimney. Cost: $600 - $1,200. This is more labor-intensive and may require masonry work.
- Valley Metal Replacement: Removing old, damaged valley metal and installing new, painted aluminum valley. Cost: $800 - $1,500 per valley. This is critical for water shedding.
- Skylight Re-flashing: Complete removal and re-installation of skylight curb and flashing. Cost: $1,000 - $2,500. This ensures a watertight seal for a complex penetration.
- Partial Re-roof Section: For widespread shingle failure in one area (like a sun-facing slope). Includes new underlayment and shingles. Cost: $1,500 - $4,000. This is often more cost-effective than countless small repairs.
Always get a detailed, written estimate. It should list the scope of work, materials to be used (brand and type), and warranty information. Be wary of quotes that seem too low. They often indicate the use of inferior materials or a temporary fix that will fail quickly.
Materials Comparison: What Works Best for Repairs
Using the right material is half the battle in a lasting repair. From my hands-on experience, not all sealants and flashings are equal. For most flashing jobs, I prefer 26-gauge galvanized steel or painted aluminum. Copper is excellent but costly. For sealants, I rely on high-quality, roofing-grade polyurethane or silicone. Products like NP1 or Sikaflex have great adhesion and flexibility. Never use general-purpose caulk from a hardware store on your roof. It dries out and cracks within a year. For underlayment in repair areas, I use synthetic underlayment or ice and water shield. This provides a secondary barrier if water gets past the primary repair.
When matching shingles, an exact match is ideal but not always possible. Sun exposure fades shingles over time. A bundle from the same manufacturer and color line may still look slightly different. We often recommend blending new shingles from multiple bundles to create a more uniform appearance. For major repairs, consider the remaining life of your roof. If the roof is near the end of its lifespan, investing in a partial repair may not be wise. A full replacement could be a better long-term financial decision. We provide this honest assessment to our customers.
The Step-by-Step Repair Process: From Inspection to Completion
Here is the proven methodology we follow on every leak repair job. This ensures nothing is missed and the repair is durable.
- Comprehensive Inspection: We inspect the interior damage, attic, and exterior roof. We use moisture meters when needed to find wet wood.
- Source Identification: We trace the water trail to its origin. We often use a water test, simulating rain with a hose, to confirm the leak source.
- Scope of Work Agreement: We provide a detailed plan and cost. The homeowner approves the repair before any work begins.
- Material Preparation: We gather all necessary materials, ensuring compatibility with the existing roof system.
- Safe Work Area Setup: We use roof jacks, harnesses, and protective ground tarps. Safety for our crew and your property is paramount.
- Execution of Repair: We perform the repair using manufacturer-approved techniques. This includes proper fastening, sealing, and integration.
- Clean-up and Final Inspection: We clean all debris from your roof, gutters, and yard. We then perform a final water test to confirm the leak is fixed.
Practical Homeowner Tips from Real Projects
After thousands of repairs, I have learned what proactive homeowners do right. These tips can extend your roof's life and help you catch problems early.
- Schedule Bi-Annual Inspections: Have a professional inspect your roof every spring and fall. They can spot minor issues before they become major leaks.
- Keep Gutters Clean: Clogged gutters are a leading cause of ice dams and water backup at the eaves. Clean them at least twice a year.
- Trim Overhanging Branches: Branches scrape and damage shingles. They also drop leaves that clog gutters and hold moisture against the roof.
- Ensure Proper Attic Ventilation: A hot attic bakes shingles from underneath. Proper intake and exhaust ventilation regulate temperature and prevent ice dams. The National Roofing Contractors Association (NRCA) provides excellent resources on this.
- Document Everything: Keep records of inspections, repairs, and your roof's warranty. This is invaluable for insurance or future buyer questions.
Navigating Insurance Claims for Roof Leaks
Insurance can cover sudden, accidental damage like storm-related leaks. It typically does not cover wear and tear or lack of maintenance. If a storm causes missing shingles and a leak, you likely have a claim. The process can be daunting. First, call your insurance company to start a claim. They will send an adjuster. Before the adjuster arrives, have your documentation ready: photos of the damage, your repair estimate, and your policy number. Be present during the adjuster's inspection. Point out all areas of concern. The adjuster's estimate may be lower than your contractor's. This is common. You have the right to share your contractor's detailed estimate with the insurance company. They can negotiate the "scope of loss." Remember, you choose your contractor, not the insurance company. Select a licensed, insured roofer with experience in insurance claims.
Frequently Asked Questions (FAQ)
1. Can I repair a roof leak myself?
Simple repairs on a low-pitch, safe roof might be a DIY project for a skilled homeowner. This includes replacing a vent boot or applying sealant to a small crack in flashing. However, most leaks require professional diagnosis and repair. Working on a roof is dangerous. Improper repairs can void warranties and lead to more extensive, costly damage. If you are unsure, always call a professional.
2. How long should a roof leak repair last?
A proper repair performed by a qualified professional using quality materials should last as long as the surrounding roof. If your roof has 10 years of life left, the repair should last 10 years. It should not be a temporary fix. Always ask your contractor for a warranty on both materials and labor for the repair work.
3. Is a small leak something to worry about immediately?
Yes. A small leak is a symptom of a breach in your home's waterproof envelope. Even a slow drip can cause rot in roof sheathing and framing. It promotes mold growth in your attic and insulation, which is a health hazard. Addressing it immediately is always cheaper than repairing structural damage later.
4. How do I find a reputable roofing contractor?
Look for a local, established company with a physical address. Verify they are licensed and insured (ask for proof). Check online reviews on multiple platforms. Ask for references from recent repair jobs. Ensure they offer a detailed, written estimate and warranty. Avoid door-to-door storm chasers who pressure you to sign a contract immediately.
5. Will repairing a leak fix my ceiling stain?
Repairing the roof stops new water from entering. It does not fix the existing water stain on your drywall ceiling. The stained area must dry completely. Then, you may need to scrape, prime with a stain-blocking primer, and repaint. If the drywall is soft or sagging, it may need to be cut out and replaced by a drywall professional.
6. Can one leak mean I need a whole new roof?
Not necessarily. A single, isolated leak from a failed penetration (like a vent) often only requires a spot repair. However, if your roof is near the end of its expected lifespan (20+ years for asphalt shingles) and you are experiencing multiple leaks, a full replacement may be the most economical long-term solution. A trustworthy contractor will give you an honest assessment.
7. What is the best season to repair a roof leak?
Roof repairs can be made year-round, but ideal conditions are dry and mild (45-85 degrees Fahrenheit). This allows sealants to cure properly and makes the work safer for the crew. However, emergency repairs to stop active leaking should be done as soon as safely possible, regardless of season.
Real Project Case Studies
Case Study 1: The Wandering Leak
A homeowner reported a leak in their first-floor hallway, far from any exterior wall. Multiple handymen had failed to fix it. Our inspection found a cracked chimney flashing on the second-story roof. Water was running down a plumbing vent pipe inside the wall, traveling along a wire, and dripping in the hallway. We replaced the chimney flashing and installed a new vent boot. Total cost: $1,100. Outcome: Leak stopped completely. The lesson: Leaks can travel great distances. A systematic search for the highest point of moisture is essential.
Case Study 2: The Recurring Ice Dam Leak
Every winter, a home developed ice dams and interior leaks. Previous repairs only addressed the shingles at the eaves. We performed a full assessment and found critically poor attic ventilation and insufficient insulation. We repaired the damaged roof deck, installed proper ice and water shield at the eaves, and added ridge vents and soffit vents. We also advised the homeowner on adding insulation. Total cost: $3,800. Outcome: No ice dams or leaks have occurred in three subsequent winters. The lesson: Treating the symptom (the leak) without addressing the cause (poor ventilation) leads to repeat failures.
Industry Statistics and Data
Understanding the broader context helps. According to a Insurance Institute for Business & Home Safety (IBHS) study, wind and hail cause the majority of insured roof damage claims. However, the NRCA estimates that 90% of leaks are due to issues at penetrations (vents, chimneys, etc.) and flashing failures, not shingle failure. A survey by HomeAdvisor indicates the average roof repair cost nationally ranges from $379 to $1,755, with most homeowners spending around $1,000. These numbers align with my local experience in Texas, though material and labor costs can vary.
Conclusion: Your Action Plan for a Dry Home
A roof leak is a serious issue, but it is a solvable problem. Start by staying calm and taking immediate steps to protect your interior. Document the damage thoroughly. Understand that finding the true source requires expertise. Do not settle for a quick fix that addresses only the visible water stain. Invest in a proper diagnosis and repair from a qualified professional. Use this guide to ask informed questions and understand the process. Your roof is your home's first line of defense. A quality repair protects your investment, your safety, and your peace of mind. The next step is to contact a licensed, insured roofing contractor in your area for an inspection. Share this article with them to discuss your specific situation. Here's to a dry and secure home for years to come.