
Sagging Roof Repair: A 25-Year Contractor's Guide to Saving Your Home
I have repaired over 3,000 roofs across Texas in my 25 years as a licensed roofing contractor. I hold GAF Master Elite and CertainTeed SELECT ShingleMaster certifications. This experience taught me that a sagging roof is more than cosmetic. It is a structural warning sign. This article exists because homeowners need clear, honest information about this serious problem. You might see a dip in your roofline and wonder about costs, safety, and solutions. This guide answers those questions with real-world contractor insights, not just internet research. I gathered this information from hundreds of customer projects, manufacturer installation manuals, and the International Residential Code (IRC). My methodology is simple: explain the problem, show the proven solutions, and help you make an informed decision to protect your biggest investment.
A sagging roof creates anxiety. You worry about safety, water damage, and repair costs. This guide will calm those fears. I will walk you through the causes, from simple fixes to major structural repairs. You will learn how to spot early warning signs. You will understand what contractors look for during an inspection. Most importantly, you will get transparent cost breakdowns from actual Texas projects. This knowledge will help you communicate effectively with any roofing professional. It will prepare you for insurance claims if storm damage is involved. My goal is to empower you with the same information I share with my own clients.
Understanding Roof Sag: More Than Just a Visual Problem
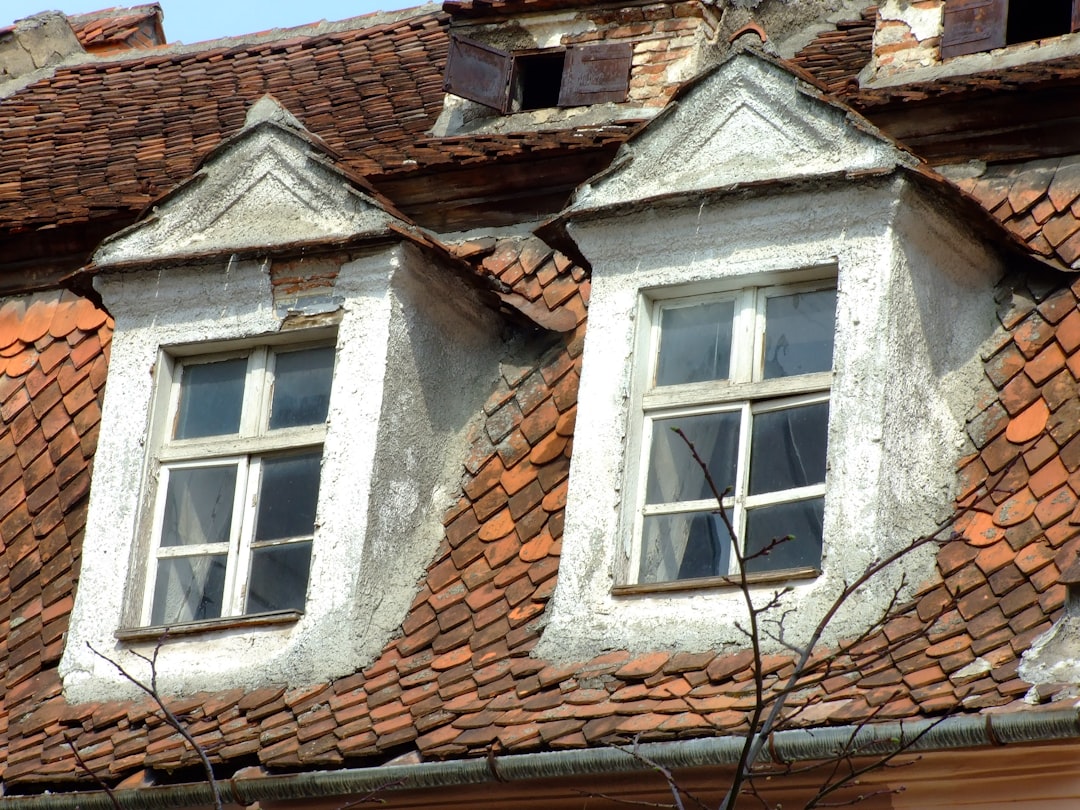
A sagging roof is a symptom of underlying structural stress. It is not normal wear and tear. The visible dip means the roof's support system is failing. This system includes rafters, trusses, collar ties, and the roof deck. When these components weaken, the roof can no longer hold its shape. Gravity pulls it downward. This creates the sag you see from your driveway. Ignoring this problem leads to cascading damage. Water can pool in the low spot, accelerating shingle deterioration. The added weight from water or snow can worsen the sag. Eventually, interior ceilings may crack or bow.
Primary Causes of a Sagging Roof
Understanding the cause is the first step to a proper repair. The most common causes fall into three categories. First, structural overload happens when the roof supports too much weight. This includes multiple layers of old shingles, heavy snow, or improper installation of heavy roofing materials like slate or clay tile. Second, framing member failure is a critical issue. This means the wooden rafters or trusses themselves are damaged. They can rot from long-term moisture leaks. They can crack from impact or age. Sometimes, they were undersized from the original construction, not meeting local building codes.
Third, connection and support failure is very common. The joints where rafters meet the ridge board or wall plate can loosen. Metal connector plates on trusses can rust or pull out. The horizontal ceiling joists or collar ties that prevent rafters from spreading can be missing or broken. According to the International Association of Certified Home Inspectors (InterNACHI), improper attic ventilation is a major contributor. Trapped heat and moisture in the attic can weaken wooden framing over decades, making it spongy and less supportive.
How to Identify and Measure Roof Sag
Homeowners can perform a simple visual check. Stand across the street and look at your roofline. Look at the ridge (the highest peak). It should appear straight. Compare one side to the other. Use a long, straight object like a 2x4 board as a visual reference. You can also look from inside your attic. Shine a bright light along the underside of the roof deck. A straight edge or a taught string line can reveal dips. For a more precise measurement, contractors use a laser level. They measure the deviation from a straight line over a specific length, like 10 feet.
A slight dip of half an inch over 10 feet might be minor. A dip of 2 inches or more is a serious concern. You should also look for secondary signs. Check for cracked or separated drywall on interior ceilings, especially at corners. Look for doors that suddenly stick or won't close properly. This can indicate the house frame is shifting due to roof movement. Listen for new creaking or popping sounds during windy weather. These are all signals that professional assessment is needed immediately.
Professional Inspection: What a Good Roofer Looks For
When you call a professional, a thorough inspection follows a specific process. A reputable contractor will inspect both the exterior and the interior attic space. Externally, they examine the roof plane and shingles. They look for patterns of wear, ponding water, and damaged flashing. The real diagnosis happens in the attic. This is where the structural bones of the roof are visible. The contractor will bring a bright flashlight, a ladder, and tools. They will check every rafter or truss for signs of bending, cracking, or rot.
They probe the wood with a screwdriver or awl in suspect areas. Soft, punky wood indicates rot. They measure the size and spacing of the framing members. They compare this to the span tables in the International Residential Code (IRC) to see if they are adequate. They inspect all metal connectors, like hurricane ties and truss plates, for rust or pull-out. They check the condition of the roof decking (plywood or OSB) from underneath. They also evaluate attic ventilation. Proper ventilation is crucial for roof longevity, as outlined by the Asphalt Roofing Manufacturers Association (ARMA). A good inspector will take photos and videos to document their findings for you.
Common Structural Issues Found in Attics
In my experience, these are the most frequent problems discovered during sagging roof inspections. Cut or missing structural members are a major issue. Homeowners or previous workers sometimes cut through rafters or truss webs to make room for HVAC ducts or attic storage. This severely compromises the roof's integrity. Another common find is rotten ridge boards. The ridge board is the horizontal board at the very peak where rafters meet. If it rots, the whole peak can sink. Inadequate bracing is also typical. Trusses especially require permanent lateral bracing as specified by the Truss Plate Institute (TPI). Without it, they can buckle under load.
Finally, chronic moisture from a long-term, slow leak is a silent destroyer. It can rot sheathing and framing far from the original leak source. The contractor will use a moisture meter to detect hidden wet wood. All these issues require different repair strategies. A proper diagnosis saves you money. It ensures the repair fixes the root cause, not just the symptom.
Repair Solutions: From Simple Reinforcement to Full Rebuild
The repair method depends entirely on the cause and severity of the sag. There is no one-size-fits-all solution. For minor sags with sound structural wood, sistering is the standard repair. This involves attaching a new, straight lumber member (a "sister") alongside the damaged rafter or truss chord. The new piece must be the same size or larger. It must be securely bolted and glued to the old member. This effectively creates a new, strong support. The existing sag may not be pulled back up completely, but further movement is stopped.
For more significant sags or where wood is rotten, replacement is necessary. The damaged section of the framing member is carefully cut out. A new section is spliced in with scab boards on both sides. This is a precise carpentry task. It often requires temporary support walls to be built inside the attic to hold the roof up during the repair. In cases of widespread failure or undersized framing, a full structural reinforcement may be needed. This can involve adding new load-bearing walls or beams in the attic space. It transforms the attic from unfinished storage to a structural zone.
The Process of Jacking and Leveling a Roof
Sometimes, a roof can be gently lifted back to level. This is a delicate operation. It is not a DIY project. Professionals use hydraulic jacks and temporary support posts. They work slowly, lifting the structure only a fraction of an inch per day. This allows the house to adjust without causing new cracks in drywall or breaking other connections. The goal is to restore as much of the original shape as possible before performing the permanent sistering or replacement repair. This process requires engineering knowledge. The force must be applied at the correct points to avoid causing new damage.
Cost Breakdown: Real Project Examples from Texas Homes
Costs vary widely based on the repair scope, home size, and location. Here are real examples from my project logs in the Kingwood/Houston area. For a minor repair involving sistering 3-4 rafters in a standard attic with good access, homeowners can expect to pay between $1,500 and $3,000. This includes labor, materials (lumber, bolts, adhesive), and cleanup. A moderate repair replacing a rotten ridge board and sistering several rafters on a 2,000 sq. ft. home typically ranges from $4,000 to $8,000. This is more involved and requires careful sequencing of work.
A major structural repair addressing widespread truss damage or adding a new support beam can cost $10,000 to $20,000 or more. This price reflects the engineering time, specialized materials like LVL beams, and significant labor. If the roof decking is also damaged and needs replacement in sections, add $75 to $150 per sheet of plywood installed. Remember, these are repair costs only. They do not include the cost of a new roof covering (shingles). If your roof is old and needs replacement anyway, it is often most cost-effective to combine the structural repair with a full reroof.
- Labor: The biggest cost driver. Skilled carpentry is required.
- Materials: Lumber, engineered wood beams (LVL), metal connectors, fasteners.
- Access Difficulty: A cramped, low attic costs more than a tall, clear one.
- Engineering Report: Some municipalities require a stamped engineer's plan for major repairs.
- Permit Fees: Most structural repairs require a building permit from your local jurisdiction.
Materials Matter: Choosing the Right Lumber and Connectors
Using the correct materials is non-negotiable for a lasting repair. The lumber must be kiln-dried and grade-stamped. For sistering rafters, #2 grade Southern Yellow Pine or Douglas Fir is common. The new lumber should be the same depth as the existing member. For new beams, engineered lumber like Laminated Veneer Lumber (LVL) from manufacturers like Boise Cascade or Weyerhaeuser is often superior. LVL is stronger, straighter, and more dimensionally stable than solid sawn lumber. It resists warping and shrinking.
Connectors are critical. Galvanized or stainless steel framing anchors and joist hangers from Simpson Strong-Tie are the industry standard. They are tested and code-listed. Never use just nails for structural connections. Structural adhesive, like a premium construction adhesive, is used between the sistered members to create a solid bond. For fasteners, use hot-dipped galvanized or structural screws rated for the application, such as those from GRK Fasteners. Using the wrong nails or screws can lead to a failed repair.
Insurance and Sagging Roofs: What's Typically Covered
This is a crucial area of confusion for homeowners. Standard homeowners insurance (HO-3 policy) covers sudden, accidental damage. It does not cover wear and tear or long-term neglect. If your roof sags because a tree fell on it during a storm, that is likely covered. If it sags slowly over 20 years due to aging materials and poor ventilation, that is considered a maintenance issue. It is not covered. Insurance companies will investigate the cause thoroughly. They often send their own adjuster or hire a forensic engineer.
To file a claim, you need evidence linking the damage to a covered peril. Photos of the damage immediately after a storm are powerful. A report from a licensed contractor attributing the failure to a specific event (like wind lifting the roof and breaking trusses) is also helpful. Always review your policy details and talk to your agent. For more information, see the Insurance Information Institute's guide. Be prepared that most sagging roof repairs are paid out-of-pocket by the homeowner.
Prevention: How to Stop Sagging Before It Starts
The best repair is the one you never need. Proactive maintenance prevents most major sagging issues. First, ensure your attic has balanced, adequate ventilation. This means intake vents (soffit vents) and exhaust vents (ridge vents, gable vents, or turbines). The GAF Ventilation Calculator can help determine your needs. Proper ventilation keeps the attic temperature and moisture close to outside levels. This preserves the strength of the wood framing.
Second, never store heavy boxes or items directly on attic floor joists. The weight transfers to the bottom chords of trusses or ceiling joists, potentially causing them to sag. Third, if you are re-roofing, have your contractor remove old layers of shingles. Multiple layers add tremendous dead load. Most building codes, including the International Residential Code, limit roofs to two layers. One layer is always best. Finally, have a professional roof inspection every 2-3 years. A trained eye can spot early signs of trouble, like minor deflection or rusting connectors, long before a visible sag appears.
Frequently Asked Questions from Homeowners
Is a sagging roof dangerous?
Yes, it can be. A significant sag indicates structural failure. The risk is not typically of sudden collapse, but of progressive worsening. The danger includes water damage from ponding, potential for ceiling drywall to fail, and in extreme cases, a safety hazard during heavy snow or wind loads. You should have it inspected promptly to assess the risk level.
Can I fix a sagging roof myself?
For anything beyond a very minor, localized issue, no. Roof structural repair requires knowledge of load paths, building codes, and specialized tools. Incorrect repairs can worsen the problem or create new safety hazards. This is skilled carpentry work best left to licensed, insured professionals who understand residential framing.
How long does a roof repair take?
A minor sistering job might take a skilled crew 1-2 days. A more complex repair involving beam installation or multiple member replacements can take 3-5 days. If engineering plans and permits are required, the overall timeline from inspection to completion can be 2-4 weeks. Weather can also delay exterior work if roof decking is removed.
Will my homeowners insurance rates go up if I file a claim?
Filing any claim can potentially affect your rates or insurability. If the damage is clearly from a widespread storm event (a hail storm that hit your entire neighborhood), the impact may be less. If the insurance company determines the cause was lack of maintenance, they may deny the claim and still note the incident. Always discuss the potential consequences with your agent before filing.
Should I repair the structure and reroof at the same time?
Absolutely, if your shingles are near the end of their life. It is the most cost-effective approach. The roofing crew will already be set up. You avoid paying for tear-off and disposal twice. More importantly, the structural repair can be done with the decking exposed, which is easier and allows for a more thorough job. Coordinate both projects together.
What questions should I ask a roofing contractor about this repair?
Ask for their specific experience with structural repairs. Request references from similar projects. Ask if they will pull the required building permit (a reputable contractor will). Inquire about warranty coverage on the labor for the structural work. Finally, ask who will perform the work—their own crew or a subcontractor—and verify that subcontractor's insurance.
What is the difference between a sag and a roof valley?
A roof valley is an intentional, designed low point where two roof planes meet to channel water. It is straight and uniform. A sag is an unintentional dip or curve in a roof plane that should be flat or straight. A valley has proper flashing and drainage. A sag often leads to water pooling and shingle damage.
Real Project Case Study: A Kingwood Home Rescue
Last spring, a homeowner in Kingwood called me with a visible sag over their garage. The dip was about 3 inches over 8 feet. Inside the attic, we found the cause. Two garage roof trusses had cracked bottom chords. A previous HVAC installer had cut through the lateral bracing, weakening the system. Over years, the trusses slowly deflected. Our solution was to install a new, temporary support wall below the damaged trusses. We then sistered new LVL boards to the cracked chords, using structural screws and adhesive. We reinstalled proper metal bracing as per the Truss Plate Institute guidelines. Finally, we gently jacked the roof back up about 1.5 inches over two days. The total cost was $6,200. The homeowner combined this with a new GAF Timberline HDZ shingle roof. The outcome was a stable, level roof with a new 50-year manufacturer warranty. The key lesson was addressing the root cause (missing bracing) and not just the symptom (the cracked wood).
Conclusion: Taking the Next Step with Confidence
A sagging roof is a serious issue, but it is a solvable one. The first step is a professional inspection to diagnose the exact cause and extent. Do not panic. Use the information in this guide to understand what the contractor is telling you. Ask informed questions about their proposed solution and materials. Get 2-3 detailed written estimates. Check licenses and insurance. Remember, the cheapest bid is rarely the best value for structural work. You are investing in the long-term safety and value of your home.
Proactive maintenance is your best defense. Ensure proper attic ventilation and avoid overloading attic storage. Address small leaks immediately before they cause rot. If you are facing a repair, view it as an investment in your home's integrity. With the right contractor and a proper repair plan, your roof can be restored to full strength and function. This will give you peace of mind for years to come. Your home is your sanctuary. Protecting its structure is the most important repair you can make.