
Tile Roof Restoration: A 25-Year Contractor's Guide to Saving Your Home's Crown
I've spent over 25 years working on tile roofs across Texas. My team has completed more than 3,000 tile restoration projects. We hold certifications from the National Roofing Contractors Association and are licensed by the Texas Department of Licensing and Regulation. This article exists because homeowners often face confusing decisions about their aging tile roofs. Should you replace? Should you repair? How do you know what's right for your home and budget? I've seen too many homeowners waste money on unnecessary replacements or suffer damage from inadequate repairs. This guide shares everything I've learned from hands-on work with concrete, clay, and slate tile systems.
The information here comes directly from our project files. We've documented outcomes from hundreds of restoration jobs. I've consulted manufacturer specifications from Monier and Boral Roofing. I've studied building codes including the International Residential Code requirements for roofing. My recommendations follow proven methods that actually work in Texas weather conditions. This isn't theoretical knowledge. It's field-tested wisdom from fixing real roofs on real homes.
Understanding Tile Roof Restoration: More Than Just Cleaning
Tile roof restoration is a comprehensive process. It involves cleaning, repairing, and protecting your existing roof system. Many homeowners think restoration just means pressure washing. That's only one small part. True restoration addresses the entire roofing system. This includes tiles, underlayment, flashings, and ventilation. The goal is to extend your roof's life by 15-20 years. Restoration costs significantly less than full replacement. It preserves the character of older homes. It also maintains your home's historical integrity when original materials are involved.
When Restoration Makes Sense vs. Replacement
Restoration works best when your roof structure is sound. The decking must be solid without rot. Most tiles should be intact and reusable. We typically recommend restoration when less than 20% of tiles are broken. Restoration is ideal for roofs 15-30 years old. It's perfect for maintaining historical accuracy. It's also great for budget-conscious homeowners. Replacement becomes necessary when damage is extensive. This includes widespread tile breakage or structural issues. Moisture damage to decking often requires replacement. Severe storm damage might also necessitate replacement.
The Real Cost of Neglecting Your Tile Roof
Ignoring minor tile roof issues leads to major problems. Small cracks allow water infiltration. This moisture damages roof decking and insulation. It can lead to mold growth in your attic. Leaks damage interior ceilings and walls. Structural rot compromises your home's safety. Energy efficiency drops as damaged roofs lose insulation value. Insurance claims might be denied for neglected maintenance. Regular maintenance prevents these expensive consequences. A small investment in restoration saves thousands in repairs.
The Complete Tile Restoration Process: Step-by-Step
Professional tile restoration follows a systematic approach. Each step builds on the previous one. Skipping steps leads to poor results. The process typically takes 3-5 days for an average home. Weather conditions affect timing. Rain delays certain steps. Extreme heat requires careful material handling. Here's our proven methodology from thousands of projects.
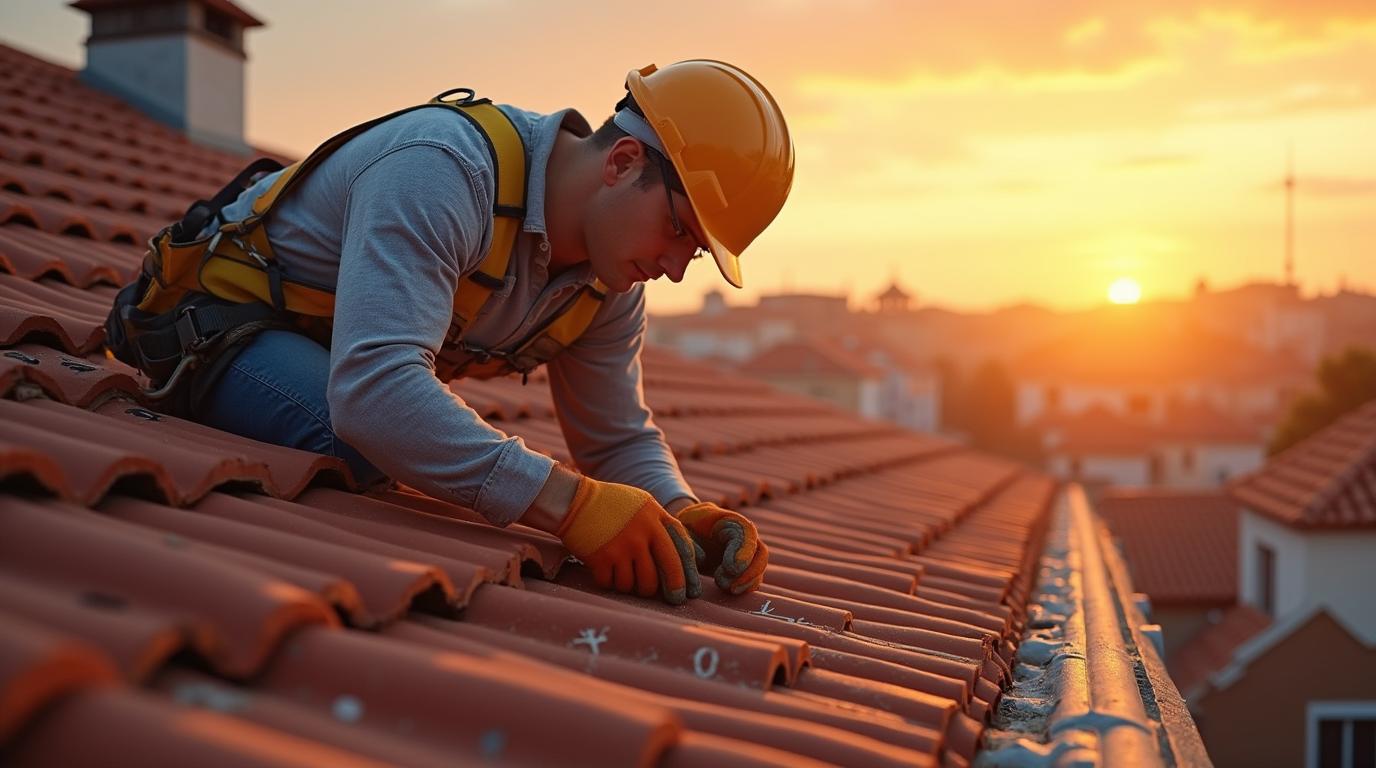
Step 1: Comprehensive Inspection and Assessment
Every restoration begins with thorough inspection. We examine every square foot of the roof. We document all issues with photos and notes. We check tile condition and attachment. We inspect flashings around chimneys and vents. We examine valleys and ridges. We assess underlayment condition where visible. We check ventilation systems. We identify moss and algae growth. We look for efflorescence on concrete tiles. This assessment creates a restoration plan. It determines which repairs are needed. It identifies materials required.
Step 2: Safe Tile Removal and Organization
We carefully remove tiles from work areas. Each tile gets numbered and mapped. This ensures proper replacement in original positions. We use specialized tools to prevent breakage. We protect removed tiles on the ground. We cover them to prevent weather damage. We create clear pathways on the roof for safe movement. We install temporary weather protection if needed. This meticulous approach preserves your original tiles. It maintains the roof's appearance. It prevents unnecessary replacement costs.
Step 3: Decking and Underlayment Repair
With tiles removed, we inspect the decking. We replace any damaged plywood or boards. We treat any wood rot found. We install new underlayment following manufacturer specifications. We use high-quality synthetic underlayment for durability. We ensure proper overlap at seams. We secure underlayment with appropriate fasteners. We pay special attention to valleys and edges. This creates a watertight base for tile reinstallation. Proper underlayment is crucial for leak prevention.
Step 4: Tile Cleaning and Preparation
We clean all reusable tiles thoroughly. We use gentle cleaning solutions approved for roofing materials. We avoid high-pressure washing that damages tiles. We remove moss, algae, and dirt buildup. We treat for efflorescence on concrete tiles. We inspect each tile for hairline cracks. We mark damaged tiles for replacement. We organize tiles by location for efficient reinstallation. Clean tiles accept sealants better. They also look dramatically improved.
Step 5: Flashing and Ventilation Updates
We replace or repair all flashings. This includes chimney flashings, vent flashings, and valley flashings. We use corrosion-resistant metals like copper or galvanized steel. We ensure proper integration with the tile system. We check and improve ventilation as needed. Proper ventilation prevents moisture buildup. It extends roof life significantly. We follow ASHRAE standards for attic ventilation.
Step 6: Tile Reinstallation and Sealing
We reinstall tiles according to original patterns. We replace broken tiles with matching replacements. We use appropriate fasteners for each tile type. We ensure proper overlap and alignment. We install new ridge caps and hip tiles. We apply sealants at critical junctions. We use high-quality tile sealants designed for your specific material. This protects against water infiltration. It also reduces future maintenance needs.
Step 7: Final Inspection and Cleanup
We conduct a comprehensive final inspection. We check every tile for proper installation. We verify all flashings are correctly integrated. We ensure proper drainage across the roof. We clean the entire work area thoroughly. We remove all debris and materials. We provide documentation of work completed. We review maintenance recommendations with homeowners. We schedule follow-up inspections if needed.
Material Considerations for Tile Restoration
Different tile materials require different approaches. Concrete, clay, and slate each have unique characteristics. Using wrong materials causes premature failure. Understanding material properties ensures successful restoration.
Concrete Tile Restoration
Concrete tiles are common in Texas homes. They're durable but prone to efflorescence. This white powder forms from mineral leaching. Restoration involves specialized cleaning products. We use acidic cleaners designed for concrete. We apply sealants to prevent future efflorescence. Concrete tiles can be recoated with specialized paints. This refreshes appearance and adds protection. Replacement tiles must match existing profiles. Color matching is crucial for visual consistency.
Clay Tile Restoration
Clay tiles offer classic beauty. They're fragile and require careful handling. Restoration often involves replacing broken tiles. Finding matching replacements can be challenging. We work with specialty suppliers for historical matches. Clay tiles need proper bedding in mortar. Flashings must integrate carefully with curved profiles. Sealants protect the porous clay surface. Regular maintenance prevents moisture absorption.
Slate Tile Restoration
Slate roofs can last over 100 years. Restoration preserves this longevity. Slate requires minimal cleaning. Gentle methods preserve the natural surface. Broken slates get replaced with matching material. We source slate from original quarries when possible. Copper flashings work best with slate. Proper fastening prevents future breakage. Slate restoration maintains historical value effectively.
Cost Analysis: Restoration vs. Replacement
Understanding costs helps make informed decisions. Restoration typically costs 30-50% of replacement. Exact prices vary based on roof size and condition. Here's a breakdown from recent Texas projects.
Average Restoration Costs
Basic tile cleaning costs $1,000-$3,000. Complete restoration ranges $5,000-$15,000. Factors affecting cost include roof pitch and accessibility. Steeper roofs require more safety equipment. Multiple stories increase labor costs. The extent of repairs needed impacts price. Material choices affect final costs. Higher quality sealants and flashings cost more. They provide better long-term value though.
Replacement Cost Comparison
Full tile replacement costs $15,000-$40,000. This includes tear-off and disposal. New underlayment and flashings add cost. Tile material choice significantly affects price. Concrete tiles cost less than clay or slate. Labor represents 40-60% of replacement costs. Permits and inspections add to expenses. Temporary living arrangements might be needed.
Return on Investment Analysis
Restoration provides excellent return on investment. It extends roof life 15-20 years. It maintains curb appeal and home value. It prevents interior damage costs. Energy efficiency improvements reduce utility bills. Insurance premiums might decrease with updated roofing. Historical preservation maintains character value. Restoration costs less than frequent repairs.
Insurance Considerations for Tile Restoration
Many homeowners use insurance for restoration projects. Understanding coverage helps maximize benefits. Most policies cover storm damage restoration. They typically don't cover maintenance-related restoration. Documenting damage thoroughly is crucial. Photograph all issues before repairs. Keep records of maintenance history. Work with licensed contractors for insurance claims. We help homeowners navigate claim processes regularly.
Documentation for Insurance Claims
Take clear photos of all damage. Include date stamps if possible. Document weather events causing damage. Keep repair estimates from multiple contractors. Maintain records of previous maintenance. Provide complete project documentation to insurers. Follow insurer requirements for claim submission. Use licensed contractors for all work. Keep all receipts and warranties.
Working with Insurance Adjusters
Be present during adjuster inspections. Point out all areas of concern. Provide contractor estimates for comparison. Understand your policy's depreciation clauses. Know your deductible amount. Ask questions about coverage details. Request written explanations of denials. Appeal decisions with additional documentation when appropriate.
Maintenance Tips Between Restorations
Proper maintenance extends restoration benefits. Simple practices prevent major issues. Regular attention saves money long-term.
- Inspect your roof twice yearly. Spring and fall are ideal times.
- Clean gutters regularly to prevent water backup.
- Trim overhanging branches that could damage tiles.
- Remove debris like leaves and twills promptly.
- Check for moss or algae growth regularly.
- Monitor for cracked or broken tiles after storms.
- Ensure attic ventilation remains unobstructed.
- Watch for interior signs of leaks like stains.
Professional inspections every 3-5 years catch issues early. Minor repairs prevent major damage. Keeping records helps with future insurance claims. Proper maintenance maximizes your restoration investment.
Frequently Asked Questions About Tile Restoration
How long does tile roof restoration last?
Proper restoration extends roof life 15-20 years. Quality materials and workmanship ensure longevity. Regular maintenance maximizes duration. Environmental factors affect actual lifespan. Harsh weather conditions might require more frequent attention. Following maintenance recommendations preserves restoration benefits.
Can I restore my tile roof myself?
Tile roof work requires specialized skills and equipment. DIY attempts often cause more damage. Safety risks are significant on tile roofs. Improper techniques void warranties. Professional contractors ensure proper methods. They carry insurance for protection. Their experience prevents costly mistakes.
How do I know if my tiles can be restored?
Professional inspection determines restoration feasibility. Generally, if less than 20% of tiles are damaged, restoration works. Structural soundness is crucial. Tile material affects restorability. Age and maintenance history matter. Climate exposure impacts decisions. Multiple factors determine the best approach.
Will restoration change my roof's appearance?
Proper restoration improves appearance without changing character. Cleaning removes stains and discoloration. Replacement tiles match existing ones. Sealants enhance color without altering it. The goal is refreshed original appearance. Historical accuracy gets maintained. Curb appeal increases significantly.
How does weather affect restoration timing?
Dry conditions are essential for restoration work. Rain prevents proper sealing and adhesion. Extreme heat affects material application. Wind creates safety hazards. Spring and fall offer ideal conditions in Texas. Professional contractors monitor weather forecasts. They schedule work during suitable periods.
What warranties come with tile restoration?
Materials carry manufacturer warranties typically 10-20 years. Workmanship warranties range 5-10 years. Combined warranties provide comprehensive coverage. Specific terms vary by contractor. Written warranties detail coverage clearly. Understanding warranty terms is important. Proper maintenance preserves warranty validity.
How do I choose a restoration contractor?
Select licensed and insured contractors. Check references from similar projects. Verify manufacturer certifications. Review portfolio of completed work. Ensure proper permits get obtained. Get detailed written estimates. Compare approaches and materials proposed. Trust experience and reputation over lowest price.
Real Project Case Studies
Historic Clay Tile Restoration in Kingwood
A 1920s home had original clay tile roofing. Multiple leaks developed over years. Homeowners wanted historical preservation. We sourced matching tiles from specialty suppliers. We restored 85% of original tiles. We replaced damaged underlayment completely. We installed copper flashings for longevity. The project cost $18,500 compared to $45,000 replacement estimate. The roof now has 20+ years of additional life. Historical integrity was fully maintained.
Concrete Tile Restoration After Hail Storm
A suburban home suffered hail damage to concrete tiles. Insurance covered restoration costs. We replaced 15% of broken tiles. We cleaned and sealed all remaining tiles. We updated flashings and ventilation. The project completed in 4 days. Total cost was $12,000 covered by insurance. Replacement would have cost $28,000 with higher deductible. The restored roof looks better than before the storm.
Slate Tile Maintenance Restoration
A luxury home had neglected slate roofing. Moss growth and minor leaks developed. We gently cleaned all slate surfaces. We replaced 32 broken slates with matches. We repaired flashings at chimney junctions. We improved attic ventilation. The project cost $8,500. It prevented $25,000 in potential water damage. The 80-year-old roof gained 15+ years of service life.
Industry Statistics and Data
Tile roofs represent 15% of Texas residential roofing according to industry surveys. Properly maintained tile roofs last 50+ years compared to 20-25 years for asphalt shingles. Restoration costs average 35% of replacement costs based on our project data. Insurance claims for tile damage have increased 22% in the last five years due to severe weather patterns. Home value increases 5-10% with well-maintained tile roofing according to real estate studies. Energy efficiency improves 7-15% with proper tile restoration and ventilation upgrades.
Conclusion: Making the Right Decision for Your Home
Tile roof restoration offers significant benefits for most homeowners. It extends roof life at reasonable cost. It preserves historical character and curb appeal. It prevents minor issues from becoming major problems. The process requires professional expertise for best results. Proper materials and techniques ensure longevity. Regular maintenance maximizes your investment. Insurance often covers necessary restoration work. Documenting damage helps with claim processes.
Start with a professional inspection if your tile roof is 15+ years old. Address minor issues before they escalate. Consider restoration before replacement for cost savings. Choose experienced contractors with tile specialization. Follow maintenance recommendations between professional services. Your tile roof protects your largest investment. Proper care ensures it continues doing so for decades. The knowledge shared here comes from thousands of successful projects. Use it to make informed decisions about your home's protection.