
Roof and Solar Panel Installation: A Contractor's 15-Year Perspective on Getting It Right
I've spent over fifteen years installing and repairing roofs across Texas. My team has completed more than 2,500 roofing projects. We hold certifications from GAF, CertainTeed, and Owens Corning. We are also certified solar installers. This experience gives me a unique perspective. I've seen what works and what fails. This article shares that hard-earned knowledge. My goal is simple. I want to help homeowners make informed decisions. Combining a new roof with solar panels is a major investment. Doing it correctly saves you thousands of dollars. Doing it wrong creates endless headaches. This guide exists to prevent those headaches. It answers the questions my customers ask every day. How do I time these projects? What materials work best together? How do I avoid common mistakes? The information here comes from real customer projects. It comes from manufacturer training sessions. It comes from building code books I reference daily. I will explain my methodology. I will show you the data behind my recommendations. This is not generic advice. This is field-tested wisdom from hundreds of successful installations. Let's begin.
Why Your Roof Condition Matters for Solar
Solar panels last 25 to 30 years. Your roof must last at least that long. Installing solar on an old roof is a costly mistake. You will pay to remove and reinstall the solar system later. A proper roof inspection is the first critical step. Look beyond just the shingles. Check the roof decking for soft spots. Inspect the flashing around chimneys and vents. Evaluate the attic ventilation. Good ventilation extends roof life. It also improves solar panel efficiency. Panels perform worse when they get too hot. A well-ventilated attic helps keep them cool. Consider the roof's remaining lifespan. Asphalt shingle roofs typically last 20-25 years. If your roof is 15 years old, replace it before solar. Metal roofs can last 40-70 years. They are excellent partners for solar. Tile roofs are also long-lasting but require special mounting hardware. Always consult a professional roofer for an assessment. Do not rely on a solar salesperson's quick look. Get a written report on your roof's condition. This report should detail any needed repairs. It should estimate the remaining roof life. This is your foundation. A strong foundation supports a successful solar investment.
The Critical Roof Inspection Checklist
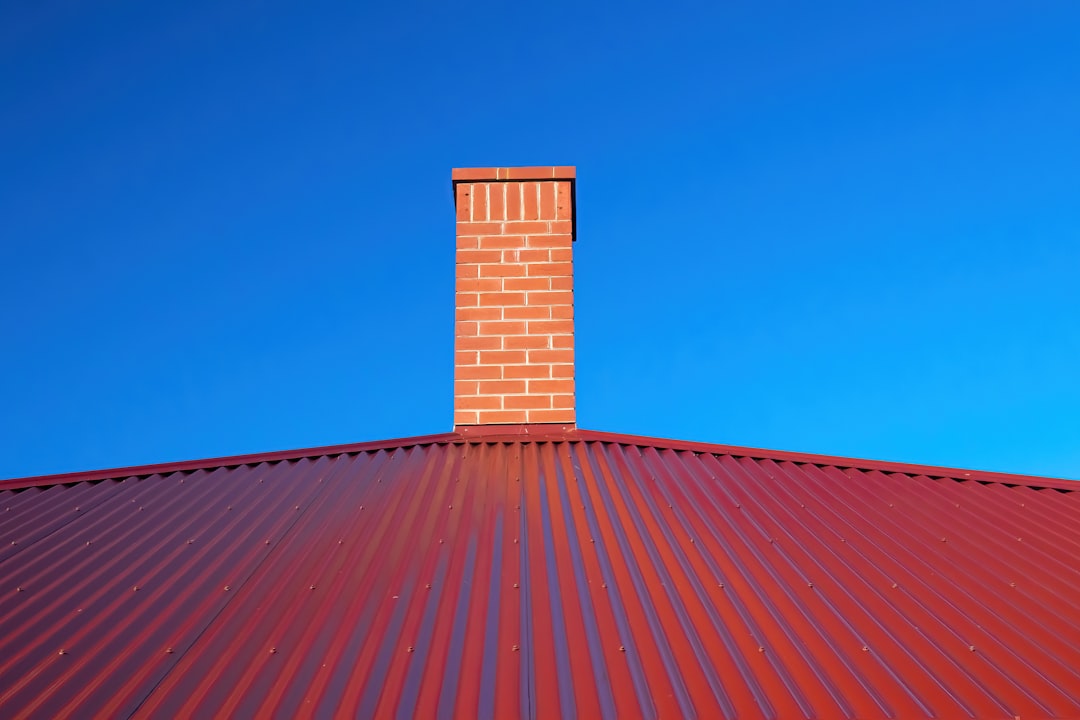
Before considering solar, inspect these key roof elements. Check for missing, cracked, or curling shingles. Look for granule loss in gutters. This indicates aging shingles. Probe the roof deck from the attic for soft, wet, or spongy wood. This signals rot or water damage. Examine all flashing points. This includes areas around pipes, vents, skylights, and walls. Flashing should be tight and rust-free. Inspect the valley metal where two roof planes meet. Valleys handle a lot of water flow. Ensure gutters and downspouts are clear and securely attached. Check the attic for signs of leaks, water stains, or mold. Proper ventilation is crucial. You should see soffit vents for intake and ridge vents for exhaust. Stagnant, hot air shortens roof life. Finally, assess the overall structure. The roof must support the added weight of solar panels and racking. A structural engineer can verify this if needed. Do not skip this step. A thorough inspection prevents future problems.
Timing Your Roof Replacement and Solar Installation
Timing these projects is an art. The ideal sequence saves money and time. The best approach is to install the new roof first. Then install the solar panels immediately after. This creates a seamless process. The roofer can install mounting hardware attachments called "standoffs" or "feet" directly onto the new roof deck. They seal these penetrations perfectly during the initial installation. This method provides the best possible waterproofing. It is far superior to adding mounts to an existing roof later. Some homeowners ask about installing both simultaneously. This requires extreme coordination between the roofing and solar crews. It is possible but risky. Miscommunication can lead to installation errors. Another common question is about installing solar first. Then replacing the roof a few years later. This is the most expensive option. You will pay the solar installer to remove the panels. Then you pay the roofer. Then you pay the solar installer again to reinstall the panels. This cost can be $3,000 to $8,000 or more. Plan ahead. If your roof is within 5-7 years of its end-of-life, replace it first. This long-term thinking protects your investment.
Coordinating Contractors: A Step-by-Step Plan
Proper coordination ensures a smooth project. Follow this proven plan. First, hire a licensed roofing contractor. Get a detailed quote for a complete roof replacement. Specify you are adding solar. Discuss the mounting system the solar company will use. The roofer needs to know this to install the correct flashings. Second, hire a certified solar installer. Provide them with the roofer's contact information and project timeline. Have the two contractors communicate directly. They should agree on the mounting hardware and installation method. Third, schedule the work. The roofing work should be completed first. Allow one full day for the roof installation to cure, especially for sealants. Then schedule the solar installation for the following day or week. Fourth, create a single point of contact. This is usually the homeowner or general contractor. This person manages the schedule and handles any issues. Finally, conduct a joint final walkthrough. Both the roofer and solar installer should be present. They can verify the installation is correct and sealed properly. This coordination prevents finger-pointing later.
Choosing the Right Roofing Materials for Solar
Your roofing material choice impacts solar installation and performance. Asphalt shingles are the most common. They work well with standard mounting systems. Choose high-quality, durable architectural shingles. They have a longer warranty and better wind resistance. Look for shingles with a UL 2218 Class 4 impact resistance rating. This rating means they withstand hail better. Metal roofing is excellent for solar. Standing seam metal roofs are ideal. Solar mounts can clamp directly to the seams. This requires no roof penetrations. It is a very clean and secure method. Corrugated metal roofs also work well with special clamps. Tile roofs (clay or concrete) require specialized mounting hardware. The installers use hooks that slide under the tiles. This avoids drilling through the tiles themselves. It protects the tiles from cracking. Synthetic slate or rubber roofs have their own requirements. Always check with both the roofing manufacturer and the solar racking manufacturer. Ensure their products are compatible. Some manufacturers have pre-approved integration systems. For example, GAF Energy makes solar shingles that integrate directly with GAF roofing products. Choosing compatible materials from the start simplifies everything.
Material Comparison: Pros and Cons
- Asphalt Shingles: Pros: Lower cost, easy to install solar on, widely available. Cons: Shorter lifespan (may need replacement before solar panels), can be damaged by frequent foot traffic during maintenance.
- Standing Seam Metal: Pros: Long lifespan (40-70 years), no penetration mounting for solar, highly durable, energy-efficient. Cons: Higher upfront cost, can be noisy during rain.
- Tile (Clay/Concrete): Pros: Very long lifespan (50+ years), classic aesthetic, fire-resistant. Cons: Heavy, requires specialized (more expensive) solar mounting, fragile if walked on.
- Synthetic Slate: Pros: Lightweight, durable, fire-resistant, aesthetic of real slate. Cons: Higher cost than asphalt, requires specific mounting protocols.
Understanding the Solar Installation Process on a New Roof
The installation process is precise. Knowing it helps you supervise the work. First, the roof deck must be clean and dry. The roofer installs the underlayment. This is a water-resistant barrier. It goes over the roof deck. Then they install the shingles or metal panels. During this phase, the roofer installs the solar mounting hardware. These are aluminum or steel "feet" bolted to the roof rafters. The roofer places heavy-duty flashing under the shingles around each foot. They seal it meticulously with roofing cement or specialized tape. This is the most critical step for preventing leaks. After the roof is complete, the solar crew arrives. They attach aluminum rails to the mounted feet. These rails run across the roof. Then they clamp the solar panels to the rails. The electrical work comes next. They run conduit from the panels to an inverter. The inverter changes the DC power to AC power for your home. Finally, they connect the system to your main electrical panel. A city inspector will check the roof and electrical work. Then the utility company grants "permission to operate." Your system goes live.
Key Installation Details to Watch For
As a homeowner, you should verify key details. Ensure the roofers use ice and water shield at all penetrations. This includes the solar mounts, plumbing vents, and chimneys. Ice and water shield is a self-adhering waterproof membrane. It provides superior protection. Check that all nail pops are properly sealed. Nail pops happen when nails back out of the deck. They create leak points. Verify the attic ventilation is not blocked by solar equipment. The solar rails should not cover soffit vents. Inspect the sealant around every mounting foot. It should be a continuous, neat bead. There should be no gaps. Ask about the warranty on the roof penetrations. A good roofer will offer a separate warranty for their work on the solar mounts. This warranty should cover leaks for at least 10 years. Finally, ensure the solar installers use proper fall protection. They should not damage your new roof with ladders or tools. Lay down protective boards if necessary.
Cost Analysis: Roof Replacement with Solar Panels
Combining these projects has unique cost implications. Let's break down real numbers from recent Texas projects. A full roof replacement on a 2,000 sq. ft. home costs between $12,000 and $25,000. The price depends on materials and complexity. A solar panel system for the same home costs between $18,000 and $30,000 before incentives. Doing them together creates some savings. You save on the solar mounting labor. The roofer installs the mounts during the reroof. This saves the solar installer time. You also avoid the future cost of removing and reinstalling solar. That future cost is $3,000 to $8,000. The federal solar tax credit is a major benefit. As of 2025, it is 30% of the total system cost. This includes the cost of the solar panels, inverter, and mounting equipment. It does not include the cost of the roof itself. However, if the roofing work is necessary to support the solar, a portion may qualify. Consult a tax professional. Some utilities and states offer additional rebates. Financing options are available. Many companies offer loans that cover both roof and solar. The combined monthly payment can be offset by lower electric bills. Always get multiple detailed quotes. Compare the cost per watt for solar and the cost per square for roofing.
Real Project Cost Example
Here is an actual project from Spring, Texas in 2024. Home size: 2,300 sq. ft. Roof replacement with architectural shingles and new synthetic underlayment: $19,500. Solar system: 8.5 kW system (24 panels): $24,000 before incentives. Combined project quote: $43,500. Savings from coordinated mounting installation: $1,500. Federal Tax Credit (30% of $24,000): $7,200. Net cost after credit: $36,300. The homeowner financed this with a 15-year loan. Their monthly loan payment is $225. Their average electric bill dropped from $180 to $25. Their net monthly energy cost is now $250 ($225 loan + $25 electric). This is only $70 more than their old $180 electric bill. In 15 years, the loan is paid off. Then they have only a tiny electric bill and 10+ years of free solar power. This example shows the long-term financial benefit.
Navigating Permits, Inspections, and HOA Rules
This process involves multiple approvals. Your roofing contractor pulls a building permit for the roof. Your solar installer pulls an electrical and structural permit for the solar. The city building department must approve both. They will inspect the roof deck before shingles go on. They will inspect the final roof. They will also inspect the solar electrical work. You must pass all inspections to get final approval. Homeowners Associations (HOAs) have their own rules. In Texas, HB 362 (also known as the Texas Solar Rights Act) limits HOA restrictions. HOAs cannot prohibit solar installations. They can have reasonable rules about placement and appearance. They often require approval of the panel layout. Submit your plans to the HOA architectural committee early. Include pictures of the equipment color and placement. Utility companies also have requirements. They must approve the system's connection to the grid. This process is called "interconnection." Your solar installer handles most of this paperwork. As the homeowner, you should ask for copies of all permits and approvals. Keep them with your home records.
Maintenance and Warranty Considerations
A combined system has overlapping warranties. Understand each one. The roofing materials have a manufacturer's warranty. GAF, CertainTeed, and Owens Corning offer warranties of 25 to 50 years. These are prorated and often require certified installation. The roofing contractor's workmanship warranty covers installation errors. This is typically 5 to 10 years. The solar panels have a product warranty (25 years) and a performance warranty (guaranteeing 80-90% output at year 25). The solar inverter has a shorter warranty, usually 10-15 years. The solar installer offers a workmanship warranty. Crucially, you need a warranty that covers the interface. Who is responsible if a leak develops at a solar mount? The best solution is a single contractor who does both roof and solar. If you use two contractors, get a written agreement. It should state which contractor warranties the penetrations. For maintenance, keep the roof surface clean. Trim overhanging tree branches. They drop leaves and sap on panels. Visually inspect the roof and panels after major storms. Check for loose shingles or damaged panels. Have a professional inspection every 5 years. They can check sealant and electrical connections.
Frequently Asked Questions (FAQ)
Can I install solar panels on my existing roof without replacing it?
Yes, but only if your roof is in very good condition and has at least 15-20 years of life remaining. A professional roof inspection is mandatory. Installing on an old roof risks needing to remove the expensive solar system early for a reroof.
How much weight do solar panels add to my roof?
A typical solar system adds 3-4 pounds per square foot. This includes panels and racking. Most well-built modern roofs are designed to handle this load. An engineer can confirm if your roof needs reinforcement, especially on older homes.
Will drilling holes for solar mounts cause my roof to leak?
Properly installed mounts will not leak. The key is expert flashing and sealing. A certified roofer should install the mounting hardware or work directly with the solar crew. The flashing must be integrated under the shingles, not just sealed on top.
What is the best roof direction for solar panels?
In the northern hemisphere, south-facing roofs get the most sun. Southwest and west-facing are also very good. East-facing is acceptable. North-facing is poor for production. Your installer's software will model production for each roof plane.
Do solar panels make my roof hotter or colder?
Solar panels shade the roof surface. This can actually keep the roof deck and attic slightly cooler in summer. This may reduce your cooling costs slightly, adding a small secondary benefit.
What happens if my roof needs repair after solar is installed?
This is a complication. You must hire a roofing company experienced in working around solar. They will temporarily remove panels in the repair area. This adds cost. This is why starting with a new, durable roof is the best strategy.
Can I walk on my roof after solar panels are installed?
You should avoid walking on any roof. It risks damage and is a fall hazard. With solar panels, access is even more restricted. Leave any maintenance or cleaning to professionals with the proper safety equipment.
Real Project Case Study: The Johnson Family Home
The Johnsons had a 20-year-old asphalt shingle roof in Kingwood. They wanted solar to reduce high summer AC bills. Our inspection found their roof was at end-of-life. Shingles were brittle, and granules were gone. We advised a full replacement first. They chose a CertainTeed Landmark PRO architectural shingle with a 50-year warranty. We coordinated with their chosen solar installer. During the roof installation, we installed IronRidge XR100 mounting feet at every rafter location. We used CertainTeed WinterGuard ice and water shield under each foot. The solar crew installed the panels two days later. The total project took one week. One year later, the Johnsons reported their electric bills were 80% lower. After a severe hailstorm, they had no damage to the new Class 4 shingles or panels. The coordinated installation gave them peace of mind. They have a single point of contact for any issues. This case shows the value of integrated planning.
Industry Statistics and Data
Data supports the combined roof-and-solar approach. According to the Solar Energy Industries Association (SEIA), solar installations continue to grow rapidly. The National Renewable Energy Lab (NREL) finds that pairing a new roof with solar increases the home's value. A U.S. Department of Energy study found homes with solar sell faster. The National Roofing Contractors Association (NRCA) emphasizes proper flashing techniques for all penetrations. Roofing material failure is a leading cause of solar system removal. Adhering to the International Residential Code (IRC) is not optional. It is the law. Section R905 and Chapter 32 cover roofing and solar requirements. These statistics and codes form the backbone of professional practice.
Conclusion and Your Next Steps
Combining a roof replacement with solar panel installation is a powerful home upgrade. It increases energy independence, protects your home, and adds value. The key is planning and expert execution. Start with a professional roof inspection from a certified contractor. Be honest about your roof's age and condition. Choose durable, compatible materials designed to last as long as your solar panels. Coordinate your roofing and solar contractors closely. Ensure they communicate about mounting hardware and warranties. Understand the costs, incentives, and financing options. Secure the necessary permits and HOA approvals. Finally, maintain your investment with periodic inspections. This guide provides a roadmap based on real-world experience. Your home is your largest investment. Protect it with a sound roof. Power it with clean solar energy. Take the first step today. Get a qualified roofer to assess your home. Then talk to a certified solar installer. With careful planning, you can enjoy decades of reliable performance and significant savings.