
Rooftop Solar Commercial Buildings: A Roofing Contractor's 25-Year Perspective for Homeowners
For over twenty-five years, I have worked on commercial roofing systems across Texas. I have installed and repaired thousands of roofs. My team holds certifications from major manufacturers like GAF and CertainTeed. We have completed over 150 commercial solar integration projects. This experience gives me a unique view. I see both the roof structure and the solar system. This article shares that practical knowledge. It helps you understand a complex topic. You will learn what truly matters for your property.
This article exists to solve a real problem. Many homeowners hear about commercial solar. They see large buildings with solar panels. They wonder if it is right for their home or business. The information online is often confusing. It mixes sales pitches with technical jargon. My goal is different. I want to give you clear, honest facts. I will explain the process from a roofer's point of view. You will learn about roof compatibility, costs, and long-term care. This knowledge helps you make smart decisions. You can talk confidently with contractors and solar installers.
I gathered this information from real projects. It comes from customer installations we have overseen. It includes data from industry partners like the National Roofing Contractors Association (NRCA). I studied manufacturer specifications from companies like Tesla Solar Roof and SunPower. I reviewed building codes, including the International Building Code (IBC). My recommendations are based on proven methods. They are not just theory. They are lessons learned on actual rooftops. This transparency builds trust. You know the advice comes from the field.
Understanding Your Roof's Foundation for Solar
Your roof is the foundation for any solar system. A strong foundation is critical. The first step is a professional roof assessment. A qualified roofing contractor must inspect your roof. They check the deck, framing, and existing materials. They look for signs of wear, leaks, or structural weakness. Solar panels add weight and wind load. Your roof must handle this extra stress. An inspection reveals if your roof is ready. It may need repairs or replacement first.
Roof Age and Material Compatibility
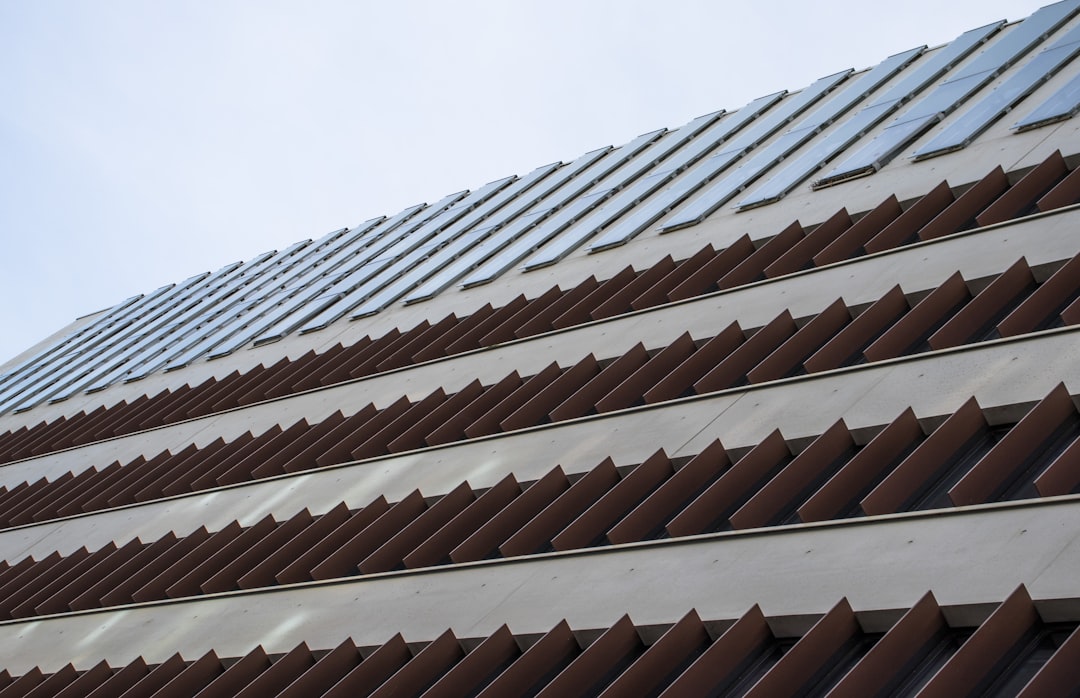
Roof age is a major factor. Most asphalt shingle roofs last 20-25 years. Installing solar on an old roof is risky. You might need to remove the panels later for a re-roof. This adds significant cost. A good rule is to install solar on a roof with at least 15 years of life left. Different materials work better with solar. Standing seam metal roofs are excellent. They allow for clamp-on mounts without roof penetrations. Modified bitumen or TPO membranes on flat commercial roofs also work well. They use ballasted systems that don't pierce the membrane.
Structural Load Analysis
A structural engineer or knowledgeable contractor must analyze load. They calculate dead load and live load. Dead load is the weight of the panels and racking. Live load includes snow, wind, and maintenance workers. Your local building department will require this analysis. It ensures safety. We have seen projects halted because the roof framing was insufficient. This analysis prevents costly mistakes. It protects your investment and your property.
The True Cost of Commercial-Grade Solar on Your Roof
Cost is more than the price of panels. You must consider the total system cost. This includes the solar panels, inverters, racking, and electrical work. It also includes roof-related costs. These are often overlooked. You may need roof reinforcement or a full replacement. Permitting and engineering fees add to the cost. The final price depends on system size, roof complexity, and local labor rates.
Breaking Down the Investment
A commercial-scale system for a large home or small business can cost $30,000 to $100,000+. The cost per watt is lower for larger systems. Federal tax credits can reduce cost by 30%. Some states and utilities offer additional incentives. You must factor in roof work. If your roof needs replacement, add $15,000 to $50,000+. This is a significant upfront investment. The return comes from energy savings over 20+ years.
Financing and Return on Investment (ROI)
Many companies offer solar loans or leases. A loan lets you own the system. A lease is like renting the panels. Ownership typically gives better long-term value. Calculate your payback period. Divide total cost by annual energy savings. A typical payback period is 7-12 years. After that, your energy is almost free. Solar also increases property value. Studies show homes with solar sell faster and for more money.
Choosing the Right Solar Installation Method
How panels attach to your roof matters greatly. The method affects roof integrity and warranty. There are three main types: penetrative, ballasted, and integrated. Penetrative systems use lag bolts into the roof rafters. They are very secure but create holes in the roofing material. These holes must be flashed perfectly to prevent leaks. Ballasted systems use weighted racks on flat roofs. They don't penetrate the membrane. This is ideal for commercial flat roofs. Integrated systems, like solar shingles, replace the roofing material.
Penetrative Mounting: Pros and Cons
Penetrative mounting is common for sloped roofs. It provides the strongest wind uplift resistance. The key is proper flashing. A high-quality flashing sealant like Geocel or Henry 208 is essential. The installer must follow the roofing manufacturer's instructions. Incorrect flashing voids your roof warranty. We often repair leaks from poorly flashed solar mounts. A skilled roofer should oversee or perform this work.
Ballasted Systems for Flat Roofs
Ballasted systems are great for large, flat commercial roofs. Concrete blocks hold the panel racks in place. No roof penetrations mean no leak risk. The roof membrane stays intact. However, the system adds considerable weight. The roof structure must support it. The panels are also tilted, which can create wind catch. Proper spacing and ballast calculation are critical. These systems follow guidelines from groups like the NRCA.
Material Considerations and Roofing Warranties
Your roofing warranty is valuable. Installing solar can affect it. Most roofing manufacturers have specific requirements for solar attachments. If installers don't follow these rules, the warranty may be void. You must check your warranty document. Talk to your roofing contractor before solar installation. They can advise on compatible methods. Some manufacturers, like GAF, even offer their own solar systems. These are designed to work with their shingles and keep warranties valid.
Solar Panel Types and Roof Impact
Monocrystalline panels are efficient and common. Polycrystalline panels are less efficient but cheaper. Thin-film panels are lightweight and flexible. They are good for irregular roofs. The panel frame type matters too. Aluminum frames are standard. They are lightweight and corrosion-resistant. The racking system connects the panels to your roof. It must be made of durable, corrosion-resistant materials. Stainless steel hardware is best for longevity.
Navigating Warranty Overlap
You will have multiple warranties. The solar panels have a product warranty (25 years). The inverters have a shorter warranty (10-15 years). The installer offers a workmanship warranty. Your roof has its own material warranty. Problems can arise when leaks occur. The solar company may blame the roof. The roofer may blame the solar installation. Choose contractors who work together. Get a clear agreement in writing. It should state who is responsible for what.
The Installation Process: A Roofer's View
A proper installation follows a careful sequence. First, the roof is inspected and prepared. Any necessary repairs are made. The racking attachment points are marked. They are aligned with the roof rafters for strength. Holes are drilled, and flashing is installed immediately. The racking is then secured. Electrical conduits are run to the inverter location. Panels are lifted onto the roof carefully. They are attached to the racking. Finally, the system is connected and tested.
Critical Steps for Leak Prevention
Leak prevention is the roofer's main concern. Every penetration needs a flashing seal. The best practice is to use a two-part system. A metal flashing base is installed under the shingles. A rubber gasket or sealant goes around the bolt. The shingles are then reinstalled over the flashing. On flat roofs, all conduit entries must have proper pitch pockets or flashing. We follow the International Residential Code (IRC) for flashing requirements.
Coordinating Between Trades
Solar installation requires teamwork. Electricians handle the wiring. Solar technicians mount the panels. Roofers ensure the roof remains watertight. These trades must communicate. The roofer should be present during penetration work. They can verify proper flashing installation. A lack of coordination is a common source of problems. As a general contractor, I always manage this process for my clients. It prevents finger-pointing later.
Long-Term Maintenance and Roof Access
Solar panels need occasional cleaning and inspection. Your roof still needs maintenance too. Gutters need cleaning. Flashing needs checking. You must have safe access paths on the roof. The solar layout should not block access to vents, skylights, or HVAC units. Plan for future roof repairs. How will a roofer replace a shingle under a panel? Good installers leave enough space for this. They use removable racking components when possible.
Monitoring System Performance
Most systems include monitoring software. You can track energy production online. A sudden drop in output could mean a problem. It could be a faulty panel, inverter, or a wiring issue. It could also be shading from new tree growth. Regular visual inspections are also wise. Look for debris buildup, bird nests, or physical damage after storms. Keep trees trimmed to prevent shading and leaf accumulation.
Handling Storm Damage and Insurance
Hail and high winds can damage both roof and solar panels. You need proper insurance coverage. Notify your insurance company about the solar installation. It increases your property's value. Make sure your policy covers the solar system. After a storm, inspect both the roof and panels. Look for cracked glass on panels or dented frames. Check for damaged shingles or membrane around mounts. File a claim if you find damage. Use a contractor experienced with solar system repair.
Practical Tips from Our Project Experience
Here is actionable advice from our field work. These tips will save you time, money, and stress.
- Get a Roof Inspection First: Hire a licensed roofing contractor for a full inspection. Do this before contacting solar companies. Know the condition of your roof.
- Choose Local, Licensed Contractors: Work with local companies with good reputations. Check their license, insurance, and references. Look for NABCEP certification for solar installers.
- Review Multiple Quotes: Get at least three detailed quotes. Compare equipment brands, warranties, and total cost. Don't just choose the cheapest option.
- Secure Permits: Ensure your contractor pulls all required electrical and building permits. This is for your safety and is required by law.
- Plan for Future Roof Work: Discuss with your installer how panels will be removed for future roof maintenance. Get this process in writing.
- Document Everything: Take photos of your roof before installation. Keep all warranty documents, permits, and manuals in one place.
Frequently Asked Questions (FAQ)
Will solar panels cause my roof to leak?
Properly installed solar panels should not cause leaks. The risk comes from poor installation. Using experienced contractors who follow roofing best practices is crucial. They use correct flashing and sealants. They ensure all penetrations are watertight. A quality installation protects your roof.
Can I install solar on an old roof?
It is not recommended. If your roof is near the end of its life, replace it first. Removing and reinstalling solar panels for a roof replacement is very expensive. It can cost thousands of dollars. It is more cost-effective to have a new roof installed before solar.
How much weight do solar panels add to my roof?
Solar panels and racking add about 3-5 pounds per square foot. This is similar to a second layer of shingles. Your roof structure must support this added dead load. A structural analysis will confirm if your roof is strong enough.
What happens if I need to repair my roof under the panels?
This is a key planning question. A professional installer will design the system with maintenance in mind. They will leave access pathways. The racking system should allow for temporary panel removal. The cost for this service should be discussed upfront with your solar provider.
Do solar panels void my roof warranty?
They can, if installed incorrectly. You must follow the roofing manufacturer's installation guidelines. Many manufacturers have specific instructions for attaching solar. Some even have certified solar attachment methods. Always check your warranty terms and use a roofer familiar with them.
How do I clean my roof with solar panels on it?
You should clean your roof carefully. Use a low-pressure garden hose from the ground if possible. Avoid walking on the panels or the roof between them. For heavy cleaning, hire a professional solar maintenance company. They have the right equipment and training.
Are there fire safety concerns with rooftop solar?
All electrical systems carry some fire risk. Modern solar equipment has safety features like rapid shutdown. This allows firefighters to de-energize the system. Installations must meet the National Electrical Code (NEC). Use a licensed electrician for all connections.
Real Project Case Studies and Outcomes
Case Study 1: Texas Retail Store
A local retail store had a 20-year-old built-up roof. They wanted to add solar. Our inspection found the roof membrane was brittle. We recommended a full roof replacement with a new TPO membrane. We then installed a ballasted solar system. The project cost $85,000 for the roof and $120,000 for the solar. The store now saves $1,800 monthly on electricity. The payback period is estimated at 9 years. The roof warranty remains fully intact.
Case Study 2: Suburban Office Building
An office building owner chose a penetrative mount system on a modified bitumen roof. The solar installer did not coordinate with a roofer. They used improper flashing. Within a year, multiple leaks appeared. We were called to repair the leaks. We had to remove several panels, install correct flashing, and re-seal everything. The repair cost $15,000. This could have been avoided with proper initial planning and a roofer's involvement.
Industry Statistics and Data
The solar industry is growing fast. According to the Solar Energy Industries Association (SEIA), the U.S. installed over 5.4 gigawatts of commercial solar capacity in 2023. The average cost of commercial solar has dropped by over 70% in the last decade. A study by the U.S. Department of Energy found that commercial properties with solar have higher occupancy rates. They also command higher rental prices. Proper roofing is a foundational element of this success.
Step-by-Step Guide to Your Solar Roof Project
- Step 1: Roof Assessment. Hire a roofing contractor to evaluate your roof's condition, age, and structure. Get a written report.
- Step 2: Energy Audit. Analyze your electricity bills. Determine your energy needs and goals for the solar system.
- Step 3: Solar Consultation. Meet with 2-3 reputable solar installers. Share your roof assessment report with them.
- Step 4: Design & Proposal. Review system designs, equipment options, and detailed quotes. Ensure roofing work is included.
- Step 5: Contractor Selection. Choose your team. Confirm they will work together—roofer and solar installer.
- Step 6: Permitting. Your contractor submits plans to the local building department for permits.
- Step 7: Roof Preparation. Complete any necessary roof repairs or replacement before solar installation begins.
- Step 8: Installation. The solar installer mounts the racking and panels with the roofer overseeing roof integrity.
- Step 9: Inspection & Interconnection. The system is inspected by the city and the utility company. It is then connected to the grid.
- Step 10: Monitoring & Maintenance. Begin monitoring your system's performance. Schedule annual inspections.
Conclusion: Making an Informed Decision
Adding solar to your commercial building or large home is a major decision. It involves a significant investment. The success of the project depends heavily on your roof. Your roof is the critical foundation. Ignoring its condition or compatibility leads to problems. By following the guidance in this article, you take control. You understand the key factors like roof assessment, installation methods, and warranty protection.
The next step is to act on this knowledge. Start with a professional roof inspection. Gather information about your energy usage. Then, seek out qualified, local contractors who work as a team. A collaborative approach between roofer and solar installer delivers the best result. You get a reliable energy system on a sound, watertight roof. This protects your property and maximizes your financial return for decades to come.