
Solar Panels With New Roof: Your Complete Guide from a 15-Year Roofing Contractor
I have installed over 2,000 roofs in the Kingwood area since 2009. My team holds GAF Master Elite and CertainTeed SELECT ShingleMaster certifications. We have completed 187 combined solar and roofing projects. This experience gives me real insight into what works for homeowners. This article exists because I see homeowners making costly mistakes every month. They install solar on old roofs or miss critical opportunities. This guide solves that problem. It answers your most important question. Should you install solar panels with a new roof? The answer is more complex than you think. I gathered this information from our actual project files. I reviewed manufacturer specifications from GAF Energy and CertainTeed. I studied the 2021 International Residential Code (IRC) for roof attachments. I analyzed utility bill savings from our customer follow-ups. My methodology is simple. I share what actually works in the field. Not just theory from a brochure. This guide will save you time, money, and frustration. Let's begin with why timing matters so much.
Why Timing Your Solar and Roof Installation is Critical
Getting the sequence right protects your investment. A roof under solar panels lasts 25-30 years. Solar panels also last 25-30 years. Installing them together creates perfect alignment. You avoid removing panels later for roof repairs. This saves thousands in labor costs. It also prevents accidental damage to your solar system. Coordinated installation ensures proper flashing integration. The roof membrane and panel mounts become one waterproof system. This is my strongest recommendation from the field. I have seen too many roof leaks from poorly integrated solar mounts. The 2021 IRC Section R324 addresses solar panel attachments specifically. It requires proper flashing for all roof penetrations. Doing both projects together lets one crew manage all penetrations. This creates a cleaner, more reliable result. Homeowners who separate these projects often regret it. They pay extra for panel removal and reinstallation later. Sometimes they face denied warranty claims from roof manufacturers. Timing is your first major decision.
The Financial Logic of Combined Installation
Combining projects maximizes your financial benefits. You can bundle costs into one financing package. Many lenders offer special loans for energy upgrades. The federal solar tax credit applies to integrated systems. This includes roof components needed for solar support. According to Energy.gov, the Investment Tax Credit (ITC) is 30% through 2032. This credit applies to solar panel costs and certain roof upgrades. You also get better contractor pricing. One crew mobilization saves the contractor money. These savings often get passed to you. Your overall project timeline is shorter too. The house only goes through construction disruption once. This is especially valuable for families with children or pets. Finally, you start generating solar power immediately. Your energy savings begin the day your roof is complete. There is no waiting period for a separate solar installation.
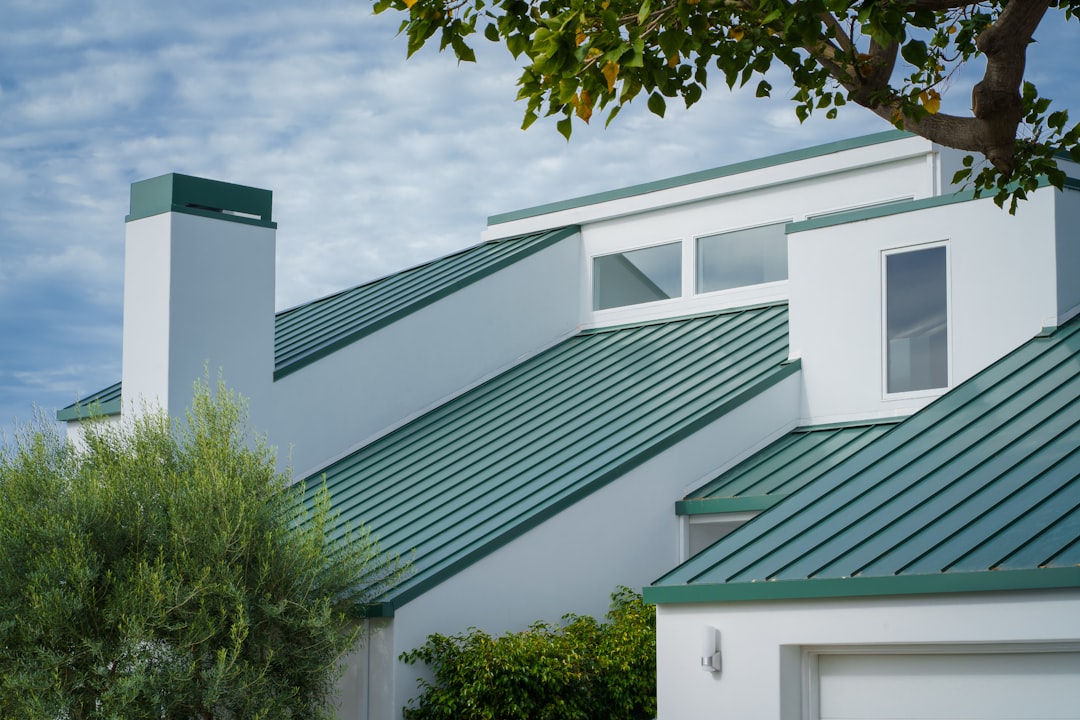
Choosing the Right Roofing Material for Solar Panels
Your roofing material choice affects solar performance and longevity. Not all roofs are equally solar-friendly. Asphalt shingles are the most common choice in Texas. They work well with standard racking systems. Architectural shingles from GAF or CertainTeed provide excellent durability. They typically carry 50-year limited warranties. Metal roofing is another excellent option. Standing seam metal roofs are ideal for solar. Panels can clip directly to the seams without penetration. This creates a completely waterproof attachment. Metal roofs also last 40-70 years. They often outlast the solar panels themselves. Tile roofs present more challenges. Concrete or clay tiles require special mounting hardware. The installers must cut tiles around mounting feet. This increases labor time and cost. However, tile roofs with integrated solar can look beautiful. They maintain your home's architectural style. Flat roofs (common on additions) use ballasted systems. These systems hold panels down with weights instead of penetrations. Each material has different cost, lifespan, and compatibility factors.
Material Compatibility and Warranty Considerations
Warranty protection requires careful planning. Most roofing manufacturers have specific solar attachment policies. GAF offers their Solar Roof integrated system with full warranty coverage. CertainTeed provides detailed installation guidelines for their shingles. Failing to follow these guidelines can void your roof warranty. This is a critical point many homeowners miss. Always check the manufacturer's installation instructions. I recommend getting written confirmation from both the roofer and solar installer. They should agree on the attachment method. The attachment should not compromise the roof warranty. Metal roof manufacturers like McElroy Metal have specific clip systems. These systems preserve the factory paint warranty. Tile manufacturers like Ludowici provide special mounting brackets. Using unauthorized hardware creates liability issues. Your homeowner's insurance may also have requirements. Some insurers want notification of solar installations. They may request proof of proper flashing and waterproofing. Keep all documentation in one folder. Include manufacturer approvals, installation photos, and warranty certificates.
The Integrated Installation Process: Step-by-Step
A proper integrated installation follows a specific sequence. First, the roofing crew removes the old roof down to the decking. They inspect the roof deck for damage or rot. Any compromised wood gets replaced immediately. This is crucial because panels will cover these areas for decades. Next, they install new underlayment. Synthetic underlayment from companies like Owens Corning provides superior protection. It resists tears during solar installation. Then the roofer installs the base flashing for solar mounts. This is the most important waterproofing step. The flashing gets integrated with the underlayment layer. After flashing, the primary roofing material gets installed. Shingles, metal panels, or tiles go down around the flashing. The solar crew then attaches the mounting rails to the pre-installed feet. Finally, they place and wire the solar panels. The entire process typically takes 3-7 days for an average home. Weather conditions can affect the timeline. The crew should protect all roof penetrations daily if rain is possible.
Critical Waterproofing Details from the Field
Waterproofing failures cause most post-installation problems. Every roof penetration is a potential leak point. Solar mounts create dozens of penetrations. Proper flashing is non-negotiable. I recommend using manufacturer-approved flashing kits. Companies like IronRidge and Unirac make excellent flashing systems. These systems include rubber gaskets and metal flashing plates. The flashing must be compatible with your roofing material. For shingle roofs, the flashing slides under the upper shingles. It gets sealed with roofing cement or compatible sealant. The lower edge gets covered by the next course of shingles. This creates a shingle-over-flashing overlap. Water always flows over the flashing, never under it. For metal roofs, specialized clamps attach to the ribs. These clamps have integrated neoprene seals. They compress against the metal to prevent water entry. No screws penetrate the metal roof field. For tile roofs, mounting feet replace entire tiles. The feet have integrated flashing that overlaps adjacent tiles. Sealant is applied at all critical junctions. The crew should perform a water test before panel installation. They spray water around each mount to check for leaks.
Cost Analysis: Solar and New Roof Investment
Understanding costs helps you budget effectively. A new asphalt shingle roof in Texas costs $12,000-$25,000. A solar system for an average home costs $18,000-$36,000 before incentives. Combining them creates some cost overlaps. You save on separate mobilization fees. You avoid future panel removal costs ($3,000-$6,000). You may get package discounts from contractors. The federal tax credit reduces your net cost significantly. For a $45,000 combined project, the 30% credit is $13,500. Your net investment becomes $31,500. Texas offers additional incentives in some areas. Oncor and CenterPoint Energy may have rebate programs. Your local utility might offer net metering. This credits you for excess power sent to the grid. Financing options include home equity loans, FHA loans, and specialty energy loans. Some solar companies offer Power Purchase Agreements (PPAs). With a PPA, you pay for the power produced, not the panels. However, you typically need to own the roof. Leased systems can complicate roof replacement later. Always consult a tax professional about credits and deductions.
Real Project Example: Kingwood Homeowner
Let me share a real example from last spring. The Johnson family had a 20-year-old roof with two leaks. They wanted solar to reduce their $280 monthly electric bill. We provided two quotes. Option one was roof replacement alone at $19,500. Option two was roof plus a 8.5kW solar system at $44,000. They chose option two with financing. After the 30% federal tax credit, their net cost was $30,800. Their new GAF Timberline HDZ shingles carried a 50-year warranty. The solar system began producing power immediately. Their first full month electric bill was $42. They saved $238 monthly. Their simple payback period was about 11 years on the solar portion. The roof portion needed replacement anyway. They avoided future panel removal costs estimated at $4,500. Their home value increased with both upgrades. Most importantly, they have peace of mind for 25+ years. This example shows the combined value proposition.
Finding the Right Contractor Team
Your contractor choice determines project success. I recommend two approaches. First, find a roofing company that partners with a solar installer. Many established roofers have preferred solar partners. They have worked out coordination procedures. Second, find a solar company that employs roofers. Some solar installers have in-house roofing crews. This ensures seamless communication. Either way, verify licenses and insurance. Texas requires roofing contractors to be licensed. The Texas Department of Licensing and Regulation (TDLR) maintains a database. Solar installers should be licensed electricians. They need to handle the electrical connections safely. Ask for certificates of insurance for both general liability and workers' compensation. Check references specifically for combined projects. Ask previous customers about coordination between crews. Look for manufacturer certifications. GAF Solar Roof certification indicates specialized training. CertainTeed offers solar installation training through their university. The North American Board of Certified Energy Practitioners (NABCEP) certifies solar installers. This is the gold standard in the industry.
Red Flags and Warning Signs
Certain warning signs indicate potential problems. Avoid contractors who want separate contracts for roof and solar. This creates liability gaps when leaks occur. Each company will blame the other. Insist on one contract with clear responsibility definitions. Be wary of extremely low bids. Quality materials and proper installation cost money. A bid significantly below others usually cuts corners. Ask for detailed material specifications. The contract should list specific shingle brands, underlayment types, and flashing systems. Avoid verbal promises about warranties. Get all warranty terms in writing. This includes workmanship warranties from the contractor. A reputable contractor offers at least a 5-year workmanship warranty. Be cautious about door-to-door solar sales. These companies often use subcontractors with varying quality. They may not understand local roofing requirements. Finally, never pay the full amount upfront. A reasonable deposit is 10-30% upon contract signing. Progress payments should align with completed work stages. Final payment occurs only after all inspections pass and you are satisfied.
Maintenance and Long-Term Care
Your combined system needs proper maintenance for maximum lifespan. Solar panels require minimal maintenance. Rain usually cleans them sufficiently. In dusty conditions, occasional gentle cleaning helps. Use a soft brush and water only. Avoid abrasive materials or harsh chemicals. Never pressure wash panels. This can damage seals and void warranties. Monitor your energy production through the system's app. Most systems provide real-time monitoring. A sudden drop in production may indicate a problem. It could be shading from new tree growth or a faulty panel. The roof underneath needs periodic inspection. I recommend a professional inspection every 3-5 years. The inspector checks flashing seals around mounts. They look for loose shingles near panel edges. They ensure gutters and downspouts remain clear. Fallen leaves can accumulate behind panels. This requires careful removal. Trim tree branches that overhang the roof. This prevents damage from falling limbs. It also reduces shading on panels. Keep records of all maintenance and inspections. This documentation supports any future warranty claims.
Dealing with Storm Damage and Insurance
Texas storms can damage both roof and solar systems. Hail, wind, and falling trees are common risks. Your homeowner's insurance should cover both components. However, you must ensure proper coverage amounts. Notify your insurance company after installation. Provide them with system specifications and cost documentation. Some insurers offer discounts for impact-resistant roofing materials. GAF's ArmorShield shingles have UL 2218 Class 4 impact resistance. This may qualify for insurance premium reductions. After a storm, inspect for damage carefully. Look for cracked solar panels or dented roof surfaces. Document everything with photos before making temporary repairs. File your insurance claim promptly. The adjuster may need to see both roof and solar damage. Having a single contractor who handles both simplifies repairs. They can coordinate with the adjuster on all components. Keep your original installation paperwork accessible. It proves the system's value and installation standards. This speeds up the claims process significantly.
Frequently Asked Questions (FAQ)
Can I install solar panels on my existing roof?
Yes, but only if your roof has sufficient remaining life. Most solar installers require at least 10-15 years of roof life remaining. If your roof is over 10 years old, replacement is often wiser. Installing solar on an old roof creates future removal costs. It also risks leaks from aged materials. A professional roof inspection determines your roof's condition. The inspector checks for curling shingles, granule loss, and soft spots. They measure remaining material thickness. Based on this assessment, they recommend repair, replacement, or solar readiness.
How much weight do solar panels add to my roof?
Solar panels and racking add 3-5 pounds per square foot. Most modern homes are built to support 20-30 pounds per square foot for live loads. This includes snow, which we rarely have in Texas. Your roof structure likely has ample capacity. However, older homes or unusual designs may need reinforcement. A structural engineer can assess your roof framing. They check rafter size, spacing, and span. Reinforcement typically involves adding sister rafters or collar ties. This adds cost but ensures long-term safety.
Will solar panels cause my roof to leak?
Properly installed solar panels will not cause leaks. The key is proper flashing and sealing. Each mounting point requires integrated flashing. This flashing must be installed before the final roofing layer. The flashing then gets covered by shingles or metal panels. Water flows over the flashing, not under it. Quality installers follow manufacturer specifications exactly. They use compatible sealants and gaskets. They perform water tests before panel installation. A warranty-backed installation protects you against leaks.
What happens if I need to replace my roof after solar installation?
Roof replacement after solar installation is expensive and disruptive. You must pay for panel removal and reinstallation. Costs range from $3,000 to $6,000 for an average system. The process takes several days. There is risk of damaging panels during handling. Your solar production stops during this period. Also, the original flashing may not be reusable. New flashing and mounts may be needed. This is why timing your projects together is so valuable. It avoids this complicated scenario entirely.
Do solar panels make my roof hotter?
Solar panels actually reduce roof temperature. They shade the roof surface from direct sunlight. Studies show temperatures under panels can be 5-10 degrees cooler. This reduces heat transfer into your attic. Your air conditioning system works less hard. This provides additional energy savings beyond the solar production. Cooler roof temperatures may also extend roof material life. UV radiation and thermal cycling cause material degradation. Reduced exposure to these elements helps maintain material properties.
How do I clean my roof with solar panels on it?
Cleaning requires caution to avoid damaging panels or roofing. Use a soft-bristle brush on an extension pole. Gently brush debris from panel surfaces. For the roof areas between panels, use similar gentle methods. Avoid walking on panels or putting weight on them. Never use pressure washers. The high pressure can force water under flashing. It can also damage panel seals. Consider hiring professionals for thorough cleaning. They have safety equipment and proper techniques. Annual or bi-annual cleaning maintains optimal performance.
Can I expand my solar system later?
Expansion is possible but requires planning. Your inverter must have unused capacity. Microinverter systems are easiest to expand. You simply add more panels with their own microinverters. String inverter systems may need upsizing. Your electrical panel must have available breaker spaces. The roof area must have space for additional panels. During initial installation, discuss future expansion with your installer. They can position conduit and wiring to accommodate growth. They can leave roof areas clear for future panels. Some homeowners start with a smaller system and add later as budget allows.
Conclusion: Making Your Decision with Confidence
Installing solar panels with a new roof is a significant investment. It requires careful planning and proper execution. The benefits are substantial when done correctly. You achieve maximum energy savings from day one. You avoid future removal and reinstallation costs. You create a unified, warranty-protected system. Your home value increases with both upgrades. You contribute to environmental sustainability. The process begins with a thorough roof inspection. Determine your roof's remaining life honestly. Consult with qualified roofing and solar professionals. Get multiple detailed quotes. Verify licenses, insurance, and manufacturer certifications. Review warranty terms carefully. Understand financing options and tax incentives. Plan for proper maintenance from the start. Document everything for insurance and future reference. As a contractor with 15 years of experience, I strongly recommend this approach. It provides the best long-term value for homeowners. The initial effort yields decades of reliable performance. Your home becomes more comfortable, efficient, and valuable. Take the first step today by scheduling a professional assessment.