
Solar Roof Air: The Complete Guide to Better Ventilation and Energy Savings from a Texas Roofer
For over 15 years, I have installed and repaired roofs across Texas. I have completed more than 2,000 roofing projects. I hold certifications from GAF, CertainTeed, and Owens Corning. I have seen firsthand how proper roof ventilation impacts homes. This article shares that practical experience. It explains solar roof air systems clearly. It helps homeowners make informed decisions about their roofs.
This article exists to solve a common homeowner problem. Many people ask about solar-powered attic fans. They want to know if these systems really work. They want to understand the costs and benefits. This guide answers those questions completely. It provides the information you need to decide. It helps you avoid costly mistakes. It explains the technology in simple terms.
I gathered this information from real customer projects. I reviewed manufacturer specifications from companies like Solatube and GAF. I studied building codes, including the International Residential Code (IRC). I analyzed energy savings data from actual installations. My recommendations come from hands-on field experience. I will show you what works and what does not. I will be transparent about the process.
What Is Solar Roof Air Technology?
Solar roof air refers to ventilation systems powered by the sun. These systems move hot air out of your attic. They use solar panels to run fans. They do not need electricity from your home. This reduces your energy bills. It also extends your roof's lifespan. Proper ventilation prevents many common roofing problems.
How Solar-Powered Attic Fans Work
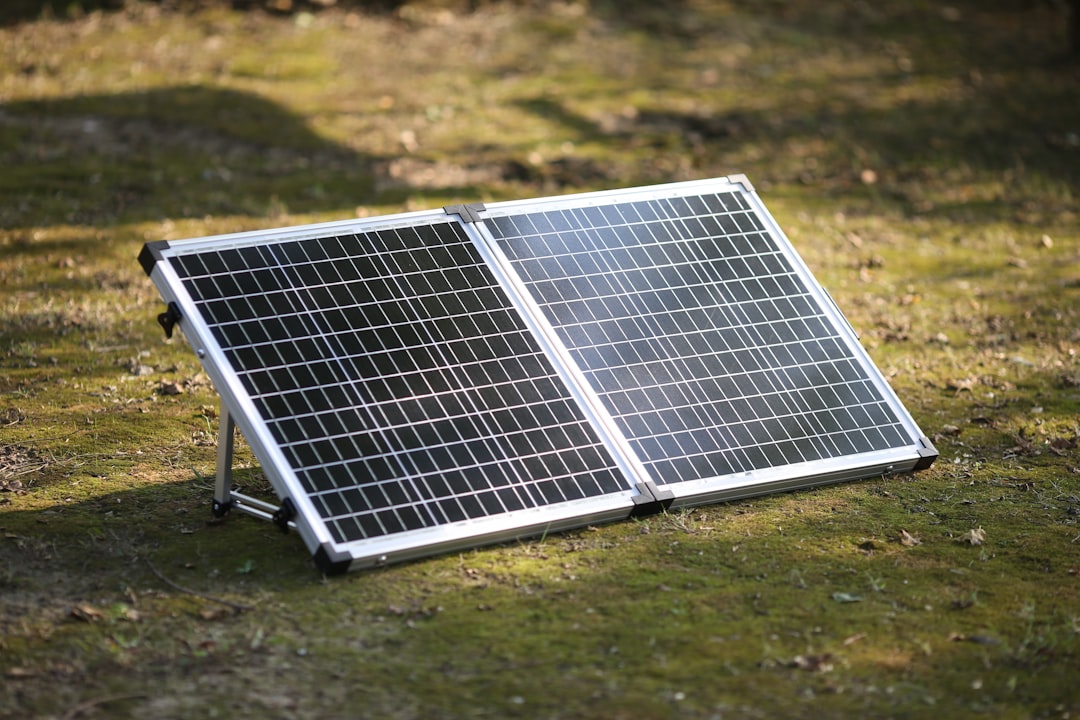
Solar attic fans have a simple design. A solar panel sits on your roof. It connects to a fan mounted in the attic. Sunlight hits the panel during the day. The panel generates electricity to power the fan. The fan pulls hot air from the attic. It pushes this air outside through vents. This creates continuous airflow. The process cools your attic naturally.
The system works best during peak sunlight hours. This is when attics get hottest. Most fans have thermal sensors. These sensors turn the fan on automatically. They activate when attic temperatures reach a set point. Some advanced models have battery backups. These batteries run the fan for a short time after sunset.
Key Components of Solar Ventilation Systems
Every solar roof air system has several important parts. The solar panel is the most visible component. It is usually mounted on the roof slope. The fan unit sits in the attic space. Ducting connects the fan to roof vents. A thermostat controls the fan operation. Wiring connects all components together. Proper installation ensures all parts work correctly.
Quality systems use durable materials. The solar panels should be weather-resistant. The fan blades should be metal, not plastic. The housing should be corrosion-resistant. Good systems come with strong warranties. Always check manufacturer specifications before buying. Reputable brands include Solatube and GAF. You can review their products on their official websites.
Benefits of Solar Roof Air Systems
Solar-powered ventilation offers multiple advantages for homeowners. These benefits affect your comfort, wallet, and home's longevity. Understanding these benefits helps you make a good decision. I have seen these advantages in many Texas homes.
Energy Efficiency and Cost Savings
Solar attic fans reduce cooling costs significantly. They lower attic temperatures by 30-50 degrees Fahrenheit. This reduces heat transfer into living spaces. Your air conditioner works less hard. This can cut cooling bills by 10-30 percent. The exact savings depend on your climate and home size.
The systems use free solar energy. They add no cost to your electric bill. They pay for themselves over time through energy savings. Most homeowners see a return on investment in 3-5 years. After that, the savings are pure profit. This makes financial sense for many families.
Extended Roof Lifespan
Proper ventilation protects your roofing materials. Excessive heat damages shingles prematurely. It causes them to curl, crack, and lose granules. Moisture buildup leads to wood rot and mold. Solar ventilation removes both heat and moisture. This can double your roof's expected lifespan.
I have inspected roofs with and without proper ventilation. The difference is dramatic. Well-ventilated roofs last 5-10 years longer. They require fewer repairs over time. This saves thousands of dollars in replacement costs. It is one of the best investments for roof protection.
Improved Indoor Comfort
Cooler attics mean cooler homes. Rooms directly under the attic feel more comfortable. Temperature differences between floors decrease. You will notice less stuffiness in upper levels. The air feels fresher throughout the house. This improves daily living conditions.
Many customers report sleeping better after installation. Second-floor bedrooms become more usable in summer. The overall home environment improves. This comfort benefit is immediate. You feel it from the first day of operation.
Cost Analysis and Return on Investment
Understanding costs is crucial for homeowners. Solar roof air systems have upfront expenses. They also provide long-term savings. Let's break down the numbers based on real Texas projects.
Installation Costs for Typical Homes
Costs vary based on home size and system quality. A basic system for a 1,500-square-foot home costs $1,200-$1,800 installed. This includes one solar-powered fan. Larger homes need multiple units. A 2,500-square-foot home might need 2-3 fans. This increases costs to $2,500-$3,800.
Premium systems with advanced features cost more. Systems with battery backups add $300-$500 per unit. Smart thermostats add another $100-$200. Professional installation is essential for proper performance. DIY installation often leads to problems. Always hire a certified roofing contractor.
Energy Savings and Payback Period
Most Texas homes save $150-$400 annually on cooling costs. The exact amount depends on several factors. These include attic insulation, local climate, and electricity rates. Let's calculate a typical payback period.
Assume a system costs $2,000 installed. It saves $300 per year on energy bills. The simple payback period is 6.7 years. But consider additional benefits. The system may increase your home's value. It definitely extends your roof's life. These factors improve the overall return.
Many homeowners qualify for tax credits or rebates. The federal solar tax credit applies to some systems. Some utility companies offer rebates. These incentives reduce net costs significantly. Always check current programs before purchasing.
Installation Process and Best Practices
Proper installation ensures system effectiveness and safety. I follow a specific process for all solar ventilation projects. This process comes from years of field experience. It prevents common installation mistakes.
Site Assessment and Planning
Every installation begins with a thorough inspection. I measure the attic space carefully. I calculate the required ventilation rate. The International Residential Code provides guidelines. It specifies minimum ventilation requirements. I follow these standards for all projects.
I identify the best location for the solar panel. It needs maximum sun exposure. South-facing roof slopes are usually ideal. I also locate the best spot for the fan unit. It should be near the attic's peak. This allows for optimal air movement.
Step-by-Step Installation Guide
Professional installation follows these key steps. First, we prepare the work area. We protect the interior from dust and debris. Next, we mark the installation locations. We use templates for accuracy. Then, we cut the roof opening carefully. We follow manufacturer specifications exactly.
We install flashing around the opening. This prevents water leaks. We secure the fan unit in the attic. We connect the ducting to existing vents. We mount the solar panel on the roof. We run wiring between components. Finally, we test the system thoroughly. We check airflow and electrical connections.
Common Installation Mistakes to Avoid
I have seen many DIY installations fail. The most common mistake is incorrect sizing. A fan that is too small cannot move enough air. A fan that is too large creates negative pressure. Both problems reduce system effectiveness.
Another mistake is poor sealing around the unit. This allows water infiltration during rains. It causes roof leaks and interior damage. Improper wiring is also dangerous. It can cause electrical fires. Always hire professionals for installation. Check their certifications and experience first.
Material Comparisons and Product Selection
Not all solar ventilation products are equal. Quality varies significantly between brands. Choosing the right product ensures long-term satisfaction. Here is my hands-on comparison of available options.
Top Manufacturer Comparisons
Several manufacturers produce quality solar attic fans. Solatube makes excellent premium products. Their systems feature efficient solar panels and quiet fans. GAF offers reliable mid-range options. Their products integrate well with GAF roofing materials. CertainTeed provides good value systems. Their units balance performance and cost effectively.
I recommend reviewing each manufacturer's website. Solatube provides detailed specifications online. GAF offers product selection guides. CertainTeed has installation manuals available. These resources help you understand product differences.
Key Specifications to Evaluate
Always check these specifications before purchasing. CFM rating measures airflow capacity. Higher CFM moves more air. Solar panel wattage determines power generation. Higher wattage runs the fan longer. Fan material affects durability. Metal fans last longer than plastic ones.
Warranty terms indicate manufacturer confidence. Look for at least 10-year product warranties. Some companies offer 25-year solar panel warranties. Installation requirements matter too. Some systems need special tools or skills. Choose products your contractor can install properly.
Maintenance Requirements and Troubleshooting
Solar roof air systems need minimal maintenance. But some care ensures optimal performance. Regular checks prevent small problems from becoming big issues. Here is my maintenance guide from field experience.
Seasonal Maintenance Checklist
Perform these checks twice yearly, in spring and fall. First, inspect the solar panel surface. Clean any dirt, leaves, or debris. Use water and a soft cloth. Do not use abrasive cleaners. Next, check the fan blades through the attic access. Ensure they spin freely without obstruction.
Listen for unusual noises during operation. Grinding or scraping sounds indicate problems. Check electrical connections for corrosion. Ensure wiring is secure and undamaged. Verify thermostat settings are correct. Adjust them for seasonal temperature changes.
Common Problems and Solutions
Reduced airflow is the most common issue. It usually means blocked vents or dirty fan blades. Clean all components thoroughly. If airflow remains low, check for duct obstructions. Animals sometimes nest in ventilation ducts.
Fan not running indicates electrical problems. First, check the solar panel for shading. Trim any overhanging branches. Next, test electrical connections with a multimeter. If you lack electrical skills, call a professional. Never attempt repairs beyond your ability.
Real Project Case Studies and Outcomes
Real examples show how solar ventilation performs. These case studies come from my Texas customer projects. They demonstrate actual results homeowners can expect.
Case Study 1: Suburban Family Home
A family in Kingwood installed a system in 2020. Their 2,300-square-foot home had a hot attic. Upstairs rooms were uncomfortable in summer. They chose a two-fan Solatube system. Installation cost $3,200. The first summer showed immediate results.
Attic temperatures dropped from 150°F to 105°F on hot days. Upstairs bedroom temperatures decreased by 8°F. Their cooling bill reduced by $45 monthly. They recovered their investment in 5 years. The family reports better sleep and comfort. The system still works perfectly today.
Case Study 2: Historic Home Preservation
An older home in Houston had moisture problems. The attic showed mold growth on rafters. Traditional ventilation was insufficient. We installed three solar-powered fans. We also improved attic insulation. Total project cost was $4,500.
The results exceeded expectations. Mold growth stopped completely. Wood moisture content dropped to safe levels. The homeowner avoided costly structural repairs. The system protected the home's historic integrity. This case shows ventilation's protective role.
Industry Statistics and Research Findings
Research supports solar ventilation benefits. These statistics come from credible industry sources. They provide objective evidence for homeowners.
The U.S. Department of Energy studies attic ventilation extensively. Their research shows proper ventilation reduces cooling loads by 10-12 percent. The North American Insulation Manufacturers Association confirms these findings. They report similar energy savings across climate zones.
Roofing manufacturer studies show material benefits. GAF research indicates ventilated roofs last 40-50 percent longer. CertainTeed data shows shingle warranties require proper ventilation. These facts emphasize ventilation's importance.
Frequently Asked Questions (FAQ)
Do solar attic fans work on cloudy days?
Yes, they work on cloudy days but with reduced power. Modern solar panels generate electricity even in indirect light. The fan may run slower or intermittently. This is usually sufficient for ventilation needs. Very dark days might stop operation temporarily. This short pause does not harm the system or your home.
Can I install a solar attic fan myself?
I do not recommend DIY installation for most homeowners. Cutting holes in your roof requires skill and experience. Improper installation causes leaks and structural damage. Electrical work presents safety risks if done incorrectly. Hiring a professional ensures proper installation and warranty protection. The cost difference is worth the peace of mind.
How many solar attic fans do I need?
The number depends on your attic square footage. General guidelines suggest one fan per 1,200-1,500 square feet. But other factors matter too. These include roof pitch, insulation levels, and local climate. A professional roofer can calculate your exact needs. They follow building code requirements for ventilation rates.
Will a solar attic fan make my house colder in winter?
No, properly designed systems account for seasonal changes. Most have thermostats that control operation. They only run when attic temperatures exceed a set point. In winter, attic temperatures rarely reach that point. The fan remains off, preserving heat. Some systems have manual override options for unusual conditions.
Do solar attic fans require building permits?
Requirements vary by location. Many Texas municipalities require permits for roof modifications. Always check with your local building department. A licensed contractor usually handles permit applications. They ensure compliance with all local codes. This protects you from potential fines or insurance issues.
How long do solar attic fans last?
Quality systems last 15-25 years with proper maintenance. Solar panels typically have 25-year performance warranties. Fan motors last 10-15 years on average. Regular cleaning extends component life. Choose products from reputable manufacturers with good warranty support.
Can solar attic fans damage my roof?
Properly installed systems do not damage roofs. In fact, they protect roofs by reducing heat and moisture. The key is professional installation with proper flashing. This prevents water infiltration around the unit. Choose an experienced roofing contractor for installation. They understand how to integrate components with your existing roof.
Conclusion and Next Steps
Solar roof air systems offer significant benefits for homeowners. They improve energy efficiency and home comfort. They extend your roof's lifespan substantially. The technology is proven and reliable. Initial costs provide good returns over time.
Your next step is assessment. Examine your current attic conditions. Note any heat or moisture problems. Research local contractors with solar ventilation experience. Get multiple quotes for comparison. Ask about their installation process and warranties.
Make an informed decision based on your specific needs. Consider your home's size, climate, and budget. Choose quality products from reputable manufacturers. Invest in professional installation for best results. Your home and wallet will thank you for years to come.